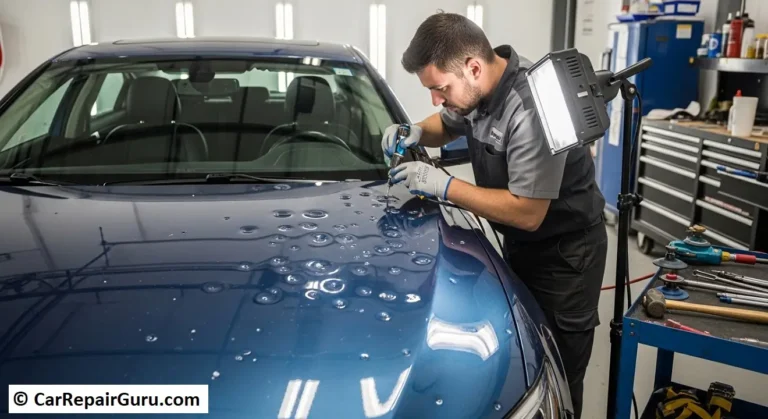
Car repairs often demand precision and the right materials, especially when it comes to restoring a vehicle’s smooth finish. One of the most trusted tools in this process is body filler, a versatile compound designed to repair dents, scratches, and surface imperfections. Whether you’re fixing a minor ding or smoothing out a larger repair area, body filler can transform damaged surfaces into seamless perfection.
For DIY enthusiasts and professionals alike, understanding how to properly use body filler is essential. It’s not just about the end result—it’s about doing the job right, ensuring durability, and maintaining the vehicle’s value. From choosing the right type to applying it effectively, mastering the use of body filler empowers anyone to tackle automotive repairs with confidence.
This guide walks you through everything you need to know, from preparation to application, so you can achieve professional results every time. Let’s get started!
What is Body Filler?
Body filler is a specially formulated material used in automotive repairs to restore a vehicle’s surface after damage. Made primarily from a polyester resin combined with a hardener, body filler creates a malleable compound that adheres to the car’s surface. Once applied, it hardens and can be sanded down to a smooth finish, seamlessly blending with the vehicle’s original shape.
The composition of body filler allows it to bond effectively with metal and, in some cases, other materials like fiberglass. It is lightweight yet durable, making it an ideal solution for filling dents, scratches, and small holes on a car’s body.
There are several types of body filler commonly used in car repairs:
- Standard Body Filler: Ideal for minor dents and surface imperfections, it is easy to apply and sand but may lack durability for larger repairs.
- Lightweight Filler: Easier to shape and sand, this is often used for more intricate or detailed repairs.
- Fiberglass Filler: Reinforced with fiberglass strands, it offers added strength and is suitable for larger dents or areas requiring extra durability.
- Metal Filler: Combines polyester resin with metal particles, providing a stronger and more corrosion-resistant finish.
Choosing the right type of body filler depends on the extent of the damage and the desired finish.
When to Use Body Filler in Car Repairs

Body filler is an essential tool in many car repair scenarios, but knowing when to use it can make all the difference in achieving a lasting, professional result. It is most appropriate for:
- Repairing Minor Dents: Body filler is excellent for small to medium-sized dents caused by minor accidents or hail damage.
- Smoothing Surface Imperfections: Scratches, chips, or shallow gouges can be easily filled to restore a vehicle’s flawless surface.
- Blending Welded Repairs: When replacing or welding panels, filler can help smooth the seams and create a uniform finish.
- Customizing Bodywork: It’s also useful for adding details or shaping modifications to a car’s body design.
However, body filler does have limitations. It is not a substitute for structural repairs or as a solution for severe damage:
- Rust and Corrosion: Filler should never be applied over untreated rust. The rust will continue to spread underneath, causing the repair to fail. Always remove rust thoroughly and use a rust converter or primer before applying filler.
- Large Dents or Structural Damage: For extensive damage, replacement parts or professional panel beating may be necessary to restore the vehicle’s integrity.
- Plastic or Non-Metal Surfaces: While some fillers are designed for use on plastic, most are formulated specifically for metal and may not adhere properly to other materials.
In summary, body filler is perfect for aesthetic and surface-level repairs but should be paired with proper preparation and used only where its capabilities are suitable.
Step-by-Step Guide to Applying Body Filler
Repairing your car with body filler requires careful attention to detail at each stage of the process. Follow this step-by-step guide to ensure a professional finish.
Preparation
The first step to applying body filler is proper preparation. Begin by thoroughly cleaning the damaged area to remove dirt, grease, and debris. Use a degreaser or rubbing alcohol to ensure the surface is free of contaminants that could affect adhesion.
Next, sand the area around the damage using coarse sandpaper (80-grit works well). This step removes paint and provides a rough surface for the filler to bond to. If rust is present, remove it completely with a wire brush or rust remover. Once clean, wipe the surface with a clean, dry cloth to eliminate dust. Proper preparation is critical for achieving long-lasting results.
Mixing the Filler
Body filler typically comes in two parts: the filler itself and a hardener. Use a clean, non-porous surface for mixing, like a plastic or metal board. Follow the manufacturer’s instructions to measure the correct ratio—usually a golf ball-sized amount of filler to a pea-sized amount of hardener.
Blend the components thoroughly using a plastic spreader, ensuring the mixture has a uniform color without streaks. Work quickly, as the filler will begin to harden within minutes after mixing. Avoid over-mixing, as this can introduce air bubbles, which may compromise the repair.
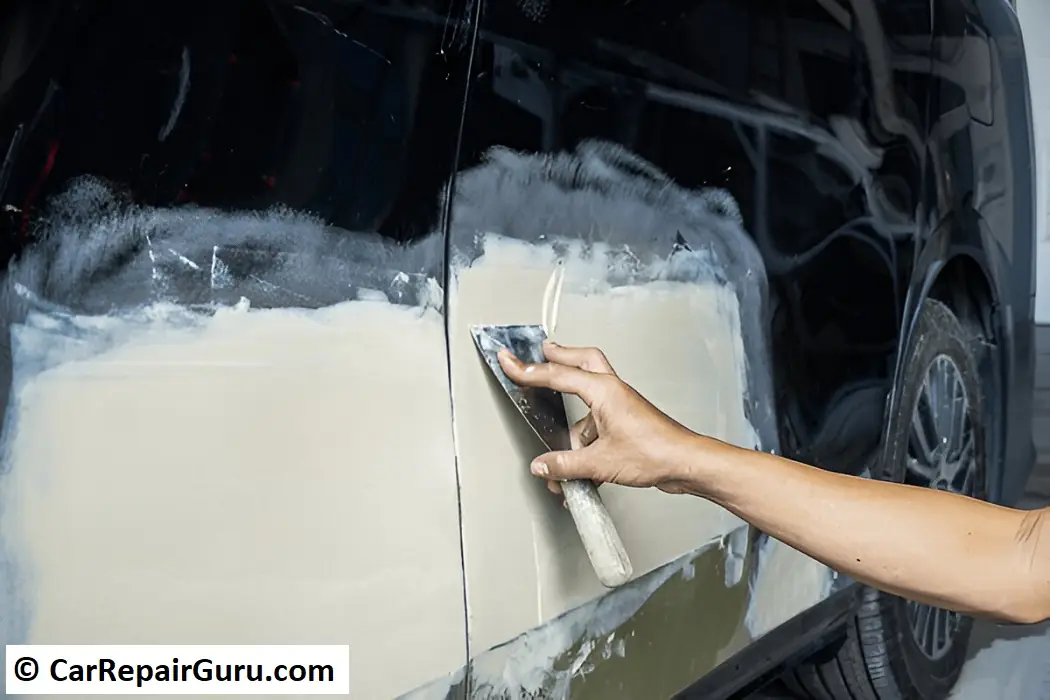
Application
Using a clean spreader, apply the mixed filler to the damaged area. Start with a thin layer, pressing firmly to ensure good adhesion. Gradually build up additional layers as needed, shaping the filler to match the contours of the surrounding area.
For deeper dents, apply in multiple thin layers rather than one thick application. Thick layers are more prone to cracking and may not cure evenly. Allow each layer to cure slightly before adding the next. Smooth the surface as much as possible during application to minimize sanding later.
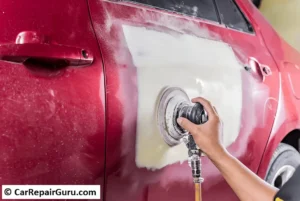
Sanding and Finishing
Once the filler has cured (usually 20–30 minutes, depending on the product), begin sanding with coarse sandpaper (80-grit) to shape the repair. Gradually switch to finer grits (120- and 220-grit) to smooth the surface and blend it with the surrounding area.
For a perfect finish, use a sanding block to maintain even pressure and avoid creating low spots. Wipe away dust and inspect the repair under good lighting. If necessary, apply a thin layer of filler to address any remaining imperfections, then repeat the sanding process.
By following these steps, you’ll achieve a smooth, professional finish that’s ready for priming and painting. Proper application ensures a durable and visually seamless repair.
Common Mistakes to Avoid
While body filler can be a powerful tool for car repairs, mistakes during its application can lead to poor results. Here are some frequent errors and tips to help you achieve a professional finish:
1. Skipping Proper Preparation
Failing to clean and sand the damaged area thoroughly can result in poor adhesion. Always remove all dirt, grease, paint, and rust before applying body filler. A clean, rough surface ensures the filler bonds effectively.
2. Incorrect Mixing Ratios
Using the wrong filler-to-hardener ratio can compromise the curing process. Too much hardener causes the filler to dry too quickly, making it hard to work with, while too little prevents it from curing properly. Follow the manufacturer’s instructions carefully.
3. Applying Thick Layers
Applying filler in thick layers can lead to uneven curing, cracking, or sagging. Instead, build up the filler in thin, even layers, allowing each layer to cure before adding the next.
4. Rushing the Sanding Process
Skipping grits or using excessive pressure during sanding can create low spots or uneven surfaces. Begin with coarse sandpaper and gradually move to finer grits for a smooth, professional finish.
5. Overlooking Final Touches
Neglecting to inspect for pinholes or minor imperfections can compromise the repair’s appearance. Apply a skim coat of filler or glazing putty to address any flaws before priming and painting.
By avoiding these common pitfalls, you’ll ensure your repair is strong, seamless, and visually appealing.
Recommended Tools and Materials
To achieve a flawless application of body filler, having the right tools and materials is essential. Here’s a list of must-haves for your repair project:
Essential Tools
- Sanding Tools: Use a combination of sanding blocks and electric sanders for efficient preparation and finishing.
- Spreaders: Plastic spreaders are ideal for applying and shaping the filler evenly.
- Mixing Board: A clean, non-porous surface for blending the filler and hardener.
- Putty Knife: Helpful for small applications or detailed work.
Materials
- Body Filler: Choose the appropriate type (standard, lightweight, fiberglass, or metal-reinforced) based on your repair needs.
- Hardener: Included with most fillers; ensure compatibility with your filler type.
- Glazing Putty: Perfect for filling pinholes and small imperfections.
Safety Equipment
- Gloves: Protect your hands from chemicals and abrasives.
- Dust Mask or Respirator: Essential for sanding to prevent inhaling fine particles.
- Safety Goggles: Shield your eyes during sanding and application.
These tools and materials are available at automotive supply stores, hardware retailers, and online marketplaces like Amazon or AutoZone. Investing in quality equipment ensures professional results and a safer, more efficient repair process.
Safety Precautions
Working with body filler involves exposure to chemicals and fine particles, making health and safety measures crucial. Follow these precautions to ensure a safe and effective repair process:
Protective Gear
- Gloves: Wear nitrile or latex gloves to shield your hands from irritants in the filler and hardener.
- Dust Mask or Respirator: Use a respirator with filters designed for dust and chemical vapors to prevent inhalation of hazardous particles during sanding and application.
- Safety Goggles: Protect your eyes from dust, splashes, and debris.
Proper Ventilation
Body filler contains chemicals that emit fumes, especially during mixing and application. Always work in a well-ventilated area, such as a garage with the door open or outdoors. If working indoors, use fans to increase airflow.
Fire Safety
Keep filler, hardener, and solvents away from heat sources, sparks, or open flames, as they are flammable.
Hygiene
Wash your hands thoroughly after handling filler and avoid eating or drinking in the work area.
By following these safety measures, you’ll minimize health risks and create a safer environment for your car repair project.
Conclusion
Body filler is a versatile and essential tool for restoring a car’s surface to its original condition. By understanding its composition, selecting the right type, and following proper preparation, application, and finishing techniques, you can achieve professional-quality results. Avoid common mistakes, use the recommended tools and safety gear, and work in a well-ventilated space to ensure success.
With this guide, you now have the knowledge to tackle dents, scratches, and other imperfections confidently. Put these tips into practice and transform your car repair projects into polished, long-lasting repairs that you can be proud of!
FAQ
Q1: Can body filler be applied over paint?
It’s recommended to apply body filler to bare metal for optimal adhesion. Remove any paint, rust, or contaminants before application.
Q2: How thick can I apply body filler?
Apply body filler in thin layers, not exceeding 1/4 inch per layer, to prevent cracking and ensure proper curing.
Q3: How long does body filler take to dry?
Drying time varies, but most body fillers cure within 20-30 minutes. Refer to the manufacturer’s instructions for specific curing times.
Q4: Can I use body filler on plastic surfaces?
Standard body fillers are designed for metal surfaces. For plastic repairs, use fillers specifically formulated for plastic adhesion.
Q5: Is it necessary to use a primer over body filler?
Yes, applying a primer over cured body filler ensures better paint adhesion and a smoother finish.