Maintaining your vehicle’s braking system is crucial not just for its longevity but for your safety on the road. One essential maintenance task that often goes overlooked is brake bleeding. But what is it, and why is it so important?
Over time, air can enter the brake lines due to leaks, repairs, or even natural wear and tear. This trapped air disrupts the hydraulic pressure, leading to a spongy brake pedal and reduced stopping power—something no driver wants to experience. Regularly bleeding your brakes ensures that the brake fluid remains free of air bubbles, maintaining a firm pedal feel and optimal braking performance.
This guide will walk you through the ins and outs of brake bleeding, including what tools you need, different methods to try, and safety tips to keep in mind. Whether you’re a seasoned DIYer or a car enthusiast eager to learn, this step-by-step approach will help you confidently tackle this essential task and keep your vehicle running smoothly.
Let’s dive into the basics of brake bleeding and understand why it’s a vital part of your car’s routine maintenance.
What Is Brake Bleeding?
Brake bleeding is a crucial process in vehicle maintenance that involves removing trapped air from the brake lines of a hydraulic braking system. This ensures the brake fluid can transfer pressure effectively from the brake pedal to the brake calipers, resulting in consistent and reliable braking performance. Without this step, the braking system may lose efficiency, compromising safety on the road.
Air can enter the brake lines for several reasons. Common causes include leaks in the braking system, repairs or part replacements (like changing brake calipers or hoses), and normal wear and tear over time. Once air gets into the system, it disrupts the hydraulic pressure needed for effective braking.
When air is present in the brake lines, it compresses under pressure, leading to a “spongy” brake pedal feel. This decreases the force applied to the brake pads and rotors, prolonging stopping distances. In extreme cases, the brakes may fail to respond altogether, which can be dangerous, especially during emergencies.
Regular brake bleeding is essential for maintaining a fully functional braking system. By removing air pockets and replacing old fluid, you help ensure your vehicle performs at its best, keeping you and others safe on the road.
Why Proper Brake Bleeding Is Essential
Air in the brake lines can significantly compromise brake performance, making it harder for your vehicle to stop effectively. When hydraulic pressure is disrupted, it takes longer for the brake pads to engage with the rotors, increasing stopping distances. This can be particularly dangerous in high-speed or emergency situations, where every fraction of a second counts.
Failing to address this issue doesn’t just impact braking efficiency; it also puts additional strain on the braking components, leading to premature wear and costly repairs. Consistent brake fluid replacement through proper bleeding can help mitigate these risks.
Fresh brake fluid ensures that the system operates at peak efficiency. Over time, brake fluid absorbs moisture, which lowers its boiling point. If left unchecked, this can lead to brake fade or even complete brake failure under intense conditions, such as during steep descents or heavy towing.
Bleeding the brakes is an essential part of routine vehicle maintenance, especially if you’ve recently replaced brake parts or noticed a spongy pedal. Not only does it improve braking response, but it also enhances overall automotive safety, giving you confidence every time you hit the road.
By prioritizing proper brake bleeding, you ensure that your vehicle remains reliable and ready to handle unexpected challenges, keeping both you and your passengers safe.
Tools You’ll Need for Brake Bleeding
Having the right tools for brake bleeding is essential to ensure the process is smooth, efficient, and safe. Here’s a list of must-have equipment to get started:
Essential Tools
- Wrench or Spanner: A proper-sized wrench is needed to open the bleeder valves on your brake calipers or wheel cylinders.
- Bleeder Bottle: A transparent bottle with tubing allows you to collect old brake fluid while preventing air from re-entering the brake system.
- Brake Fluid: Ensure you use the correct type (DOT 3, DOT 4, etc.) recommended for your vehicle to maintain compatibility and performance.
- Jack and Jack Stands: Elevate the vehicle securely for easy access to the brake components.
- Shop Towels or Rags: Useful for cleaning spills and maintaining a tidy workspace.
Optional Tools for Advanced Techniques
- Vacuum Pump: This tool simplifies bleeding by pulling air and old fluid out of the system, making it ideal for one-person jobs.
- Pressure Bleeder: A device that pushes fluid through the system under pressure, ensuring a thorough and efficient bleed.
- Brake Fluid Tester: Helps check the condition of your brake fluid, identifying moisture contamination.
Using the right brake maintenance equipment ensures you complete the job safely and effectively. Investing in advanced tools like a vacuum or pressure bleeder can make the process faster and more precise, especially for larger or modern braking systems.
Methods of Brake Bleeding
Brake bleeding can be accomplished through several methods, each suited to different situations and levels of expertise. Below, we’ll explore four popular techniques: gravity bleeding, the two-person method, vacuum bleeding, and pressure bleeding. Each method ensures an air-free brake system when done correctly.
Gravity Bleeding
Gravity bleeding is one of the simplest methods and requires minimal tools. This technique relies on gravity to pull brake fluid and air bubbles out of the system.
Steps
- Secure the vehicle on jack stands and locate the bleeder valves on each wheel.
- Attach a clear tube to the valve and place the other end in a bleeder bottle filled with a small amount of brake fluid.
- Open the valve slightly and allow gravity to draw the old fluid and air from the system. Keep an eye on the reservoir to ensure it doesn’t run dry.
- Close the bleeder valve when clean, air-free fluid flows through the tube. Repeat for all wheels, starting from the furthest wheel and working closer to the master cylinder.
Advantages
- Simple and low-cost method.
- Ideal for minor air removal or small maintenance tasks.
Drawbacks
- Time-consuming and less effective for stubborn air pockets.
Gravity bleeding is perfect for those new to brake bleeding or performing routine maintenance on their vehicle.
Two-Person Method
The two-person method is a traditional and widely used approach, relying on teamwork to expel air from the brake lines.
Steps
- One person sits inside the car to pump the brake pedal, while the other handles the bleeder valve at each wheel.
- Attach a clear tube to the valve, submerging the other end in a bleeder bottle with fluid.
- The person inside presses the brake pedal several times, holding it down while the other person opens the valve to release fluid and air.
- Close the valve before the brake pedal is released. Repeat until air-free fluid flows, then move to the next wheel.
Advantages
- Effective for removing stubborn air bubbles.
- Doesn’t require specialized tools.
Drawbacks
- Requires coordination between two people.
- Slight risk of air re-entering the system if timing is off.
This method is highly effective and commonly used in home garages to achieve an air-free brake system.
Vacuum Bleeding
Vacuum bleeding uses a vacuum pump to draw fluid and air through the system. This method is ideal for those who prefer working solo.
Steps
- Attach the vacuum pump to the bleeder valve using the provided adapter and tubing.
- Create a vacuum by operating the pump, then open the valve to pull out old fluid and air.
- Monitor the process through the clear tubing until clean, bubble-free fluid flows.
- Close the valve and repeat for all wheels, starting with the furthest wheel.
Advantages
- Works well for single-person jobs.
- Reduces the risk of air re-entering the system.
Drawbacks
- Requires a vacuum pump, which adds to the cost.
- Slightly more complex than other methods.
Vacuum bleeding is an excellent choice for DIYers looking for an efficient and precise approach to brake bleeding.
Pressure Bleeding
Pressure bleeding is a professional-grade method that uses a pressure bleeder to force fluid through the system, ensuring thorough air removal.
Steps
- Connect the pressure bleeder to the master cylinder reservoir and pressurize it according to the manufacturer’s instructions.
- Open the bleeder valves one at a time, allowing fluid and air to flow out under pressure.
- Close the valve once the fluid runs clear and repeat for each wheel.
Advantages
- Highly effective for completely flushing the brake system.
- Ideal for modern vehicles with ABS or complex brake systems.
Drawbacks
- Expensive tools required.
- Best suited for experienced users or professionals.
Pressure bleeding is the most thorough method for achieving an air-free brake system, making it a favorite in professional workshops.
Each of these methods has its own advantages and challenges, so choose the one that best fits your tools, experience, and maintenance needs. Proper brake bleeding ensures optimal brake performance, keeping you safe on the road.
Step-by-Step Guide to Brake Bleeding
Bleeding the brake system is a straightforward process when approached methodically. This guide focuses on the single-person method, providing clear steps to remove air from brake lines and ensure a fully functional hydraulic system. Proper preparation and following the correct wheel sequence are crucial for achieving optimal results.
Preparation: What You’ll Need
Before starting, gather these essential tools:
- Wrench or bleeder wrench
- Bleeder bottle with a transparent tube
- Fresh brake fluid (check your vehicle’s manual for the recommended type)
- Jack and jack stands
- Gloves and safety goggles
- Towels for spills
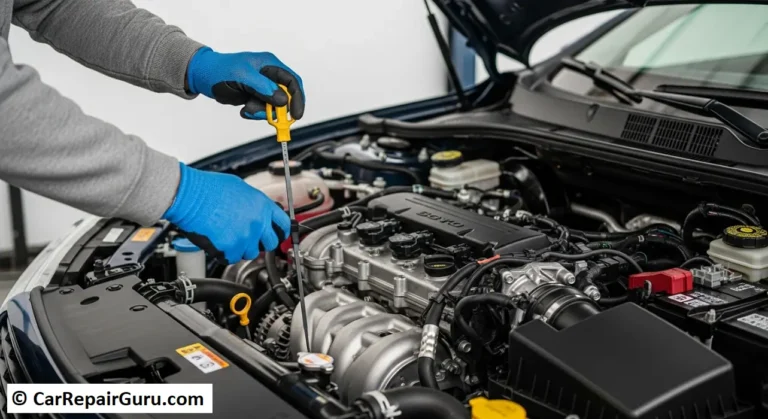
Step 1: Locate and Prepare the Master Cylinder
- Open the hood and locate the master cylinder reservoir. It’s typically near the firewall on the driver’s side.
- Check the fluid level. If it’s low, add fresh brake fluid to the “MAX” line to prevent air from entering during the process.
- Leave the reservoir cap loosely in place to prevent contamination while allowing fluid to flow.
Step 2: Determine the Correct Wheel Sequence
Bleeding must follow a specific order to ensure air is effectively removed. Start with the wheel furthest from the master cylinder and work toward the closest:
- Rear passenger side
- Rear driver side
- Front passenger side
- Front driver side
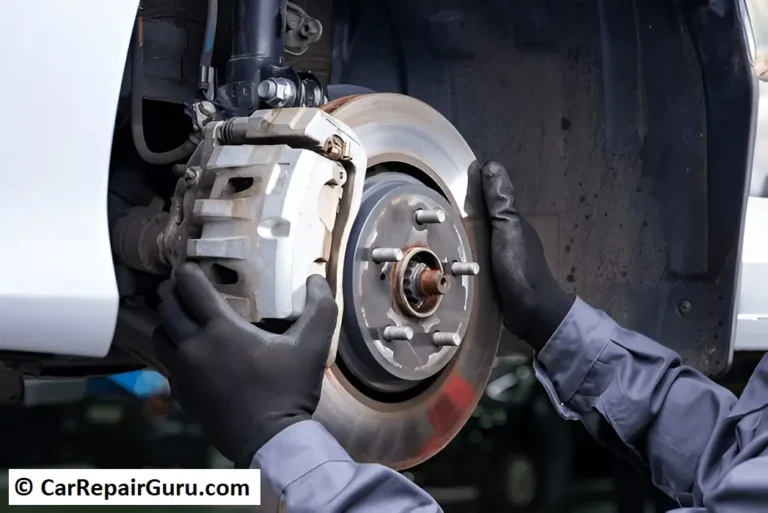
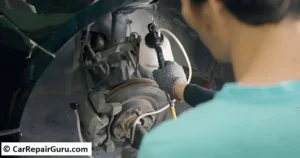
Step 3: Secure the Vehicle and Access the Bleeder Valves
- Use a jack and jack stands to safely lift the vehicle.
- Remove the wheels to access the bleeder valves on each brake caliper or drum.
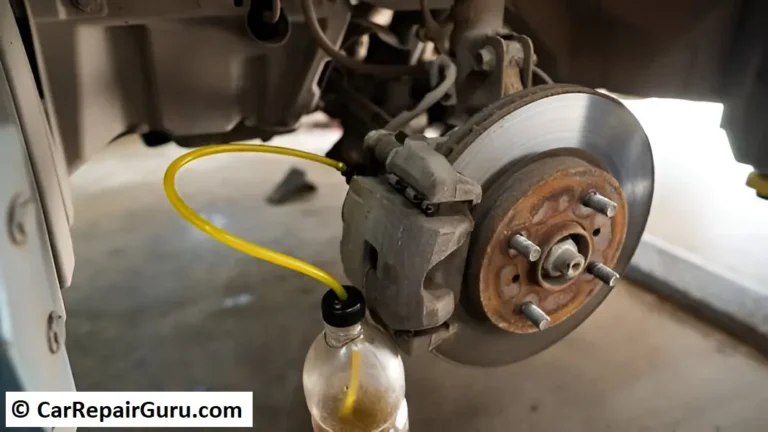
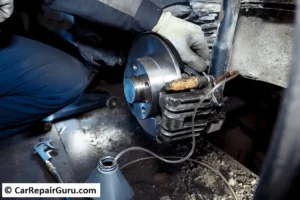
Step 4: Attach the Bleeder Bottle
- Connect the clear tubing of the bleeder bottle to the bleeder valve on the first wheel.
- Place the other end of the tube into the bottle, ensuring it’s submerged in a small amount of brake fluid.
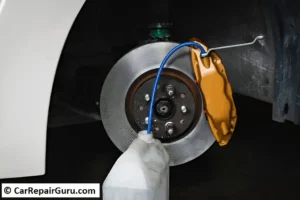
Step 5: Bleed the Brake Lines
- Loosen the bleeder valve slightly using a wrench.
- Slowly pump the brake pedal several times to build pressure in the system.
- Hold the pedal down and observe as old fluid and air bubbles exit the tube into the bottle.
- Tighten the bleeder valve before releasing the brake pedal.
- Repeat the process until air-free, clean brake fluid flows through the tube.
Step 6: Monitor the Master Cylinder
After bleeding each wheel, check the fluid level in the master cylinder and top it off as needed. Never let the reservoir run dry, as this can introduce air back into the system.
Step 7: Repeat for Each Wheel
Follow the correct sequence, repeating the bleeding process for each wheel. Be patient and ensure each wheel is completely free of air bubbles before moving on.
Step 8: Final Check and Cleanup
- After bleeding all wheels, inspect the brake pedal for firmness. If it still feels spongy, repeat the process.
- Reinstall the wheels, lower the vehicle, and secure all tools.
- Properly dispose of the old brake fluid and clean any spills to prevent damage.
Tips for Successful Brake Bleeding
- Bleeding the master cylinder: If you’ve replaced it, bleed the master cylinder first to remove trapped air before proceeding to the brake lines.
- Check for leaks: Inspect the system for leaks at the connections and bleeder valves.
- Test the brakes: Perform a slow test drive in a safe area to ensure the brakes function properly.
By following these steps, you can confidently handle how to bleed brakes and restore your vehicle’s braking performance. Proper maintenance not only ensures safety but also extends the life of your braking system.
Common Mistakes to Avoid
Bleeding brakes can seem straightforward, but a few common mistakes can compromise the effectiveness of the process and your vehicle’s braking performance. Here are the key errors to avoid during DIY brake bleeding:
1. Over-Loosening Bleeder Valves
Opening the bleeder valve too far can allow air to re-enter the brake lines. This defeats the purpose of bleeding and can make the system more difficult to seal during the process. Always loosen the valve just enough to let the fluid and air escape.
2. Letting the Master Cylinder Run Dry
Allowing the brake fluid reservoir to empty introduces air into the entire brake system, including the master cylinder. This can result in additional work to remove air and may require re-bleeding the entire system. Check and refill the master cylinder after bleeding each wheel.
3. Incorrect Wheel Sequence
Bleeding brakes in the wrong order can trap air in the system, particularly in vehicles with diagonal braking circuits. Always follow the recommended sequence: start with the wheel farthest from the master cylinder and work toward the closest.
4. Using the Wrong Brake Fluid
Using an incompatible brake fluid type can damage seals and reduce performance. Check your vehicle’s manual for the correct specification (e.g., DOT 3, DOT 4).
5. Rushing the Process
Brake bleeding requires patience. Skipping steps or rushing can leave air in the system, resulting in a spongy brake pedal. Repeat the process as necessary to ensure air-free fluid in all lines.
By avoiding these mistakes and following proper brake maintenance tips, you’ll achieve a safer, more reliable braking system. Would you like additional troubleshooting tips?
How Often Should You Bleed Brakes?
The frequency of brake bleeding depends on several factors, including mileage, driving habits, and maintenance requirements. Regularly bleeding brakes ensures optimal braking performance and prolongs the life of your brake components.
Mileage-Based Intervals
As a general rule, it’s recommended to bleed brakes every 20,000 to 30,000 miles. However, consult your vehicle’s owner manual for manufacturer-specific guidelines.
Driving Conditions
Harsh driving conditions can accelerate the need for a brake fluid flush. If you frequently drive in stop-and-go traffic, tow heavy loads, or navigate mountainous terrain, your brakes endure greater stress, making more frequent bleeding necessary.
After Repair Work
Bleeding brakes is essential after any maintenance involving the brake system, such as replacing calipers, wheel cylinders, or brake lines. These repairs can introduce air into the system, which must be removed to maintain braking efficiency.
Signs It’s Time for Brake Bleeding
- Spongy or soft brake pedal
- Decreased stopping power
- Discolored or contaminated brake fluid
By adhering to these intervals and monitoring your vehicle’s braking performance, you’ll maintain safe and reliable brakes. For routine maintenance, also consider a full brake fluid flush frequency to replace old fluid entirely. Would you like more on spotting brake system issues?
Safety Tips and Precautions
Proper safety measures are crucial when performing brake bleeding to protect yourself and your vehicle. Following these safe brake bleeding practices ensures a smooth and secure process.
1. Handle Brake Fluid with Care
Brake fluid is highly corrosive and can damage paint and skin.
- Wear protective gloves and goggles to prevent contact with your skin or eyes.
- Immediately clean any spills on the vehicle’s paintwork with water.
- Store brake fluid in a sealed container away from heat and direct sunlight.
2. Work on a Stable Surface
Always perform brake bleeding on a flat, level surface. Use quality jack stands to secure the vehicle if it needs to be elevated. Never rely solely on a jack for support.
3. Use the Right Tools
- Ensure you have the correct size wrench for the bleeder valves to avoid rounding or damaging them.
- For advanced methods, such as vacuum or pressure bleeding, follow the manufacturer’s instructions for the tools used.
4. Follow Proper Disposal Practices
Dispose of old brake fluid at a designated recycling center. Never pour it down drains or onto the ground, as it’s harmful to the environment.
5. Test Brakes Before Driving
After bleeding, pump the brake pedal to restore pressure and check for firmness before taking the vehicle on the road.
By following these automotive safety tips, you can bleed brakes effectively while minimizing risks. Ready to proceed to the next section?
Conclusion
Brake bleeding is an essential part of routine brake maintenance that ensures your vehicle’s braking system remains efficient and safe. By removing air from the brake lines, you restore proper brake fluid flow and enhance braking performance. Regularly check and replace brake fluid, especially under harsh driving conditions or after repairs, to prevent reduced stopping power.
Whether using the single-person method or more advanced techniques, ensure you follow the correct steps and maintain safe brake bleeding practices. With the right tools and precautions, you can keep your vehicle’s braking system in top shape and enhance your automotive safety. Prioritize brake maintenance, as it’s a vital part of keeping both you and your passengers safe on the road.
FAQs About Brake Bleeding
What happens if I don’t bleed my brakes?
Not bleeding your brakes causes air to remain in the brake lines, which compromises braking power. The brake pedal may feel soft or spongy, reducing stopping efficiency and increasing the risk of brake failure.
Can I bleed brakes without a helper?
Yes, you can bleed brakes alone using gravity bleeding or vacuum bleeding methods. These techniques allow you to remove air from the brake lines without a second person.
What tools are best for brake bleeding?
Essential tools include a bleeder kit, tubing, a wrench for the valve, and fresh brake fluid. For advanced methods, a vacuum pump or pressure bleeder can be used for more efficiency.
How do I know when my brakes are fully bled?
When no air bubbles appear in the fluid and the brake pedal feels firm, your brakes are fully bled.
How much brake fluid do I need?
Typically, around one quart of brake fluid is required for a complete flush, though this can vary depending on the vehicle. Always refer to your owner’s manual for specific recommendations.