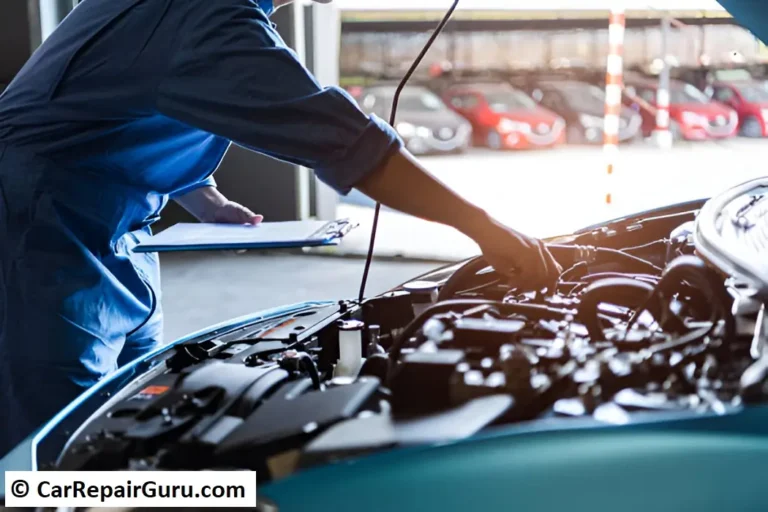
Changing your car oil may seem intimidating, but it’s actually a straightforward task that can save you money and keep your engine running smoothly. Oil is the lifeblood of your car’s engine, reducing friction, preventing overheating, and ensuring peak performance. Regular oil changes not only prolong your car’s life but also enhance fuel efficiency.
Why opt for a DIY oil change? It’s not just about saving on service costs. Doing it yourself gives you greater control over the process, from choosing the right oil to ensuring it’s done correctly. Plus, it’s a satisfying skill that makes you feel more connected to your vehicle.
In this guide, we’ll walk you through every step of the process. Whether you’re a seasoned DIYer or a complete beginner, you’ll learn how to change your car oil safely and efficiently. Ready to get started? Let’s dive in!
Tools and Materials Needed
Before you begin changing your car oil, having the right tools and materials on hand will make the process smoother and safer. Here’s what you’ll need:
- Wrench: A socket wrench or box-end wrench is essential for loosening the oil drain plug.
- Oil Filter: Ensure it’s compatible with your car model. Check your owner’s manual or use an online tool to find the correct type.
- Oil Pan: A sturdy, wide pan for collecting old oil without spills.
- Funnel: Helps pour new oil into the engine without making a mess.
- Gloves: Disposable nitrile gloves protect your hands from oil and grease.
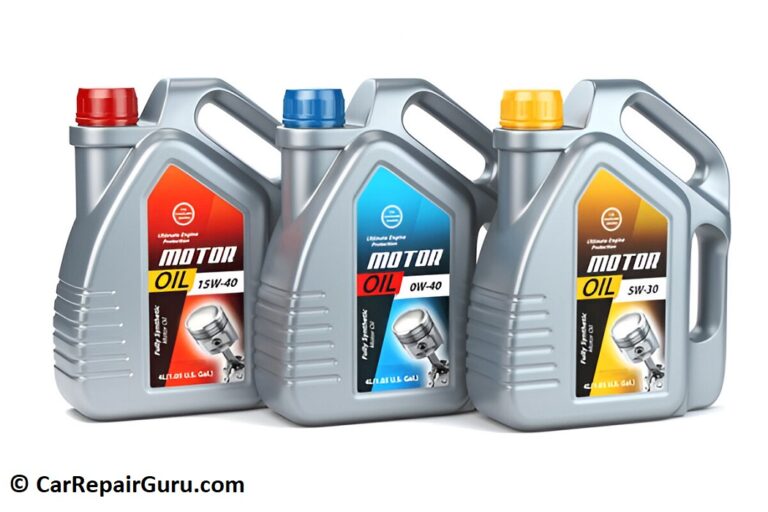
Choosing the right oil is critical. There are two main types: synthetic oil and conventional oil. Synthetic oil offers better performance at extreme temperatures and longer-lasting engine protection, making it ideal for modern vehicles or harsh climates. Conventional oil is budget-friendly and suitable for older cars or those with low mileage.
To select the right oil, refer to your owner’s manual for the recommended viscosity (e.g., 5W-30) and specifications. Using the correct oil ensures optimal engine performance and longevity.
With these tools and materials, you’re ready to take the next step toward mastering your car maintenance.
Preparing Your Vehicle
Before changing your car oil, it’s essential to prepare your vehicle and workspace to ensure safety and efficiency. Follow these steps to get started:
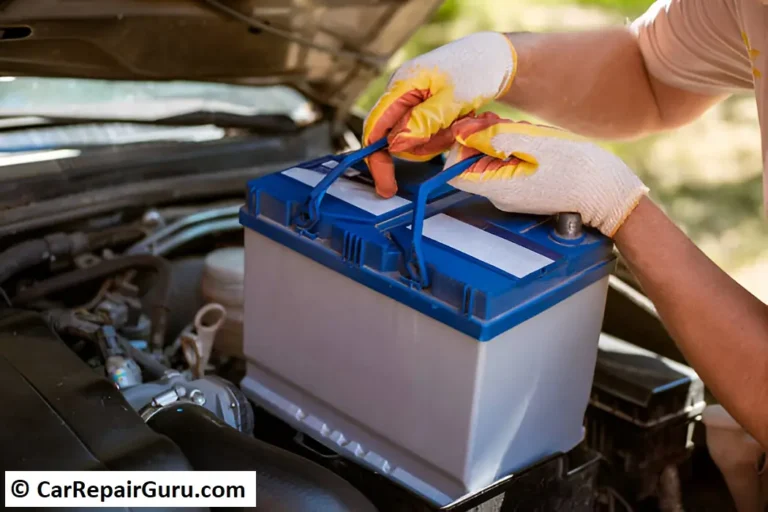
- Park on a Flat Surface: Ensure your car is parked on a stable, level surface. This prevents accidents and allows the old oil to drain completely.
- Engage Safety Features: Activate the parking brake and, for added safety, place wheel chocks behind the rear tires. This step ensures the car remains stationary during the process.
- Use Jack Stands: If you need to raise the car for better access to the oil pan, use a quality hydraulic jack and secure the vehicle with jack stands. Avoid relying solely on a jack, as it can fail unexpectedly.
- Cool the Engine: Allow your engine to cool for 20–30 minutes if it has been running. Hot oil and components can cause burns.
- Check Your Owner’s Manual: Every vehicle is different, so consult your owner’s manual for specifics like the location of the oil drain plug and filter, the type of oil required, and torque specifications for the drain plug.
Taking these preparatory steps ensures a safe and hassle-free oil change, setting you up for success as you move to the next phase.
Draining the Old Oil
Draining the old oil is one of the most critical steps in changing your car oil. Follow these steps to ensure a smooth and clean process:
- Locate the Oil Drain Plug: Underneath your car, find the oil drain plug on the oil pan. It’s typically a large bolt at the lowest point of the pan, designed to let oil flow out. Refer to your owner’s manual if you’re unsure of its location.
- Position the Oil Pan: Place a wide, sturdy oil pan directly under the drain plug. Ensure it’s large enough to hold the full volume of oil in your engine, as specified in the manual.
- Loosen the Drain Plug: Use a socket wrench to carefully loosen the plug. Turn it counterclockwise until it’s free. Be ready for the oil to start flowing once the plug is removed.
- Avoid Spills: As the oil drains, adjust the pan’s position if needed to catch all the oil. Wearing gloves helps keep your hands clean and provides a better grip on tools.
- Inspect the Drain Plug: Once removed, clean the plug and inspect it for any damage. If the washer or gasket looks worn, replace it to prevent future leaks.
Allow all the oil to drain completely. This may take several minutes but ensures no old oil is left behind. Once the flow slows to a drip, you’re ready to move on to the next step—replacing the oil filter.
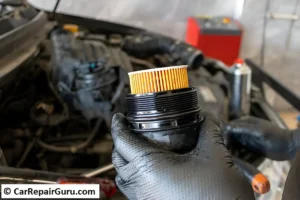
Replacing the Oil Filter
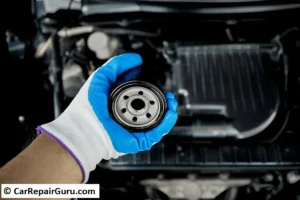
Replacing the oil filter is a crucial step in the oil change process. The filter traps dirt, debris, and contaminants, ensuring your engine runs smoothly. Follow these steps to do it correctly:
- Locate the Oil Filter: Check your owner’s manual to find the oil filter’s location. It’s usually a cylindrical component near the engine.
- Remove the Old Filter: Place the oil pan beneath the filter to catch any residual oil. Use an oil filter wrench to loosen the filter by turning it counterclockwise. Once it’s loose, carefully unscrew it by hand and let the remaining oil drain into the pan.
- Prepare the New Filter: Before installing the new filter, apply a thin layer of fresh oil to the rubber gasket on its top. This step helps create a proper seal and makes it easier to remove during the next oil change.
- Install the New Filter: Screw the new filter onto the engine by hand. Tighten it securely, but don’t over-tighten—most filters only need to be hand-tightened to create a leak-free seal.
- Double-Check for Leaks: Once installed, wipe any spilled oil and ensure the filter is snugly in place.
Replacing the oil filter regularly enhances engine efficiency and prolongs its lifespan. Completing this step properly sets you up for adding new oil and finishing your DIY oil change with confidence.
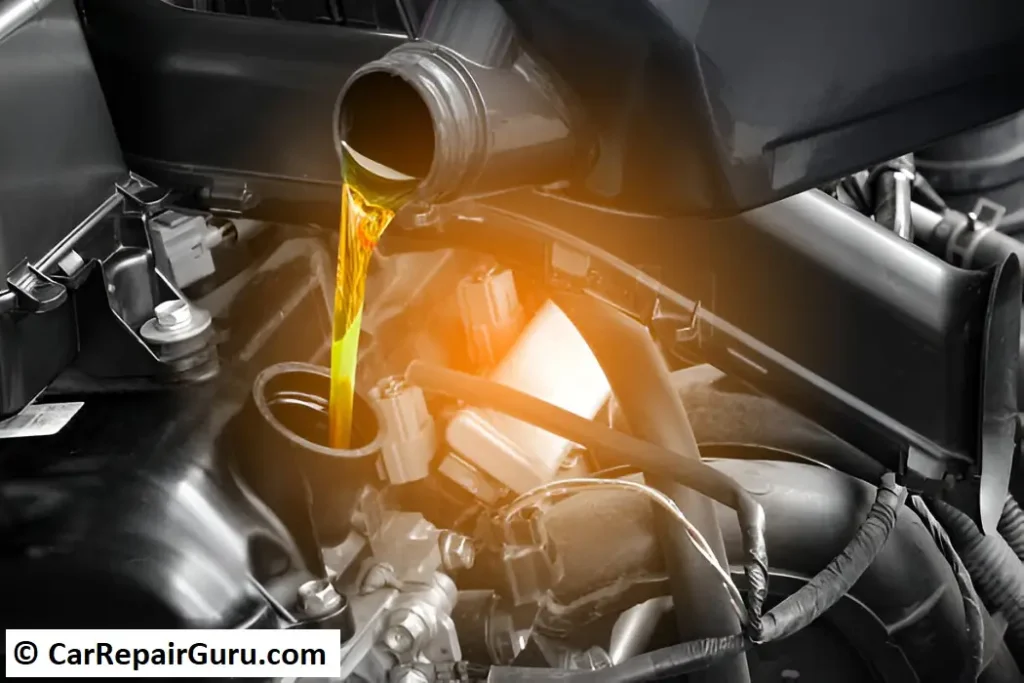
Adding New Oil
Adding the new oil is the final step in your oil change process. Here’s how to do it properly:
Choosing the Right Quantity and Type of Oil
Refer to your car’s owner’s manual to determine:
- Oil Type: The manual specifies the recommended viscosity grade (e.g., 5W-30) and whether your car needs synthetic or conventional oil.
- Oil Quantity: Most cars require 4–6 quarts of oil, but this can vary by engine size. Using the correct amount is crucial to avoid underfilling or overfilling.
Step-by-Step Process
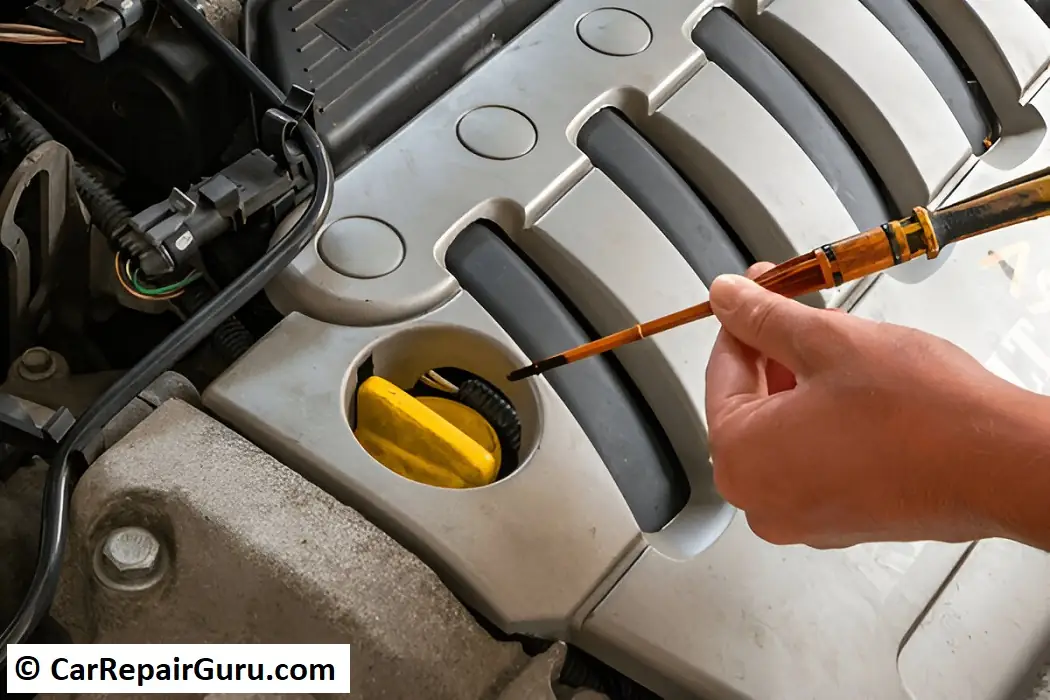
- Locate the Oil Filler Cap: Open the hood and find the oil filler cap, usually labeled “Engine Oil.” Remove the cap.
- Add the Oil: Place a funnel into the opening to prevent spills. Slowly pour in the recommended amount of oil. Start with slightly less than the required amount—this prevents overfilling.
- Check the Oil Level: Insert the dipstick fully into its tube, then pull it out to check the oil level. The oil should be within the marked range on the dipstick. If it’s low, add more oil gradually and recheck.
- Avoid Overfilling: Adding too much oil can cause excessive pressure and damage engine seals. If you accidentally overfill, use a siphon to remove the excess.
- Secure the Filler Cap: Once the oil level is correct, securely replace the filler cap and wipe away any spilled oil.
Final Tip
After adding oil, run the engine for a minute, then turn it off and recheck the oil level. This allows the oil to circulate and gives an accurate reading. With fresh oil added, your car is ready to hit the road!
Cleaning Up and Disposal
Proper cleanup and disposal after an oil change are essential for safety and environmental protection. Here’s how to handle it responsibly:
Safe Disposal of Old Oil and Filters
- Collect the Used Oil: Carefully transfer the drained oil from the oil pan into a sealed container, such as the original oil bottle or a designated oil storage container. Avoid spills to protect your workspace and the environment.
- Handle the Old Oil Filter: Place the used filter in a plastic bag to prevent leaks. Allow any remaining oil in the filter to drain into your oil pan for a few hours.
Environmental Considerations
Used motor oil is highly toxic and can contaminate soil and water if not disposed of properly. Recycling prevents pollution and allows the oil to be re-refined for future use.
Recycling Options
- Locate a Recycling Center: Many auto parts stores, service stations, and recycling facilities accept used oil and filters. Check local regulations or use websites like Earth911 to find a nearby drop-off point.
- Community Collection Events: Some areas host hazardous waste collection days, where residents can safely dispose of used oil and other automotive fluids.
Taking these steps ensures your DIY oil change has minimal environmental impact, making it a responsible and rewarding experience. Dispose of waste properly, and you’ll help protect our planet for future generations.
Conclusion
Regular oil changes are one of the simplest yet most important ways to keep your vehicle running smoothly. Not only do they ensure that your engine stays lubricated, but they also help prevent costly repairs down the road by reducing wear and tear. By following the steps outlined in this guide, you can easily perform an oil change yourself, saving time and money while gaining a sense of accomplishment.
Maintaining a car is an ongoing responsibility, and keeping up with oil changes is essential for preserving your vehicle’s health. Whether you’re a seasoned car owner or a first-time DIYer, changing your car’s oil is an achievable task that contributes to the long-term performance of your engine. Stick to the recommended schedule and you’ll enjoy smooth, reliable rides for years to come!
FAQ Section
Q: How often should I change my car oil?
A: It’s recommended to change your car oil every 5,000–7,500 miles, depending on the type of oil you use and your car’s model. Always consult your owner’s manual for specific intervals, as some newer cars can go longer between changes with synthetic oil.
Q: Can I use synthetic oil for any car?
A: Most modern vehicles can use synthetic oil, as it offers better performance, longer engine protection, and improved fuel efficiency. However, always check your owner’s manual to ensure compatibility with your engine’s requirements.
Q: What happens if I overfill the oil?
A: Overfilling the oil can cause excess pressure in the engine, which may damage seals and lead to oil leaks. It can also reduce engine efficiency and lead to smoking from the exhaust. If you accidentally overfill, it’s important to drain the excess oil immediately.
Q: Can I change my car oil without lifting it?
A: Yes, you can change the oil without lifting the car if you have enough ground clearance. However, lifting the vehicle makes the process easier and gives you better access to the oil pan and filter. Ensure the car is parked on a level surface for safety.
Q: What should I do if I spill oil during the change?
A: If you spill oil, clean it up immediately using absorbent materials like paper towels or cat litter. Be sure to dispose of the waste properly at a recycling center or auto shop. Avoid letting the oil seep into the ground, as it’s harmful to the environment.