Marco Riley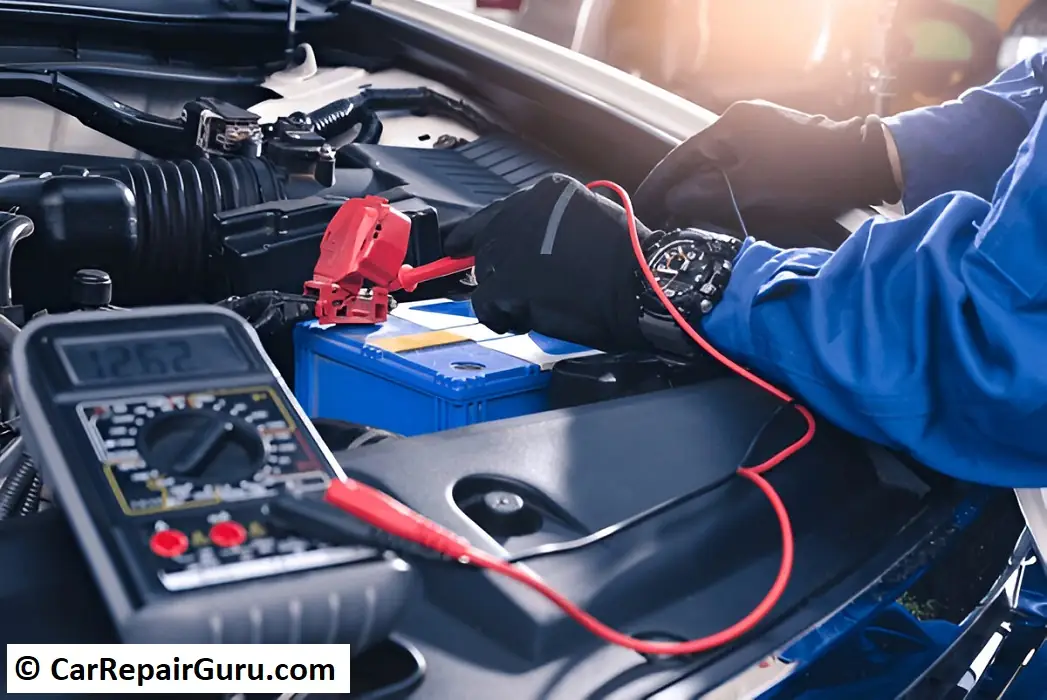
We have all experienced that sinking feeling when you turn the key or push the start button, and all you hear is a weak, agonizing click. That hollow sound usually means your battery gave up at the worst possible moment – whether you are heading out on a rainy morning or already running late for work.
I am Marco Riley, and across 15 years working in professional repair bays, I have seen drivers waste hundreds of dollars replacing starter motors and alternators when a simple five-minute test would have found the real problem right away. Learning how to perform a reliable battery check is the fastest way to protect your wallet and make sure your vehicle starts every single time you turn the key.
- Step 1 – Visual Inspection Before Touching Any Tools
- Step 2 – How to Check Resting Voltage with a Multimeter
- Step 3 – Cranking Voltage Test – The Real Strength Check
- Step 4 – Testing the Alternator Charging System
- How to Do a Quick Battery Check Without Tools
- DIY Testing vs Professional Carbon Pile Load Testing
- Common Battery Myths That Ruin Electrical Systems
- Routine Maintenance to Keep Your Battery Alive Longer
- Professional Final Thoughts
- Frequently Asked Questions About Car Battery Testing
- What should a 12V car battery read when fully charged?
- Can a bad battery ruin my alternator?
- How often should I perform a battery check?
- Why did my battery show 12.6 volts but still won’t start my engine?
Step 1 – Visual Inspection Before Touching Any Tools
Before you grab a meter or start turning bolts, you need to use your eyes and nose. In my shop, a quick 30-second look under the hood catches half of all battery problems before we run an electrical test.
Start by inspecting the battery case. If the plastic sides look swollen or bowed outward, the battery has suffered from severe overcharging or internal heat damage. Next, look closely at the cable connections. You are looking for loose clamps, frayed wiring, or a crusty white, blue, or green powder blooming around the posts. That powder is lead sulfate or copper sulfate residue, and it acts like an insulator that stops electrical current from flowing into your starter.
Important Safety Step – Never clean heavy corrosion with bare hands or lean directly over a swollen battery case. Lead-acid batteries release hydrogen gas during normal operation, and a cracked casing combined with a loose metal tool can create a spark that ignites those fumes.
Here is what you should check on your visual pass:
- Terminal Tightness – Grab the cable ends and try to twist them by hand; they should not budge at all.
- Corrosion Buildup – Look for chalky deposits around both positive and negative posts.
- Casing Condition – Make sure the plastic shell is flat, square, and free of cracks or wet acid leaks.
- Manufacture Date Sticker – Check the round sticker on the top or side (for example, “3/22” means March 2022); most standard flood batteries last between 3 and 5 years.
Step 2 – How to Check Resting Voltage with a Multimeter
Testing resting voltage tells you the battery’s basic state of charge. However, here is where most DIYers get tripped up: if you test the battery immediately after turning the engine off, you will get a false, artificially high reading caused by “surface charge.”
To get an accurate measurement, let the vehicle sit turned off for at least an hour. If you are in a rush, turn your headlights on high beam for 15 seconds, switch them off, and wait two minutes. This pulls off the surface charge and gives you the true resting number.
Set your digital multimeter to 20V DC (direct current). Place the red probe directly on the positive terminal post (marked with a + or red cover) and the black probe on the negative terminal post (marked with a - or black cover).
Pro-Tip from the Shop – Place the metal meter probes directly on the lead battery posts rather than the steel cable clamps. This ensures you are measuring the actual battery voltage instead of a poor connection caused by hidden corrosion between the clamp and the post.
| Multimeter Reading (Resting) | State of Charge | Battery Condition |
|---|---|---|
| 12.6V to 12.8V+ | 100% | Healthy and fully charged |
| 12.4V | 75% | Good condition, slightly low |
| 12.2V | 50% | Undercharged – Needs charging |
| 12.0V | 25% | Severely discharged – Charge immediately |
| 11.9V or below | 0% | Discharged – Potential dead internal cell |
Step 3 – Cranking Voltage Test – The Real Strength Check
A battery can show a resting reading of 12.6 volts on a meter and still fail to start your car. Resting voltage only measures chemical potential, not physical strength under pressure. When you engage the starter motor, the engine demands anywhere from 100 to 250 amps of instantaneous power.
To perform a cranking test, keep your multimeter hooked up to the battery posts just like in the resting test. Position the meter display where you can see it from the driver’s seat, or have a friend sit inside the car to turn the key while you watch the display.
Crank the ignition for roughly two to three seconds while closely watching the lowest number on the screen.
Crucial Reading Threshold – A healthy battery will hold its voltage above 9.6 volts during active cranking at standard room temperature. If the number plunges down to 8 volts or lower, the internal lead plates are heavily degraded, and the battery must be replaced.
- Above 10.0 Volts While Cranking – Excellent battery health and solid cold cranking capacity.
- 9.6 to 9.9 Volts While Cranking – Acceptable, but starting to show signs of age or wear.
- Below 9.6 Volts While Cranking – Weak internal capacity; the battery will likely leave you stranded during freezing weather.
Step 4 – Testing the Alternator Charging System
Before you spend money on a replacement battery, you must make sure your charging system is actually doing its job. A dead battery is frequently just the innocent victim of a failing alternator that stopped recharging it while you drive.
Leave your multimeter connected to the battery posts and start the engine. Let it settle into a smooth idle. The voltage reading should quickly climb from your resting level up into the charging range.
Next, turn on your high-beam headlights, switch the heater fan to maximum speed, and turn on the rear window defroster. Have a helper raise the engine speed to around 1,500 RPM.
Common Mechanic Mistake to Avoid – Do not assume a battery is defective simply because it went flat overnight. Always verify that the charging system produces steady, regulated voltage under electrical load before throwing away a battery that might just need a recharge.
- Normal Charging Range (13.7V to 14.7V) – The alternator and internal voltage regulator are operating correctly.
- Undercharging (Below 13.5V under load) – The alternator cannot keep up; your battery will slowly drain down while driving.
- Overcharging (Above 15.0V) – The voltage regulator has failed; this will boil the liquid electrolyte inside the battery and ruin it quickly.
How to Do a Quick Battery Check Without Tools
If you are stuck in a parking lot without a multimeter, you can still perform a basic sanity check using your car’s built-in systems.
Park your car facing a flat wall or garage door at night. Turn your headlights on with the engine turned off, and observe the brightness of the light beam on the wall for about 30 seconds. Next, start the engine while keeping your eyes on the beam.
Field Diagnostic Tip – If the lights look noticeably dim before starting and then jump significantly brighter the moment the engine fires up, your alternator is working, but your battery is struggling to hold an electrical charge.
Key non-tool observations to watch for:
- Slow Window Speed – Power windows that roll up painfully slow when the engine is off indicate low resting voltage.
- Dashboard Flickering – Instrument clusters that dim, reset, or flash during engine cranking point to severe voltage drop.
- Sluggish Starter Pitch – A starter motor that sounds slow and heavy (the classic “whir… whir… start”) means the battery cannot deliver required cranking amps.
DIY Testing vs Professional Carbon Pile Load Testing
While a digital multimeter gives you valuable voltage numbers, professional repair facilities use specialized load testers to deliver a definitive verdict.
Handheld digital conductance testers (the kind parts stores bring out to your car) send a small high-frequency signal through the battery to calculate internal resistance and estimate available Cold Cranking Amps (CCA). These tools are fast and convenient, but a true carbon pile load tester remains the gold standard in modern diagnostics. A carbon pile tester applies a physical electrical load equal to half the battery’s rated CCA for 15 full seconds to see if the internal plates collapse.
When to Visit a Shop – If your battery passes both voltage and cranking tests, yet your car still goes completely dead after sitting parked for two days, you likely have an electrical parasitic draw. That means a computer module, relay, or aftermarket accessory is staying awake and draining current while the car is locked. Tracking down a parasitic draw requires dedicated diagnostic equipment and wiring schematics.
| Testing Method | What It Measures | Best Used For | Accuracy Level |
|---|---|---|---|
| Digital Multimeter | Static DC Voltage and Cranking Drop | Quick home health checks and charging output | Good for basic screening |
| Digital Conductance Tester | Internal resistance and estimated CCA | Fast roadside capacity testing | Very reliable |
| Carbon Pile Load Tester | True amp capacity under physical load | Definitive shop diagnostics for heavy-duty testing | Highest accuracy |
Common Battery Myths That Ruin Electrical Systems
Over the years, I have heard plenty of outdated advice passed down from older generations that can seriously harm modern computer-controlled vehicles.
The most dangerous myth is disconnecting the negative battery cable while the engine is running to “see if the alternator keeps it running.” On older carbureted cars with simple dynamos, this old trick worked. On any vehicle built in the last thirty years, disconnecting the battery while running removes the electrical buffer, causing an immediate voltage spike that can instantly fry the engine control unit (ECU), transmission controller, and dashboard modules.
Modern Car Warning – Never disconnect battery cables on a running modern engine. The resulting voltage surge can destroy thousands of dollars worth of onboard computers in a fraction of a second.
Keep these facts in mind:
- Storing on Concrete – Modern plastic battery cases do not discharge through concrete floors; that myth comes from early 1900s rubber-cased batteries.
- Terminal Banging – Never hammer battery clamps onto the posts; doing so breaks the internal lead welds inside the casing and ruins the battery instantly.
- Short Trip Charging – Driving five minutes around the block will not recharge a drained battery; your alternator needs at least 20 to 30 minutes of continuous driving to replace the power used during a single start.
Routine Maintenance to Keep Your Battery Alive Longer
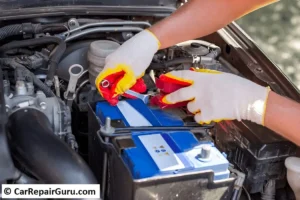
Extending the life of your battery does not take hours of work. Adding a simple cleaning routine to your seasonal car care will easily add a year or two of reliable service.
Mix a tablespoon of ordinary baking soda into a cup of warm water. Dip an old toothbrush into the mixture and scrub away any crusty build-up on the terminals and clamps. The baking soda will fizz as it neutralizes the acidic residue. Wipe everything clean with a dry rag, tighten the hardware securely, and apply a light coat of dielectric grease or petroleum jelly over the metal surfaces to block out moisture and air.
Preventative Habit – If you only drive your car on short weekend errands, purchase a quality smart battery tender. These low-amperage maintainers keep your battery at peak state of charge without boiling off fluid, preventing premature plate sulfation.
- Clean Terminals Seasonally – Scrub away corrosion every spring and autumn.
- Check Hold-Down Brackets – Ensure the battery hold-down clamp is snug; excessive engine vibration shakes active material off the lead plates.
- Take Longer Trips – Give your car a 30-minute highway drive every couple of weeks to allow the alternator to bring the charge back up to 100%.
- Turn Off Accessories Before Shutting Down – Turn off heavy electrical loads like seat heaters, windshield wipers, and headlights before cutting the ignition.
Professional Final Thoughts
Taking five minutes to perform a routine battery check before the seasons change is the difference between a smooth morning start and being stranded on the side of the road waiting for a tow truck. Grab a basic multimeter, follow the voltage steps outlined above, and you will always know the exact health of your charging system.
If your resting numbers look low or your cranking voltage dips below safe limits, replace the battery on your own schedule before it makes that decision for you.
Frequently Asked Questions About Car Battery Testing
What should a 12V car battery read when fully charged?
A fully charged 12-volt lead-acid battery in good health should read between 12.6 and 12.8 volts when the engine is turned off and surface charge has dissipated. If your reading rests at 12.2 volts or lower, the battery is holding roughly half its potential charge and needs to be connected to an external charger.
Can a bad battery ruin my alternator?
Yes. When a battery has shorted internal cells or cannot hold a charge, the alternator is forced to run at maximum output continuously to keep up with the vehicle’s electrical demands. This constant strain overheats the alternator diodes and stator windings, frequently leading to premature alternator failure.
How often should I perform a battery check?
You should test your battery at least twice a year, ideally right before summer heat waves and winter freezes. Extreme cold slows down chemical reactions and thickens engine oil, while summer heat accelerates internal grid corrosion and fluid evaporation.
Why did my battery show 12.6 volts but still won’t start my engine?
A battery can carry normal resting voltage while having virtually no cranking amp capacity. If the internal lead plates have sulfated or broken internally, they cannot supply the 100+ amps required to spin the starter motor. Running a cranking test or load test exposes this hidden weakness immediately.
About the Author