Marco Riley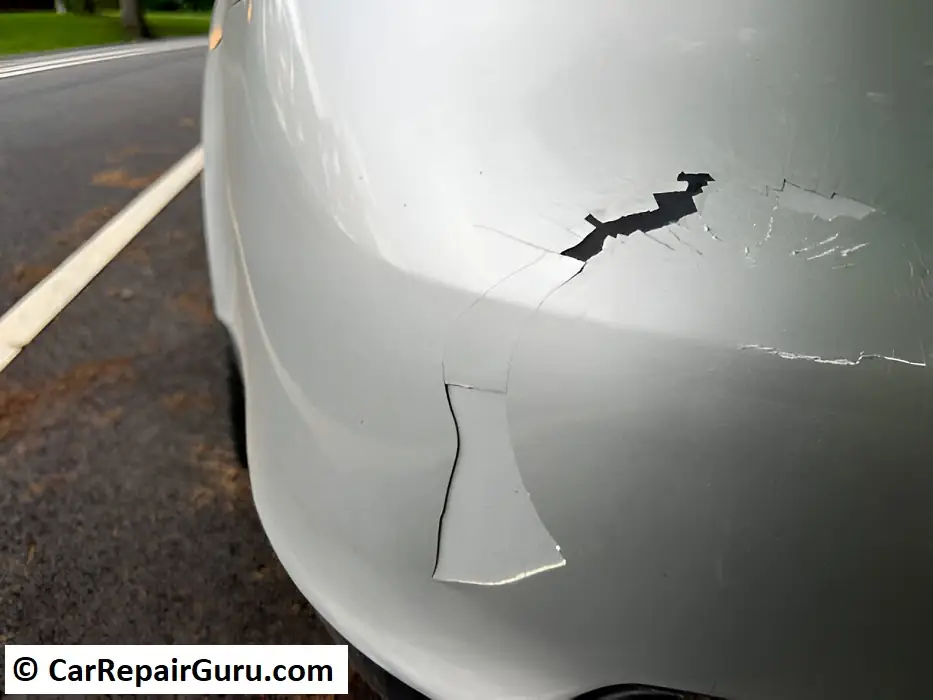
We have all felt that sinking feeling in our stomach after hearing that sudden crunch against a high curb in a tight parking lot. You step out of the car, look down at the front corner, and find an ugly scrape or pushed-in dent staring back at you. It is enough to ruin your entire weekend.
As a mechanic who has spent over fifteen years working on damaged front and rear fascias, I can tell you that modern plastic bumpers are surprisingly resilient. You do not need to drop a thousand dollars at a commercial body shop just to deal with scrapes, small tears, or parking lot dents. With the right techniques, a few affordable supplies, and some patience, these practical plastic bumper repair tips will help you restore your bumper right in your home garage.
- Identifying Your Bumper Material Before Touching Any Tool
- Safe Dent Removal – Using Heat Without Ruining Factory Paint
- Erasing Scuffs and Paint Transfer in Under Twenty Minutes
- Fixing Deep Gouges With Flexible Bumper Epoxy
- Repairing Structural Cracks With a Hot Stapler Kit
- Priming, Painting, and Blending for a Seamless Look
- Viral Internet Bumper Hacks That Do More Harm Than Good
- DIY Repair vs Shop Replacement – Knowing When to Call It
- Final Thoughts From the Shop Floor
- Frequently Asked Questions About Bumper Repairs
- Can you fix a cracked plastic bumper without taking it off the car?
- How much does it cost to fix a plastic bumper at home versus a body shop?
- What is the best filler for plastic car bumpers?
- Will a heat gun ruin my bumper paint?
Identifying Your Bumper Material Before Touching Any Tool
Before you start sanding or heating your bumper, you have to know what kind of plastic you are dealing with. Modern vehicles use different types of synthetic polymers, and each one reacts differently to heat, adhesives, and paint.
Most daily drivers on the road today use Polypropylene (PP) or Thermoplastic Olefin (TPO). These materials are chosen by manufacturers because they bend during low-speed impacts instead of shattering. However, they also contain natural oils that cause regular body fillers and paints to peel right off if you do not prep them properly. Rigid plastics like Acrylonitrile Butadiene Styrene (ABS) are stiffer and bond easily with standard adhesives, but they crack rather than dent when hit.
Pro-Tip: Turn your steering wheel all the way to one side, pull back the inner fender liner, and look at the back face of the bumper cover with a flashlight. Look for molded resin stamps such as >PP<, >TPO<, or >ABS<. This stamp tells you the exact chemical makeup of your panel.
| Resin Stamp | Plastic Name | Flexibility Level | Recommended Repair Method |
|---|---|---|---|
| >PP< / >TPO< | Polypropylene / Thermoplastic Olefin | High (Flexible) | Adhesion promoter + Flexible epoxy filler or plastic welding |
| >ABS< | Acrylonitrile Butadiene Styrene | Low (Rigid) | Standard plastic bonding epoxy or ABS solvent welding |
| >PUR< | Polyurethane | Medium (Semi-Flexible) | Two-part flexible urethane adhesives |
Safe Dent Removal – Using Heat Without Ruining Factory Paint
Thermoplastic bumpers have an internal memory. When a low-speed impact pushes the plastic inward, the material wants to return to its original factory shape, but tension locks it into the concave dent. Applying controlled heat relaxes the plastic molecules so the dent can pop back out. While traditional methods for car dent removal on steel or aluminum panels involve suction or metal rods, flexible plastics respond best to careful thermal shaping.
The goal here is slow, even heat distribution. You want to warm the entire damaged section along with an inch or two around its perimeter. Heating just one tiny spot will blister your clear coat or permanently stretch the plastic out of shape.
Crucial Temperature Warning: Keep your heat gun moving in wide, sweeping circles roughly six to eight inches away from the panel. Never let the surface get hotter than what you can briefly touch with a bare hand (around 140°F to 160°F).
- Clean the front and back of the dent thoroughly with soap and water to remove road grime.
- Heat the sunken area from the outer edges working inward for three to five minutes.
- Reach behind the bumper wearing a thick leather work glove and apply steady forward pressure to the center of the dent.
- Once the panel pops forward, immediately press a cold, wet microfiber towel against the outside face for thirty seconds to freeze the plastic back into its original shape.
Erasing Scuffs and Paint Transfer in Under Twenty Minutes
Many bumper blemishes look far worse than they actually are. When your bumper rubs against a painted garage pillar or another vehicle, the top layer of material on your bumper is often foreign paint transfer rather than missing factory paint.
Run your clean fingernail gently across the mark. If your nail glides smoothly over the mark without catching a sharp edge, your factory basecoat is completely intact underneath. You can handle this surface blemish quickly using standard techniques for removing car paint scratches with minimal abrasives.
Common Mechanic Mistake to Avoid: Reaching for coarse sandpaper to fix paint transfer. Coarse grit strips away your factory clear coat unnecessarily, turning a quick five-minute polish job into a full paint respray.
- Light Paint Transfer: Use an automotive clay bar with detailing spray, followed by a medium-cut rubbing compound on a foam pad.
- Surface Scuffs: Use a fine polishing compound with a dual-action polisher or firm hand buffing.
- Shallow Clear Coat Scratches: Wet sand very lightly with 3000-grit paper using soapy water as lubricant, then compound and polish to restore the gloss.
Fixing Deep Gouges With Flexible Bumper Epoxy
When a curb or pole cuts deep into the plastic, polishing will not save it. You need to fill the void with a compound that moves with the bumper. Standard body filler for car repair designed for metal quarter panels will cure rock-hard, but it will crack and flake away the first time someone taps your bumper in a parking space.
To make the repair permanent, you have to create a shallow channel known as a “V-groove” along the scratch. This increases the surface area and gives the flexible epoxy a mechanical edge to lock into.
Important Prep Step: Raw Polypropylene will reject filler unless you apply an automotive plastic adhesion promoter. Spray two light coats onto the sanded bare plastic and let it flash for ten minutes before applying your epoxy filler.
- Sand the gouge and one inch around it with 180-grit sandpaper to remove loose edges.
- Use a small hand file or rotary tool to carve a shallow V-shape into the center of the deep scratch.
- Clean the area with an alcohol-based wax and grease remover.
- Mist the bare plastic with adhesion promoter.
- Mix equal parts of two-part flexible bumper epoxy and press it firmly into the gouge with a plastic spreader, leaving it slightly higher than the surrounding panel.
- Allow the filler to cure for twenty minutes, then block-sand it level using 320-grit, followed by 600-grit sandpaper.
Repairing Structural Cracks With a Hot Stapler Kit
If an impact splits the bumper edge or tears through the plastic, surface filler alone cannot handle the highway wind loads. The crack will continue to open and close as the bumper vibrates, eventually splitting your fresh paint. You must reinforce the structural integrity from behind.
While older repair methods relied on fiberglass cloth and messy resins, professional shops now rely on hot stapler plastic welding tools. These tools heat small stainless steel wave pins, sinking them directly into the plastic across the fracture line to bridge both sides permanently.
Safety Note: Always disconnect the vehicle battery if you are working near front-end wiring harnesses, and wear safety glasses while clipping hot stapler wire legs.
- Remove the bumper cover or drop the splash shield to get direct access to the back side of the crack.
- Drill a tiny 1/8-inch hole at the very end of the crack to stop the split from spreading further down the panel.
- Align the broken edges tightly together using masking tape on the front face.
- Press the hot stapler pins into the rear side of the plastic across the fracture every half inch, burying the metal mesh just below the surface.
- Let the plastic cool around the pins, clip the protruding wire ends flush, and sand the front seam for filling.
Priming, Painting, and Blending for a Seamless Look
Laying down smooth paint in a home garage comes down to feathering your edges. “Feathering” means sanding the boundary between your fresh filler, the factory primer, the basecoat, and the clear coat so smoothly that you cannot feel the transition with your bare fingertips.
When applying your primer, choose a high-build flexible primer surfacer. Following precise car color matching guidelines and retrieving your paint code from the door jamb tag ensures your fresh basecoat blends into adjacent factory panels without an obvious shade mismatch.
Painter’s Rule of Thumb: Keep your color basecoat concentrated strictly over the repaired spot, but extend your clear coat further out to the nearest body line. This prevents a visible “halo” ring where new clear coat meets old clear coat.
| Stage | Product Type | Coats Required | Wait Time Between Coats |
|---|---|---|---|
| 1. Plastic Primer | Flexible Primer Surfacer | 2 to 3 medium coats | 5 to 10 minutes |
| 2. Color Basecoat | Factory Color-Matched Spray | 2 to 3 light, even coats | 10 to 15 minutes |
| 3. Top Coat | 2K High-Gloss Clear Coat | 2 wet coats | 10 minutes |
| 4. Edge Blending | Clear Coat Blending Solvent | 1 light mist on blend edges | Immediate after clear coat |
Viral Internet Bumper Hacks That Do More Harm Than Good
Social media is full of quick-fix videos showing people pouring hot liquids or using bathroom tools on expensive car bumpers. Most of these clips are staged or only show the bumper for five seconds before the plastic warps.
Here is why you should avoid these popular shortcuts:
- The Boiling Water Kettle Trick: Pouring boiling water over frozen winter plastic can cause rapid thermal shock, cracking the clear coat and causing it to peel off in sheets months later.
- The Bathroom Plunger Trick: Household suction cups pull unevenly. In most cases, they yank the plastic mounting clips right out of your fender brackets without popping the actual dent.
- Superglue and Baking Soda: This mixture cures into an extremely brittle resin that has zero flexibility. The first time your bumper flexes on the highway or bumps a parking block, the patch shatters into pieces.
DIY Repair vs Shop Replacement – Knowing When to Call It
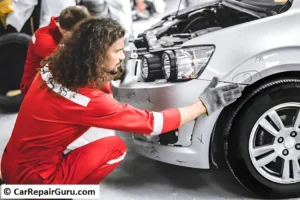
While most scrapes and small splits are simple to repair yourself, there are moments when replacing the bumper cover is the safer, more economical route. Bumper covers do more than look good – they house critical sensors and direct impact energy into the crash structure.
Take an honest look at your bumper’s mounting tabs and structural supports before buying supplies.
- Fix It Yourself: Shallow gouges, scrapes, cosmetic cracks under six inches long, and push-in dents where the mounting brackets remain undamaged.
- Replace the Bumper: Broken retaining tabs where the bumper snaps into the fender, warped plastic that twists out of alignment with the hood, or damage directly in front of internal Blind Spot and Autonomous Emergency Braking (ADAS) radar modules.
Final Thoughts From the Shop Floor
Taking care of your own car bodywork does not require years of vocational training, but it does demand patience and the right materials. If you take your time during the preparation stages, clean off all road contaminants, and use products formulated specifically for flexible plastics, your repair will look clean and hold up for years. Keep these practical plastic bumper repair tips in mind the next time you tackle a driveway repair project, and do not rush the sanding process.
Take a step back, work one stage at a time, and you will save hundreds of dollars while keeping your ride looking sharp.
Frequently Asked Questions About Bumper Repairs
Can you fix a cracked plastic bumper without taking it off the car?
For surface scuffs and shallow scratches, you can easily work on the bumper while it stays on the car. However, if the bumper is cracked through, you need to remove the cover or drop the inner fender splash shield. Structural repairs require inserting reinforcement pins or welding mesh along the back side of the split to keep the seam stable.
How much does it cost to fix a plastic bumper at home versus a body shop?
Fixing minor to moderate bumper damage at home typically costs between $50 and $100 in supplies, including flexible filler, plastic primer, color-matched paint, and sandpaper. A professional collision center generally charges between $600 and $1,400 because they factor in labor, complete panel removal, full-panel respraying, and sensor recalibration.
What is the best filler for plastic car bumpers?
The most reliable product is a two-part flexible epoxy bumper repair adhesive (such as 3M Flexible Bumper Patch or Bondo Flexible Bumper Repair). Unlike standard metal body filler, these products flex at the same rate as modern automotive plastics, preventing the patch from shrinking, lifting, or cracking over time.
Will a heat gun ruin my bumper paint?
A heat gun will only ruin factory paint if you hold it too close or concentrate the heat on a single spot for too long. By holding the heat gun six to eight inches away and sweeping it in continuous overlapping circles, you warm the plastic safely without blistering the outer clear coat.
About the Author