Marco Riley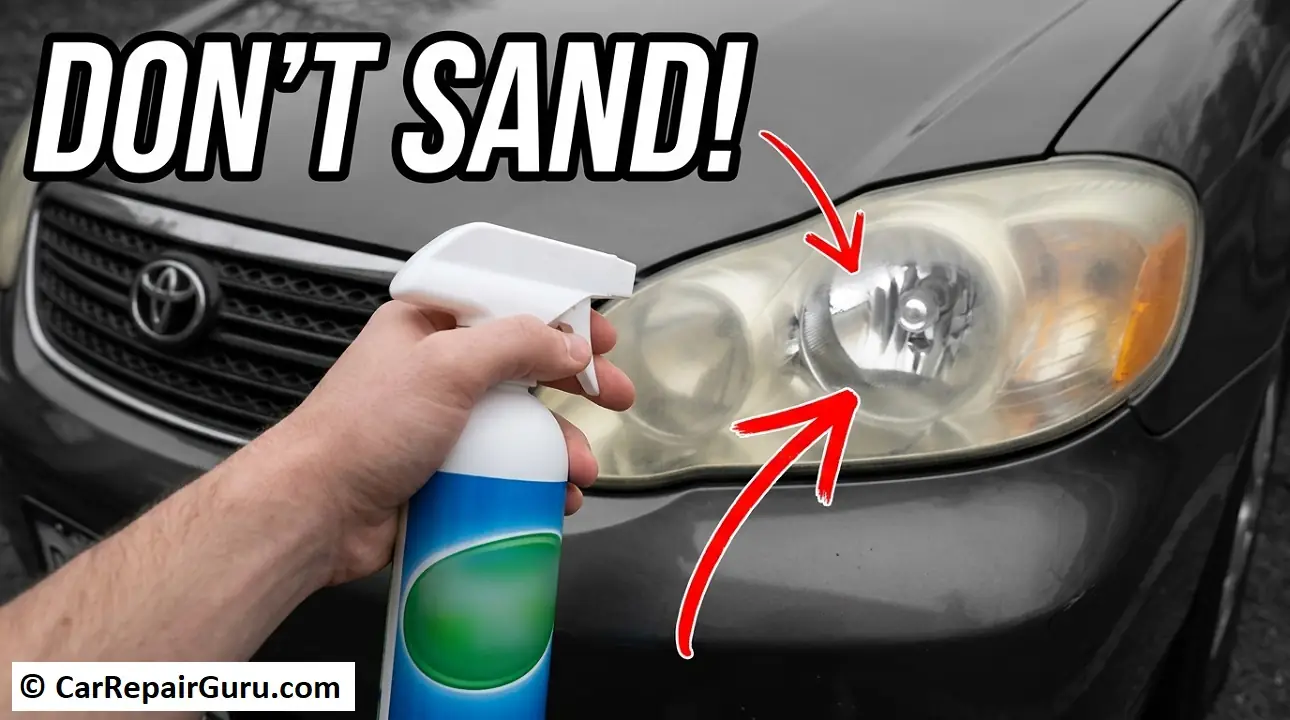
We’ve all felt that slight hesitation during a nighttime drive, realizing the road ahead isn’t as bright as it used to be. You step out of your car, look at the front end, and find your once-clear headlight lenses covered in a dull, yellowish haze. As an ASE Certified Master Technician, I often identify this during a routine car light check in the shop.
While cloudy lenses look ugly, the real danger is driving blind at night since oxidation cuts your light output by up to 80%. Fortunately, with the right approach and a bit of patience, you can safely restore faded headlights back to functional clarity.
To restore faded headlights, clean the lenses thoroughly, mask off the surrounding paint with painter’s tape, and wet-sand the oxidation using progressive grits (1000 to 3000). Next, polish the plastic with a compounding agent to restore clarity. Finally, apply a UV-resistant clear coat sealant to protect the lenses from future UV damage.
- Why Do Headlights Turn Yellow and Faded?
- DIY Restoration vs. Professional Replacement – When to Swap
- DIY vs. Professional Restoration – Is the Cost Worth It?
- The Truth About Household Hacks – Toothpaste vs. WD-40
- Step 1 – Crucial Prep Work and Surface Protection
- Step 2 – Wet Sanding to Remove Oxidation
- Step 3 – Compounding and Polishing for Clarity
- Troubleshooting – Why Do My Headlights Still Look Cloudy After Sanding?
- Step 4 – The Crucial Missing Step – Applying UV Protection
- Choosing Your UV Sealant: Aerosol Clear Coat vs. Wipe-On vs. Ceramic
- Summary and Expert Advice
- Frequently Asked Questions
- How long does a headlight restoration last?
- Can I use vinegar and baking soda to clean headlights?
- Is it cheaper to restore or replace headlights?
- Why are my headlights foggy on the inside?
Why Do Headlights Turn Yellow and Faded?
Modern automotive headlight assemblies are no longer made of heavy, breakable glass. Instead, vehicle manufacturers use polycarbonate plastic because it is highly impact-resistant, lightweight, and safer in a collision. But here is the real catch: polycarbonate is naturally susceptible to ultraviolet (UV) radiation from the sun.
To combat this, manufacturers apply a thin protective film at the factory. Over years of exposure, heat, and atmospheric debris, this film breaks down, leading to surface oxidation. This chemical reaction is what turns the smooth, clear plastic into a cloudy, yellowed barrier.
Important Safety Note: Never ignore early signs of hazing on your headlights. As the oxidation grows thicker, it scatters the light beam of your bulbs. This scatters the light upward and outward, blinding oncoming drivers while failing to illuminate the dark road directly ahead of you.
- UV Radiation: Solitary exposure to solar rays breaks down the outer polymer links of the plastic.
- Road Grit Abrasion: Tiny rocks and sand act like a sandblaster, pitting the factory clear coat.
- Harsh Chemical Cleaners: Strong commercial car washes use chemicals that strip the UV barrier away.
DIY Restoration vs. Professional Replacement – When to Swap
Not every cloudy headlight can be saved by sanding and polishing. Before you touch anything, you need to determine if you are dealing with surface oxidation or internal damage. If there is moisture trapped inside the assembly, or if the plastic has developed deep micro-cracks throughout its entire thickness – known as crazing – restoration is no longer a viable option. Crazing is structural damage caused by heat cycling from the bulb and years of expansion and contraction.
Common Mechanic Mistake to Avoid: Do not waste hours sanding and polishing a headlight that has internal condensation or physical cracks. At that stage, moisture has compromised the electrical integrity, and replacing the entire headlight assembly is the only safe and reliable route.
| Headlight Condition | Primary Cause | Can It Be Restored? |
|---|---|---|
| Surface Yellowing | UV Oxidation | Yes (Sanding & Polishing) |
| Cloudy White Haze | Clear Coat Failure | Yes (Sanding & Clear Coat) |
| Internal Moisture | Broken Housing Seal | No (Requires Assembly Replacement) |
| Crazing (Micro-Cracks) | Thermal/Physical Stress | No (Requires Assembly Replacement) |
DIY vs. Professional Restoration – Is the Cost Worth It?
If the idea of taking sandpaper to your car’s exterior makes you nervous, you might wonder if it is better to pay a professional detailer. A DIY project typically costs around $15 to $30 for materials and takes about two hours of physical labor. In contrast, professional auto detailing shops or body shops charge between $100 and $150 to restore a pair of headlights.
Before you touch anything, look at what the professionals do differently. Detailers often use high-grade, two-part urethane clear coats that are sprayed on with a pneumatic paint gun and cured under specialized UV lamps. This creates a harder, thicker, and longer-lasting barrier than the quick-drying wipe-on sealants found in standard retail kits.
If you enjoy working with your hands, the DIY approach offers the best value. However, if you want a guaranteed, long-lasting finish without the risk of accidentally scratching your paint, hiring a professional is a solid investment.
The Truth About Household Hacks – Toothpaste vs. WD-40
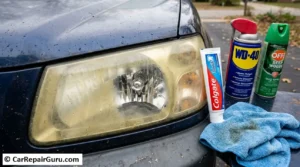
The internet is flooded with viral videos claiming you can restore cloudy headlights in seconds using household items like toothpaste or WD-40. Let’s look at what actually happens here. Toothpaste contains very mild, unstable abrasives designed to scrub plaque off teeth.
It can clear up very light surface haze temporarily, but it leaves zero protection. On the other hand, WD-40 is simply a light lubricant oil. Spraying it on a hazy headlight fills in the microscopic scratches on the surface to make it look clear temporarily. However, the oil washes off during the very next rainstorm or car wash, leaving the plastic unprotected.
Pro-Tip: Skip the temporary kitchen remedies. If you do not seal the plastic after stripping away the oxidized layer, the headlight will yellow again- often worse than before – within three to four weeks. WD-40 also attracts road dust, which can grind into the plastic and worsen the fogging over time.
- Toothpaste: Mildly abrasive but lacks the grit needed for heavy yellowing and offers no protection.
- WD-40: Temporary oily cover-up that washes away in the rain and attracts dirt.
- Bug Spray: Contains DEET, which chemically melts the plastic lens, causing permanent, irreversible damage.
Step 1 – Crucial Prep Work and Surface Protection
Proper preparation prevents costly mistakes. Before you touch any sandpaper, the lenses must be washed with automotive soap to remove dirt, grease, and bug splatter. Once clean and dry, you must protect the surrounding painted body panels. If your sanding paper slips off the plastic and onto your painted fender, you will scratch the paint’s clear coat.
Crucial Step Warning: Use high-quality, medium-tack blue painter’s tape. Apply at least two thick layers around the entire perimeter of the headlight housing. This is where most DIYers get tripped up – one slip of the coarse sandpaper can cause deep scratches in your paint that require expensive detailing to fix.
- Automotive soap and water: For removing road grime before sanding.
- Blue painter’s tape: Minimum two layers for surrounding paint protection.
- Clean microfiber towels: For wiping the lenses dry between sanding stages.
- Spray bottle with water: To keep the sandpaper lubricated during the wet-sanding phase.
Step 2 – Wet Sanding to Remove Oxidation
This is where the physical leveling of the damaged plastic takes place. We use progressive sanding grits to shave away the dead, yellowed plastic layer. Start with your coarsest paper, which is the 1000-grit. Spray the lens and the paper generously with your soapy water mixture. Keeping the surface lubricated with soapy water prevents the sandpaper from clogging and creating deep gouges in the plastic.
Once you have removed the heavy yellow oxidation with the 1000-grit, wipe the lens dry, inspect for a uniform haze, and move to the 2000-grit. Finish with the 3000-grit paper to refine the scratches. If that doesn’t solve it, don’t panic; it just means you need to spend a little more time with the medium grits to ensure the surface feels completely smooth to the touch.
Important Sanding Technique: Always sand in straight lines, alternating directions with each grit level. Sand horizontally with the 1000-grit paper, and vertically with the 2000-grit paper. This simple physical principle is why the process works – it allows you to easily see when you have completely removed the coarser scratches from the previous step.
- Soak your 1000-grit paper and wet-sand horizontally until all heavy yellow spots are gone.
- Rinse the lens, switch to 2000-grit paper, and sand vertically to smooth out the horizontal lines.
- Rinse again, switch to 3000-grit paper, and sand horizontally to achieve a fine, frosted sea-glass texture.
Step 3 – Compounding and Polishing for Clarity
After wet sanding with the 3000-grit paper, your headlight lens will look clean of yellowing but will have a uniform, milky haze. To bring back optical clarity, a compounding and polishing step is required.
Apply a nickel-sized amount of high-quality automotive compounding agent to a microfiber pad or a foam polishing pad. Work the compound into the plastic using firm, overlapping circular motions to buff out the micro-scratches left by the fine sandpaper.
Caution for Power Tool Users: If you are using a drill-attached buffing pad to speed up the process, keep the tool moving constantly and use light pressure. Friction generates heat very quickly, which can permanently melt, distort, or burn the polycarbonate plastic lens.
- The lens will transition from an opaque, milky white to a translucent haze during the first buffing pass.
- A second light pass with fine polishing compound will reveal a crystal-clear, glass-like finish.
- Wipe the surface clean with a dry microfiber towel to ensure all compound residue is removed.
Troubleshooting – Why Do My Headlights Still Look Cloudy After Sanding?
This is where many DIYers get frustrated. You have spent an hour scrubbing, wet sanding, and buffing, but the resulting finish is still slightly cloudy or hazy. If your headlights are not perfectly clear after polishing, the issue is almost always due to one of two errors in the sanding phase.
First, you may not have sanded deeply enough with your coarsest paper (1000-grit). The lower grit paper does 90% of the heavy lifting by shaving away the dead, oxidized crust. If you do not completely strip that yellow layer in step one, polishing over the remaining oxidation will only make the yellow film look shiny rather than clear.
Second, you cannot skip grit levels. If you jump from 1000-grit straight to 3000-grit, the fine paper is not abrasive enough to remove the deep valleys left by the coarse paper, leaving behind visible, permanent scratch lines that trap compound and scatter light.
- Symptom: Clear plastic with visible scratch lines. Cause: Skipped intermediate grits. You must go back and re-sand starting with 2000-grit, then 3000-grit, to level out the deep valleys.
- Symptom: Headlight is perfectly smooth but still has a dull, yellow tint. Cause: You did not sand deep enough with 1000-grit to remove all the oxidation. You must start over from step one to clear the remaining yellow layer.
Step 4 – The Crucial Missing Step – Applying UV Protection
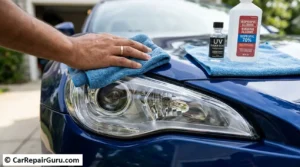
Now that your headlights are crystal clear, they are also completely vulnerable. You have sanded off the old, damaged factory UV coating, leaving the bare polycarbonate fully exposed to the elements. Without a new UV inhibitor, solar radiation will degrade the fresh plastic rapidly. Applying a high-quality UV clear coat sealant or ceramic coating is the only way to lock in the clarity.
Crucial Step Warning: Ensure the lens is completely clean and dry before applying the sealant. Wipe down the surface with an isopropyl alcohol prep solvent. This removes any leftover polishing oils that might prevent the clear coat from adhering properly to the plastic.
Choosing Your UV Sealant: Aerosol Clear Coat vs. Wipe-On vs. Ceramic
Not all UV protectants are created equal. The product you choose to lock in your work determines whether your headlights stay clear for six months or three years. Before applying your final coat, evaluate the trade-offs between application complexity and durability.
A professional-grade 2K aerosol clear coat spray contains an active hardener that must be mixed inside the can. It offers the thickest, most durable factory-like shell but requires extensive masking around the car to avoid paint overspray. Wipe-on liquid sealants are incredibly easy to apply without streaks but form a much thinner barrier. Automotive ceramic coatings are highly hydrophobic (water-repellent) and simple to wipe on, but they must be reapplied annually if your vehicle is constantly exposed to extreme heat and sun.
| Sealant Type | Average Lifespan | Application Difficulty | Best Suited For |
|---|---|---|---|
| 2K Aerosol Clear Coat | 2 to 3 Years | High (Requires heavy masking) | Daily drivers parked outdoors year-round |
| Wipe-On Liquid Sealant | 1 Year | Low (Simple wipe-and-dry) | Beginners wanting a fast, risk-free application |
| Automotive Ceramic Coating | 1 to 2 Years | Low (Wipe on and buff off) | Cars parked in garages or mild climates |
Summary and Expert Advice
Restoring faded headlights is a straightforward weekend project that directly impacts your driving safety and visibility. By taking your time during the wet-sanding phase and using progressive grits, you can achieve professional-grade clarity at a fraction of the cost.
Keep this in mind before you start: the longevity of your work depends entirely on the final step. Regular maintenance, such as parking in the shade and learning how to properly wash and wax your car twice a year, will preserve your hard work and keep the road ahead bright.
Frequently Asked Questions
How long does a headlight restoration last?
A restoration using only polish might last 1 to 3 months. However, a proper restoration protected with a high-quality UV-resistant clear coat typically lasts 1 to 3 years, depending on your vehicle’s exposure to direct sunlight.
Can I use vinegar and baking soda to clean headlights?
While the mild chemical reaction can help remove light surface dirt and road grime, it lacks the abrasive power to level heavy oxidation and provides no UV protection, meaning the yellowing will return quickly.
Is it cheaper to restore or replace headlights?
Restoration is significantly cheaper, costing around $15 to $30 for DIY materials. In contrast, brand-new replacement assemblies can cost anywhere from $100 to over $1,000 per side for modern LED or projector units.
Why are my headlights foggy on the inside?
Internal fogging is caused by a failure of the housing’s perimeter seal or a blocked vent path, which allows moist air to enter and condense against the cooler lens. This is an internal issue and cannot be solved by exterior sanding.
About the Author