Engines are often described as the heart of a vehicle, and like any heart, they need to be in top shape to perform efficiently. One of the best ways to assess the health of your engine is by performing an engine compression test. This diagnostic tool measures the amount of pressure generated within each cylinder during the compression stroke, offering valuable insights into the engine’s overall condition.
But why does this matter? Compression is essential for an engine to function properly. Without the right pressure, the air-fuel mixture in the cylinders won’t ignite effectively, leading to poor performance, reduced fuel efficiency, or even engine failure. By conducting an engine compression test, you can detect issues like worn piston rings, leaky valves, or a blown head gasket—all problems that can drastically affect your engine’s health.
The test is straightforward yet powerful, providing data that can save you from costly repairs down the line. It’s an essential part of routine maintenance or troubleshooting when you notice unusual symptoms such as reduced power or difficulty starting. Whether you’re a car enthusiast or a casual driver, understanding the basics of engine compression testing can help you keep your vehicle running smoothly and reliably.
- Understanding Compression Ratios
- Symptoms Indicating the Need for an Engine Compression Test
- Tools Required for an Engine Compression Test
- Step-by-Step Guide to Performing an Engine Compression Test
- Interpreting Engine Compression Test Results
- Common Causes of Low Engine Compression
- Engine Compression Test vs. Leak-Down Test
- Safety Precautions and Best Practices
- Conclusion
- FAQ
Understanding Compression Ratios
When it comes to understanding how your engine works, compression ratio is a term you’re likely to hear often. Simply put, the compression ratio is the measurement of how much the air-fuel mixture is compressed inside the cylinder before it’s ignited. It’s calculated by comparing the volume of the cylinder when the piston is at the bottom of its stroke to the volume when the piston is at the top.
Why is Compression Ratio Important?
The compression ratio is a critical factor in determining your engine’s efficiency and power output. Higher compression ratios typically result in better thermal efficiency, meaning your engine can extract more energy from the fuel. This leads to improved performance and fuel economy. However, higher compression ratios require high-octane fuel to prevent knocking, a harmful condition where the air-fuel mixture ignites prematurely.
Static vs. Dynamic Compression Ratios
Compression ratios are further categorized as static or dynamic. Static compression ratio is a fixed calculation based on the engine’s physical dimensions and remains constant. On the other hand, the dynamic compression ratio takes into account factors like valve timing, which affects the actual compression during operation. Engines with variable valve timing often boast higher performance due to optimized dynamic compression.
Impact on Engine Performance
Engines with higher compression ratios deliver more power and efficiency but require precise tuning and higher-quality fuel. Meanwhile, engines with lower compression ratios are less efficient but more versatile, tolerating regular fuel and handling forced induction systems like turbochargers. Understanding your engine’s compression ratio helps in optimizing its performance and longevity.
Symptoms Indicating the Need for an Engine Compression Test
Your engine might be trying to tell you something, and an engine compression test can help uncover the problem. Here are some common symptoms that indicate it’s time to perform this critical diagnostic procedure:
1. Poor Acceleration
If your vehicle feels sluggish when you press the gas pedal, low engine compression could be the culprit. Cylinders that fail to generate enough pressure can’t deliver the power needed for quick acceleration, leaving your car struggling to pick up speed.
2. Unusual Engine Noises
Strange sounds like misfires, knocking, or sputtering might indicate compression issues. These noises often result from uneven pressure between cylinders, causing an imbalance in the engine’s operation.
3. Difficulty Starting the Engine
Do you find yourself cranking the engine multiple times before it starts? Low compression could make it harder for the air-fuel mixture to ignite, especially during cold starts. This is often a sign of worn piston rings, valve problems, or a leaky head gasket.
4. Decreased Fuel Efficiency
A sudden drop in fuel mileage is another red flag. When compression is low, the engine has to work harder to perform basic functions, burning more fuel in the process.
If you notice any of these symptoms, don’t ignore them. Performing an engine compression test can pinpoint the root cause, potentially saving you from costly repairs down the road.
Tools Required for an Engine Compression Test
Conducting an engine compression test is a straightforward process, but having the right tools is essential for accuracy and safety. Here’s what you’ll need:
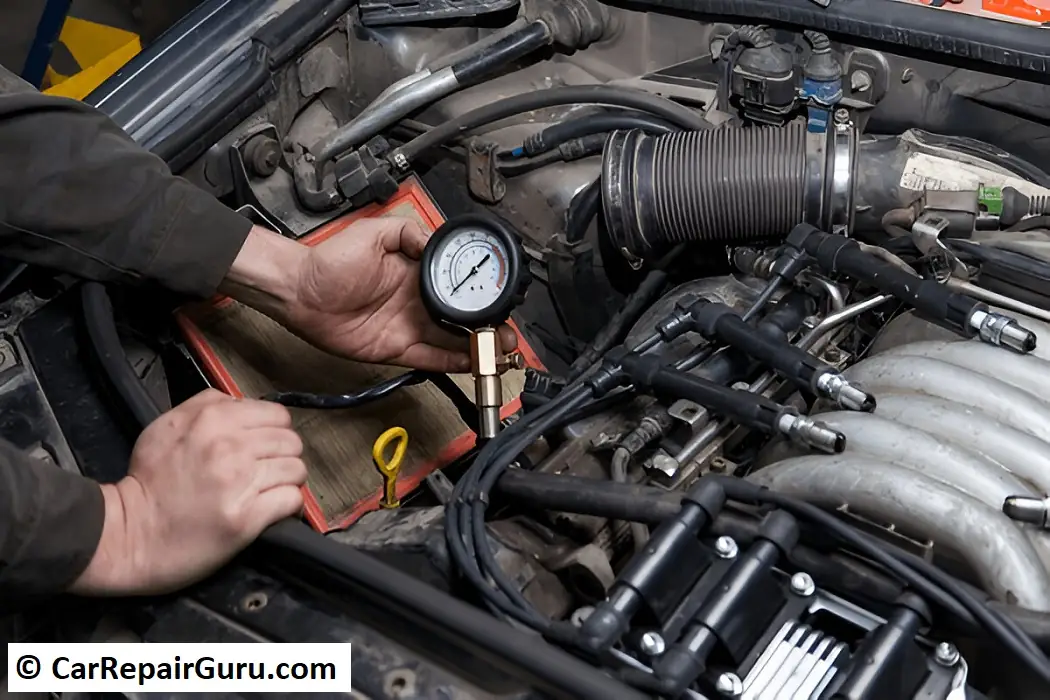
1. Compression Tester
The star of the show, a compression tester measures the pressure inside each cylinder. It typically consists of a pressure gauge and a hose that connects to the spark plug hole. Make sure to choose a tester compatible with your engine type.
2. Spark Plug Socket and Wrench
You’ll need a spark plug socket and wrench to safely remove the spark plugs. Look for a socket with a rubber insert to prevent damaging the plugs during removal.
3. Safety Gear
Always prioritize safety. Use gloves to protect your hands from hot surfaces and goggles to shield your eyes from potential debris or fluids.
4. Optional: Remote Starter Switch
A remote starter switch can make the process more convenient. It allows you to crank the engine from under the hood without needing assistance.
With these tools in hand, you’ll be ready to perform an engine compression test accurately and safely, ensuring your engine stays in peak condition.
Step-by-Step Guide to Performing an Engine Compression Test

Conducting an engine compression test is a practical way to assess your engine’s health. Follow these steps carefully to ensure accurate results and a smooth process.
Preparation
- Ensure the Engine is at Operating Temperature
Start the vehicle and let it run until it reaches normal operating temperature. A warm engine ensures that the components are properly expanded, giving you more accurate compression readings. - Disable the Ignition System
To prevent the engine from starting during the test, disconnect the ignition coil or remove the fuel pump relay. This step is crucial for safety and accurate testing. - Remove All Spark Plugs
Using a spark plug socket and wrench, carefully remove all the spark plugs. This reduces resistance and allows the engine to crank freely.
Testing Each Cylinder
- Insert the Compression Tester into the Spark Plug Hole
Screw the compression tester’s adapter into the first cylinder’s spark plug hole. Make sure it’s snug but avoid overtightening to prevent damage. - Crank the Engine and Record the Pressure Reading
Have a helper turn the ignition key or use a remote starter switch to crank the engine. Let it rotate about 4-6 times until the gauge needle stops moving. Record the pressure reading displayed on the gauge. - Repeat for All Cylinders
Move to the next cylinder and repeat the process until you’ve tested each one. Be consistent in your procedure to ensure comparable readings.
Post-Test Procedures
- Reinstall Spark Plugs
Once testing is complete, reinstall the spark plugs into their respective cylinders. Use a spark plug socket with a rubber insert to prevent over-tightening or cross-threading. - Enable the Ignition System
Reconnect the ignition coil or reinstall the fuel pump relay to restore normal engine function.
By following these steps, you’ll gather critical data about your engine’s compression levels. Compare the readings to the manufacturer’s specifications. Significant variations between cylinders or consistently low readings may indicate issues such as worn piston rings, valve leakage, or a blown head gasket. Acting on these findings promptly can help prevent further engine damage and keep your vehicle running efficiently.
Interpreting Engine Compression Test Results
An engine compression test provides valuable insights into your engine’s internal health. Knowing how to interpret the results is essential for identifying potential issues and ensuring optimal performance.
Ideal Compression Readings and Variance
The ideal compression reading depends on your engine’s make and model, but typical values range from 125 to 200 psi per cylinder for most gasoline engines. Refer to your vehicle’s service manual for specific numbers.
Equally important is the variance between cylinders. A healthy engine should show less than 10-15% variation in compression readings across all cylinders. For example, if one cylinder reads 180 psi and another reads 160 psi, that’s within the acceptable range. However, larger differences may indicate an underlying issue.
Diagnosing Potential Issues
- Low Compression in One Cylinder
- Potential Cause: A single low reading often points to a localized issue, such as a leaky valve, worn piston rings, or a damaged cylinder wall.
- Next Step: Perform a “wet test” by adding a small amount of oil to the cylinder and retesting. If the reading improves, the piston rings are likely worn. If not, the issue may lie with the valves or head gasket.
- Low Compression in Adjacent Cylinders
- Potential Cause: Consistently low readings in neighboring cylinders may suggest a blown head gasket between the two cylinders.
- Next Step: Inspect for signs of coolant or oil mixing, such as milky oil or white exhaust smoke.
- Consistently Low Compression Across All Cylinders
- Potential Cause: This could indicate a worn timing belt, camshaft issues, or overall engine wear.
- Next Step: Check the engine timing and inspect for excessive wear on components.
By understanding these results, you can pinpoint the cause of engine problems and take corrective action, ensuring your vehicle continues to run smoothly and efficiently.
Common Causes of Low Engine Compression
Low engine compression can lead to poor performance, reduced fuel efficiency, and difficulty starting your vehicle. Understanding the root causes of low compression helps diagnose problems early and prevent costly repairs. Here are the most common culprits:
1. Worn Piston Rings
Piston rings seal the gap between the piston and cylinder walls, maintaining the pressure required for combustion. Over time, these rings can wear out, allowing pressure to escape into the crankcase. Symptoms of worn piston rings include blue exhaust smoke, excessive oil consumption, and a significant drop in engine power.
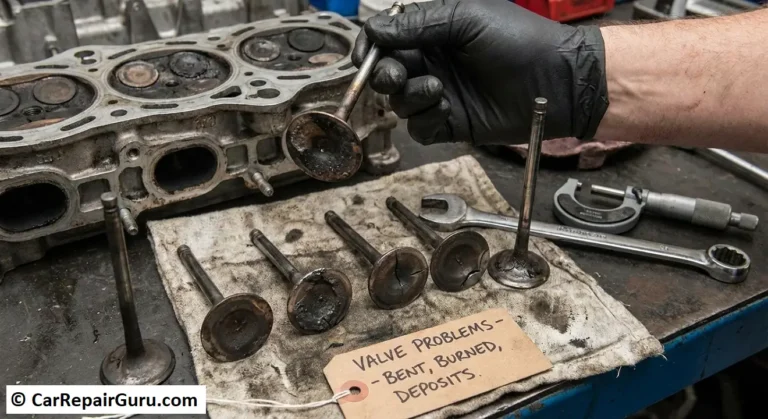
2. Leaking or Damaged Valves
Valves regulate the flow of air and fuel into the cylinder and the expulsion of exhaust gases. If intake or exhaust valves become damaged, warped, or fail to seat properly, they can leak compression. Common signs include poor acceleration, engine misfires, or a tapping noise from the valve train.
3. Blown Head Gasket
A head gasket seals the space between the engine block and cylinder head. A blown head gasket can allow compression to escape between cylinders or into the cooling system. This often leads to symptoms like overheating, white exhaust smoke, and coolant contamination in the oil.
4. Cracked Cylinder Walls
Severe overheating or mechanical stress can cause cracks in the cylinder walls, leading to significant compression loss. This issue is less common but requires extensive repairs, as it often necessitates engine block replacement.
By identifying these causes early, you can address compression issues before they escalate, ensuring your engine remains reliable and efficient.
Engine Compression Test vs. Leak-Down Test
When diagnosing engine health, both compression tests and leak-down tests provide valuable insights, but they serve different purposes and reveal distinct types of issues.
Differences Between the Two Tests
- Engine Compression Test: This test measures the pressure generated within each cylinder during the compression stroke. It provides a quick snapshot of your engine’s overall condition, helping identify cylinders with low compression. However, it doesn’t reveal the specific cause of the problem.
- Leak-Down Test: This test is more detailed and involves pressurizing each cylinder with compressed air to identify where compression loss occurs. By listening for escaping air, you can pinpoint the issue, such as a leaky valve, damaged piston rings, or a blown head gasket.
When to Use Each Diagnostic Method
- Compression Test: Use this test as the first step in diagnosing engine performance issues like poor acceleration, misfires, or difficulty starting. It’s quick, requires minimal tools, and provides a general overview of your engine’s health.
- Leak-Down Test: If a compression test reveals low readings, follow up with a leak-down test to locate the exact cause. It’s especially helpful for diagnosing specific issues like valve leaks, head gasket failures, or cracks in the cylinder walls.
By understanding these two diagnostic tools and their applications, you can ensure precise troubleshooting and efficient engine repairs.
Safety Precautions and Best Practices
Performing an engine compression test involves working with mechanical components and electrical systems, so safety should always be a priority. Follow these precautions and best practices to ensure a safe and efficient process:
1. Wear Appropriate Safety Gear
Always wear protective gloves to shield your hands from hot surfaces and sharp edges, and safety goggles to protect your eyes from potential debris or fluid sprays. Closed-toe shoes are also recommended in case tools or parts are dropped.
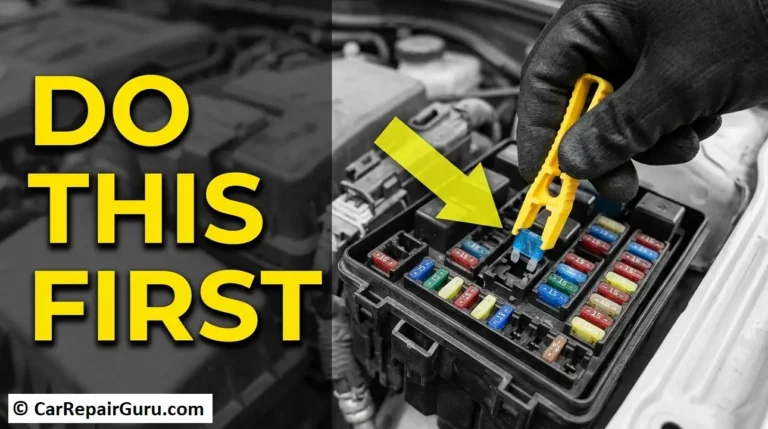
2. Disable the Engine Properly
Before starting the test, ensure the engine cannot accidentally start. Disconnect the ignition system by removing the coil or ignition fuse, and if applicable, disconnect the fuel pump relay. This prevents accidental ignition, which could lead to injuries.
3. Handle Tools and Equipment Safely
Use the correct tools, like a spark plug socket with a rubber insert, to avoid damaging components. Avoid overtightening the compression tester in the spark plug hole, as this could strip the threads. Keep tools organized and away from moving parts.
By adhering to these precautions, you can complete your engine compression test safely and effectively while protecting yourself and your vehicle from harm.
Conclusion
Regular engine compression testing is a vital part of maintaining your vehicle’s performance and longevity. By identifying potential issues like low compression or uneven cylinder performance early, you can address problems before they escalate into costly repairs. This simple diagnostic procedure offers valuable insights into your engine’s health, ensuring it runs efficiently and reliably.
Proactive maintenance, including periodic compression tests, keeps your engine in peak condition, improves fuel efficiency, and extends its lifespan. Don’t wait for symptoms to appear—stay ahead of potential issues with regular checks and timely repairs to ensure a smooth and trouble-free driving experience.
FAQ
What is an engine compression test?
An engine compression test measures the pressure generated within each cylinder during the compression stroke, helping assess the engine’s health and diagnosing potential issues.
How often should I perform an engine compression test?
It’s recommended to perform the test if you notice performance issues such as misfires or poor acceleration, or as part of routine maintenance every 30,000 miles or during a major tune-up.
Can I perform an engine compression test myself?
Yes, with the proper tools (like a compression tester) and safety precautions, a DIY engine compression test is feasible. However, if you’re unsure, consult a professional mechanic.
What do low compression readings indicate?
Low readings can suggest problems such as worn piston rings, leaking or damaged valves, or a blown head gasket. Further diagnosis, such as a leak-down test, may be necessary to pinpoint the issue.
What’s the difference between a compression test and a leak-down test?
A compression test measures the pressure within cylinders, providing a general overview of engine health. A leak-down test is more detailed, identifying specific locations of pressure loss, such as valves, piston rings, or head gaskets.