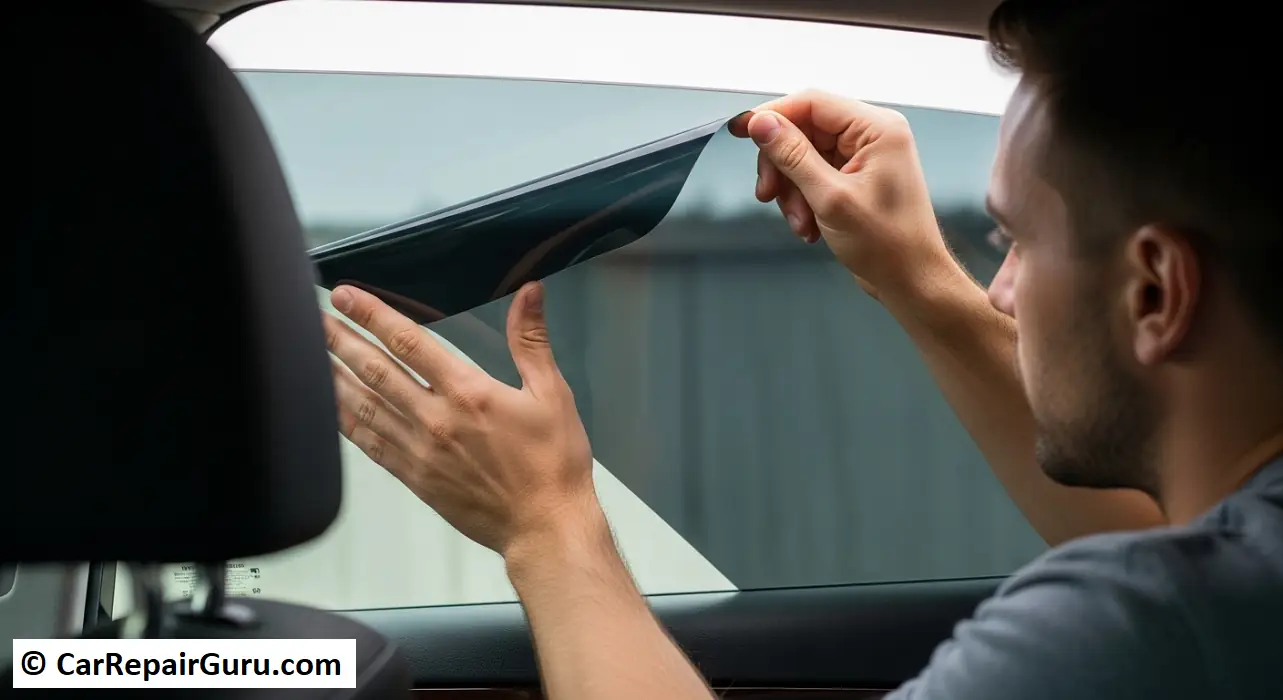
Is your car’s window tint bubbling, peeling, or turning an ugly shade of purple? Don’t worry, you’re not stuck with it. That failing film not only looks bad but can also make it harder to see, especially at night. While you could pay a professional, you can absolutely remove car window tint yourself with a little patience and the right technique.
You’ve come to the right place. This is the only guide you’ll need. We’ll walk you through everything from identifying when your tint needs to go, to the essential tools you’ll need for the job. We’ll break down the three best methods step-by-step, show you how to conquer the tricky rear window without damaging it, and reveal the secrets to cleaning up that stubborn, sticky glue left behind for a flawless, crystal-clear finish.
Let’s get those windows looking new again.
- Signs Your Window Tint Needs to Be Removed
- The Telltale “Bubbling” and “Peeling”
- The Purple Haze – Understanding Tint Discoloration
- Cracking, Fading, and Haziness
- It’s a Legal Issue – The Tint is Too Dark
- Getting Started – Your Pre-Removal Checklist
- Should You DIY or Hire a Professional? (A Quick Comparison)
- Essential Tools & Supplies Checklist
- Safety First – How to Protect Yourself and Your Car
- Personal Protective Equipment (PPE) You Shouldn’t Skip
- Protecting Your Car’s Interior
- How to Remove Car Window Tint – 3 Proven Methods
- Method 1 – The Steamer Method (Safest & Most Recommended)
- Method 2 – The Heat Gun / Hair Dryer Method
- Method 3 – The Ammonia & Sun (Trash Bag) Method
- The Ultimate Challenge – Removing Tint from a Rear Window with Defroster Lines
- The Golden Rule – NO Scraping, NO Abrasives
- The Best Method – Steaming is Your Friend
- Pro-Tip for Peeling a Rear Window
- The Sticky Situation – How to Remove Leftover Tint Glue
- Your Options for Removing Tint Adhesive
- Troubleshooting – What to Do When Tint Removal Goes Wrong
- Help! The Tint is Coming Off in Tiny, Annoying Pieces.
- I Accidentally Cut a Defroster Line. Can It Be Repaired?
- I Think I Scratched the Glass. Now What?
- Post-Removal – How to Prep Your Windows for a Perfect Finish
- The Final Deep Clean for a Streak-Free View
- Getting Your Windows Ready for New Tint (If Applicable)
- Enjoy Your Clear View
- Frequently Asked Questions
- What is the easiest way to remove old, baked-on window tint?
- How much does it cost to have window tint removed professionally?
- Can you just put new tint over old tint?
- How long does it take to remove window tint?
- Will removing window tint damage my window?
Signs Your Window Tint Needs to Be Removed
Before you start peeling, let’s confirm it’s time for a change. If you’re seeing any of these signs, a DIY window tint removal is definitely in your future.
The Telltale “Bubbling” and “Peeling”
This is the most common reason people want their tint gone. Over time, the adhesive that holds the film to the glass fails due to heat and sun exposure. This creates ugly blisters and air pockets, known as bubbling window tint. Along the edges, you might also see the film beginning to lift and peel away. This not only looks terrible but can seriously obstruct your view.
The Purple Haze – Understanding Tint Discoloration
Ever seen a car with windows that have a strange purple glow? That’s not a fashion statement. It’s a sign of old or low-quality tint. The non-metallic dyes used in many films break down under years of UV exposure, causing that distinct purple window tint. If your car looks like it’s stuck in the 90s, it’s time for the film to go.
Cracking, Fading, and Haziness
As tint gets old, it can become brittle. This can lead to fine cracks across the film or a general faded, hazy appearance. This haze is especially noticeable and dangerous when driving at night or in the rain, as it can diffuse the light from streetlights and headlights, creating glare.
It’s a Legal Issue – The Tint is Too Dark
Maybe you bought a used car with limo-dark tint, or you got a “fix-it ticket” because your windows are darker than your state’s laws allow. This is a clear-cut reason to remove the old film and either leave the windows clear or apply a legal-grade tint.
Getting Started – Your Pre-Removal Checklist
Preparation is 90% of the battle. Getting your tools and workspace ready will make the entire process smoother and save you from major headaches.
Should You DIY or Hire a Professional? (A Quick Comparison)
This is a fair question. While this guide will empower you to do it yourself, it’s good to know your options.
| Factor | DIY Window Tint Removal | Professional Service |
|---|---|---|
| Cost | Low ($20-$50 for supplies) | Moderate ($100 – $300) |
| Time | 2-4 hours, depending on skill | 1-2 hours |
| Risk | Moderate risk of damaging rear defroster | Very low risk, professionals are insured |
| Result | Good to great with patience | Flawless, guaranteed result |
The bottom line: If you’re on a budget and enjoy a satisfying project, DIY is the way to go. If you’re short on time or nervous about damaging your rear defroster, the professional window tint removal cost is often worth it.
Essential Tools & Supplies Checklist
Gather these items before you begin. Having everything within arm’s reach is a game-changer.
- Basics:
- Spray Bottle: For your soapy water solution.
- Soapy Water: A few drops of mild dish soap (like Dawn) in a bottle of water. This acts as a lubricant.
- Plastic Razor Blades & Holder: Your new best friend. They can scrape without scratching the glass.
- Microfiber Towels: You’ll need a lot of these for cleaning and wiping.
- Large Black Trash Bags: Essential for the ammonia method and great for cleanup.
- Method-Specific Tools (Choose one):
- Clothes Steamer: The #1 recommended tool.
- Heat Gun or Hair Dryer: A good alternative to a steamer.
- Cleanup & Safety:
- Adhesive Remover: A citrus-based cleaner like Goo Gone Automotive or a stronger solvent like 3M Adhesive Cleaner.
- Rubbing Alcohol (Isopropyl Alcohol): Great for final cleaning.
- #0000 Steel Wool: FOR SIDE WINDOWS ONLY. A secret weapon for stubborn glue.
- Safety Glasses & Gloves: Non-negotiable for protecting yourself.
- Face Mask/Respirator: A must if using the ammonia method.
Safety First – How to Protect Yourself and Your Car
Don’t skip this section. Five minutes of prep can save you hours of regret and hundreds of dollars in damage.
Personal Protective Equipment (PPE) You Shouldn’t Skip
- Safety Glasses: Protect your eyes from chemical splashes or a piece of film that might snap back.
- Gloves: Nitrile gloves will protect your hands from sticky glue and harsh chemicals like ammonia.
- Face Mask: If you’re using the ammonia method, a respirator is highly recommended. The fumes are powerful and hazardous in an enclosed space.
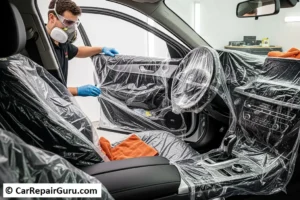
Protecting Your Car’s Interior
You’ll be using a lot of water and potentially chemicals. These can easily stain or destroy your car’s interior.
- Lay down plastic tarps or thick towels over your door panels, dashboard, speakers, and seats.
- Pay special attention to any electronics. Water and control modules don’t mix!
How to Remove Car Window Tint – 3 Proven Methods
Alright, let’s get to the main event. Here are the three most effective methods to get that old tint off.
Method 1 – The Steamer Method (Safest & Most Recommended)
This is, by far, the best all-around method. A simple steamer for window tint removal uses hot steam to gently loosen the adhesive without harsh chemicals or the risk of extreme heat. It’s the safest choice for all windows, especially the rear one.
- Prep: Fill your steamer with water and let it heat up. Protect your car’s interior with towels.
- Warm the Glass: Briefly run the steamer over the outside of the window. This helps the glass warm up evenly.
- Steam the Tint: Working from inside the car, hold the steamer nozzle a couple of inches from the tint. Move it slowly back and forth across the entire window, from top to bottom. The tint may start to look cloudy or wet underneath; that’s the glue releasing.
- Lift a Corner: Use your fingernail or a plastic razor blade to carefully pick at a top corner of the film until you have enough to grab.
- Peel Slowly: Pull the film downwards, slowly and steadily. If you feel resistance, apply more steam directly to that spot. With enough steam, the film and most of the adhesive should come off in one large sheet.
Method 2 – The Heat Gun / Hair Dryer Method
If you don’t have a steamer, a heat gun is a solid alternative. A powerful hair dryer on its highest setting can also work, but it will be slower.
CRITICAL SAFETY WARNING: Tempered glass can shatter from thermal shock. Always use the lowest effective heat setting and keep the heat gun moving constantly. Never focus the heat on one spot for more than a second or two.
- Heat the Tint: From inside, hold the heat gun 6-8 inches from the glass and wave it evenly across the surface, starting at the top.
- Lift a Corner: Once the film is warm to the touch, use a plastic blade to lift a corner.
- Peel and Heat: Pull the film down slowly. As you pull, continue to apply heat just ahead of the area you are peeling. This keeps the glue soft as you go.
Method 3 – The Ammonia & Sun (Trash Bag) Method
This is an old-school method that works well on tough, baked-on tint but requires the most safety precautions. The ammonia fumes and heat from the sun create a chemical reaction that breaks down the tint adhesive.
SAFETY WARNING: Ammonia fumes are potent and hazardous. Work in a well-ventilated area (outside is best), wear a mask, gloves, and glasses. Ammonia can stain and damage interior plastics and upholstery, so protect your interior meticulously.
- Prep: Cut two black trash bags roughly to the shape of your window.
- Apply Outside Bag: Spray the outside of the window with soapy water. Lay one of the trash bags over it. The water will hold it in place.
- Spray Ammonia: Inside the car, generously spray the tinted window with undiluted household ammonia. Be quick and try not to breathe the fumes.
- Trap the Fumes: Immediately press the second trash bag against the wet, ammonia-soaked tint inside. This seals the ammonia against the film.
- Bake in the Sun: Park your car so the window is in direct, hot sunlight for 1-2 hours. The heat will accelerate the chemical reaction.
- Peel: Remove the bags. The tint film should now peel off easily, often taking most of the glue with it.
The Ultimate Challenge – Removing Tint from a Rear Window with Defroster Lines
This is where many DIY attempts go wrong. The horizontal lines on your rear windshield are your defroster grid, and they are extremely fragile. One slip with a metal scraper can break a line and ruin your defroster.
The Golden Rule – NO Scraping, NO Abrasives
Let’s say it again: DO NOT USE A METAL RAZOR BLADE OR STEEL WOOL ON YOUR REAR WINDOW. You will permanently damage the defroster lines. Period.
The Best Method – Steaming is Your Friend
To remove tint from a rear window safely, the steamer method is your only real choice. It’s gentle, effective, and poses almost zero risk to the defroster grid. Follow the exact same steamer process as above, but with extra care.
Pro-Tip for Peeling a Rear Window
When you start to peel the film, pull it horizontally, in the same direction as the defroster lines, rather than vertically from top to bottom. This reduces the stress on the delicate lines and minimizes the chance of one lifting with the film.
The Sticky Situation – How to Remove Leftover Tint Glue
No matter which method you use, you’ll likely have some sticky adhesive residue left behind. Getting this off is the key to a professional-looking job.
Your Options for Removing Tint Adhesive
Start with the gentlest method and work your way up.
- Soapy Water & a Plastic Razor: Spray the glue with hot, soapy water, let it sit for a minute, and then use a new plastic razor blade to scrape it off.
- Commercial Adhesive Remover: This is often the easiest way to remove tint glue. Products like Goo Gone Automotive or 3M General Purpose Adhesive Cleaner are designed for this. Spray it on, let it penetrate for a few minutes as directed, and the glue will wipe away with a microfiber towel.
- Rubbing Alcohol: If you have some light residue, a cloth soaked in isopropyl alcohol can break it down effectively.
- #0000 Steel Wool (SIDE WINDOWS ONLY): For the most stubborn, baked-on glue on your side windows, #0000 (the finest grade) steel wool is a pro’s secret weapon. Drench the window in soapy water to act as a lubricant, then gently scrub the glue with the steel wool. It will remove the residue without scratching the glass. NEVER, EVER use this on your rear window.
Troubleshooting – What to Do When Tint Removal Goes Wrong
Even with the best guide, things can happen. Here’s how to fix common problems.
Help! The Tint is Coming Off in Tiny, Annoying Pieces.
This happens with very old, brittle tint. The film itself has failed.
Solution: Stop trying to pull it. Go back to your steamer or heat gun and get a small section very hot. Then, use a plastic razor blade to get under the film and push/scrape it off in small chunks. It’s tedious, but it works.
I Accidentally Cut a Defroster Line. Can It Be Repaired?
It’s a heart-sinking moment, but don’t panic.
Solution: Yes, you can often fix a broken defroster line. Auto parts stores sell conductive defroster grid repair kits. They contain a special paint that you apply over the break to restore the electrical connection.
I Think I Scratched the Glass. Now What?
Solution: First, clean the area perfectly. Most of the time, what looks like a scratch is just a very fine line of stubborn adhesive. Re-clean it with adhesive remover. If it is a true, light scratch, a cerium oxide glass polishing kit can sometimes buff it out, but deep scratches are unfortunately permanent.
Post-Removal – How to Prep Your Windows for a Perfect Finish
You’ve done the hard work. Don’t skip the final victory lap.
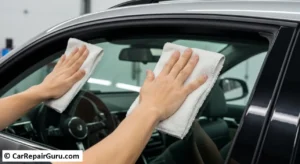
The Final Deep Clean for a Streak-Free View
Once all the glue is gone, give your windows a final, thorough cleaning inside and out with a quality, ammonia-free glass cleaner. Use one microfiber towel for the initial cleaning and a second, completely dry one to buff the glass to a streak-free shine.
Getting Your Windows Ready for New Tint (If Applicable)
If you plan to apply new tint, the glass must be surgically clean. Any oil from your fingers or residue will cause the new tint to fail. The pro-tip is to do a final wipe-down of the inside of the glass with a 50/50 mixture of isopropyl alcohol and water on a clean microfiber towel. This will prep your windows for new tint perfectly.
Enjoy Your Clear View
Congratulations! You’ve successfully removed that old, unsightly window tint and restored the clean, clear glass your car was meant to have. You’ve learned that preparation is key, steam is your safest and most powerful tool, and the rear window deserves your full respect. By taking your time and cleaning up that last bit of glue, you’ve achieved a professional-quality result right in your own driveway.
Have a tip we missed? Share your window tint removal experience in the comments below.
Frequently Asked Questions
What is the easiest way to remove old, baked-on window tint?
The steamer method is by far the easiest and most effective way to remove old, stubborn tint, as the steam penetrates and softens both the film and the adhesive.
How much does it cost to have window tint removed professionally?
Typically, you can expect to pay between $100 and $300, depending on the type of car and the condition of the old tint.
Can you just put new tint over old tint?
Absolutely not. Applying new tint over old, failing tint will look terrible. You’ll trap all the existing bubbles and peeling, and the new film will fail very quickly. You must always remove the old film first.
How long does it take to remove window tint?
For a first-timer, plan for 2-4 hours for the entire car. With experience, you can do it in about 2 hours.
Will removing window tint damage my window?
If you follow the methods in this guide—especially using plastic blades and being careful on the rear window—the risk of damage is extremely low. The only significant risk is to the rear defroster lines if you use a metal scraper.