Let’s be honest—there’s a unique sinking feeling that comes with noticing a new crack spreading across your car’s dashboard. What was once a clean, uniform surface is now marred by an ugly blemish that seems to draw your eye every time you get in the driver’s seat. It’s more than just an eyesore; it can seriously impact your car’s interior appeal and even lower its resale value.
The good news? You don’t have to stare at that crack forever, and you probably don’t need to spend a fortune at a body shop. For many common types of dashboard damage, a high-quality DIY dashboard repair is completely within reach.
This guide is your one-stop resource for understanding, repairing, and preventing those frustrating cracks. We’ll walk you through why they happen, how to fix a cracked dashboard yourself with professional-level results, and what your other options are if the damage is too severe.
- Why Do Dashboards Crack? Understanding the Common Causes
- The #1 Culprit – Sun and UV Damage
- Extreme Temperature Swings
- Age and Material Fatigue
- The Wrong Cleaning Products (The “Armor All” Debate)
- Assessing the Damage & Choosing Your Method
- When DIY Isn’t the Answer – Exploring Dashboard Covers and Professional Replacement
- The Quick & Easy Fix – Installing a Dashboard Cover or Mat
- The Flawless Finish – Professional Reupholstery or Full Replacement
- The Step-by-Step Guide to DIY Dashboard Crack Repair
- Tools & Materials You’ll Need (A Checklist)
- Step 1 – Clean and Prep the Surface
- Step 2 – Widen the Crack (Create a “V-Groove”)
- Step 3 – Apply the Filler
- Step 4 – Sand it Smooth
- Step 5 – Recreate the Texture
- Step 6 – Prime and Paint for a Perfect Match
- Top 3 Dashboard Repair Kits – A Buyer’s Guide
- What to Look For in a Dashboard Repair Kit
- 1. Best for Beginners – Permatex Vinyl & Leather Repair Kit
- 2. Best for Larger Cracks – Polyvance or 3M Bondo Products
- 3. Easiest Color Matching – SEM Repair & Refinishing Products
- Prevention is Key – How to Stop Dashboard Cracks Before They Start
- Conclusion – A Dashboard You Can Be Proud Of
- Frequently Asked Questions (FAQ)
- Is a dashboard repair kit worth it?
- How long does a dashboard repair last?
- Can you fix large, spiderweb-style cracks?
- Does Armor All really cause dashboard cracks?
Why Do Dashboards Crack? Understanding the Common Causes
Before we can fix the problem, it helps to know what caused it. A cracked dashboard is rarely a sign of a bad car; it’s usually the result of a tough life spent in a harsh environment. Here are the main culprits.
The #1 Culprit – Sun and UV Damage
If your car lives outside, the sun is its biggest enemy. Your dashboard is subjected to a relentless assault of ultraviolet (UV) radiation every single day. These UV rays penetrate the vinyl or plastic surface and break down the chemical bonds of “plasticizers”—the compounds that keep the material soft and flexible. Over time, as these plasticizers evaporate, the dashboard becomes dry, brittle, and prone to cracking under stress.
Extreme Temperature Swings
Think about a hot summer day. The inside of your car can easily reach 140°F (60°C) or more. This intense heat causes the dashboard material to expand. Then, as it cools down overnight, it contracts. This constant cycle of expansion and contraction puts immense physical stress on the material. Eventually, a weak point gives way, and a crack forms. This is especially common near stress points like defrost vents or speaker grilles.
Age and Material Fatigue
Just like anything else, your car’s interior components have a finite lifespan. After a decade or more of vibrations, temperature cycles, and UV exposure, the dashboard material simply gets tired and weak. A small bump or even the stress from its own weight can be enough to cause a brittle, aged dashboard to fracture.
The Wrong Cleaning Products (The “Armor All” Debate)
For years, detailers have debated the effects of certain interior protectants. While modern formulas are much safer, older, solvent-heavy or high-silicone protectants can accelerate the aging process. These products can draw the natural plasticizers out of the vinyl, leaving a shiny but ultimately drier and more brittle surface behind. Using a dedicated, water-based UV protectant is a much safer bet.
Assessing the Damage & Choosing Your Method
Before you grab your tools, take a moment to assess the situation. The right repair method depends on the material, the extent of the damage, and your budget. You generally have three paths to choose from.
| Method | Best For | Cost | Pros | Cons |
|---|---|---|---|---|
| DIY Repair | Minor to moderate cracks, small holes, motivated owners | $25 – $75 | Inexpensive, rewarding, restores original look | Time-consuming, results depend on skill, color matching can be tricky |
| Dashboard Cover | Extensive “spiderweb” cracks, severe sun damage | $50 – $200 | Fast, easy, hides all damage, adds protection | Doesn’t fix the problem, fit can vary, may look like an add-on |
| Professional Service | High-value cars, deep/complex cracks, perfect results | $200 – $600+ | Flawless finish, guaranteed results, saves time | Expensive, car may be in the shop for days |
This guide will focus primarily on the DIY repair, but we’ll explore the other options in more detail next.
When DIY Isn’t the Answer – Exploring Dashboard Covers and Professional Replacement

Sometimes, a DIY approach isn’t the most practical solution. If your dashboard looks like a shattered pane of glass, or you simply don’t have the time, here are your best alternatives.
The Quick & Easy Fix – Installing a Dashboard Cover or Mat
A dashboard cover for cracks is an incredibly popular and effective solution for hiding extensive damage. It’s exactly what it sounds like: a custom-molded piece of material that fits directly over your existing dashboard.
- Types: They come in several styles, including hard plastic shells that are color-matched, soft carpet mats that reduce glare, and sleek suede covers for a custom look.
- Pros: They are affordable, install in minutes, and instantly make your interior look 100 times better while protecting it from further sun damage.
- Cons: The biggest drawback is that it’s a cover-up, not a fix. Cheaper models can have an imperfect fit, and you must ensure the cover is specifically designed not to interfere with passenger-side airbag deployment. Safety is paramount.
The Flawless Finish – Professional Reupholstery or Full Replacement
For a truly perfect, factory-fresh result, nothing beats professional service. This is the best route for classic, luxury, or high-value vehicles where originality and perfection are key.
- What it Involves: A specialist can either carefully reupholster your existing dash with new vinyl or leather, or they can perform a full replacement with a new part from the manufacturer.
- The Cost: This is the main consideration. The cost to fix dashboard cracks professionally can vary widely. Reupholstering might cost between $500 and $1,500. A full dashboard replacement cost can easily run from $1,000 to over $2,500, including parts and labor, depending on the complexity of your vehicle.
The Step-by-Step Guide to DIY Dashboard Crack Repair
Ready to tackle this yourself? Great! With patience and the right materials, you can achieve a nearly invisible repair. This process works best for vinyl dashboard repair and most hard plastic dashboards.
Tools & Materials You’ll Need (A Checklist)
The easiest way to get everything you need is by purchasing a comprehensive dashboard repair kit. However, you can also buy the items individually.
- Cleaning: Isopropyl alcohol (70% or higher) and several clean microfiber towels.
- Prep: Utility knife or a Dremel with a small grinding bit.
- Sandpaper: A few sheets of 220-grit and 400-grit.
- Filler: A flexible plastic/vinyl epoxy filler (often included in kits).
- Application: A small spatula or plastic spreader.
- Texture: Graining paper (this is the secret to a good finish and comes in most kits).
- Finishing: Masking tape, paper, and a can of color-matched vinyl and plastic spray paint (SEM Color Coat is a professional favorite).
Step 1 – Clean and Prep the Surface
This is the most important step. Any dirt, oil, or old protectant will prevent the filler from bonding properly.
- Generously spray isopropyl alcohol onto a microfiber towel.
- Thoroughly scrub the cracked area and at least a few inches around it.
- Wipe it dry with a separate clean towel. The surface should be completely matte and squeaky clean.
Step 2 – Widen the Crack (Create a “V-Groove”)
This sounds counterintuitive, but it’s crucial. You need to give the filler more surface area to grab onto.
- Using your utility knife or Dremel, carefully carve out the crack into a “V” shape.
- Bevel the edges, making the opening at the surface slightly wider than the base of the crack.
- Wipe away any dust and debris with your alcohol and towel.
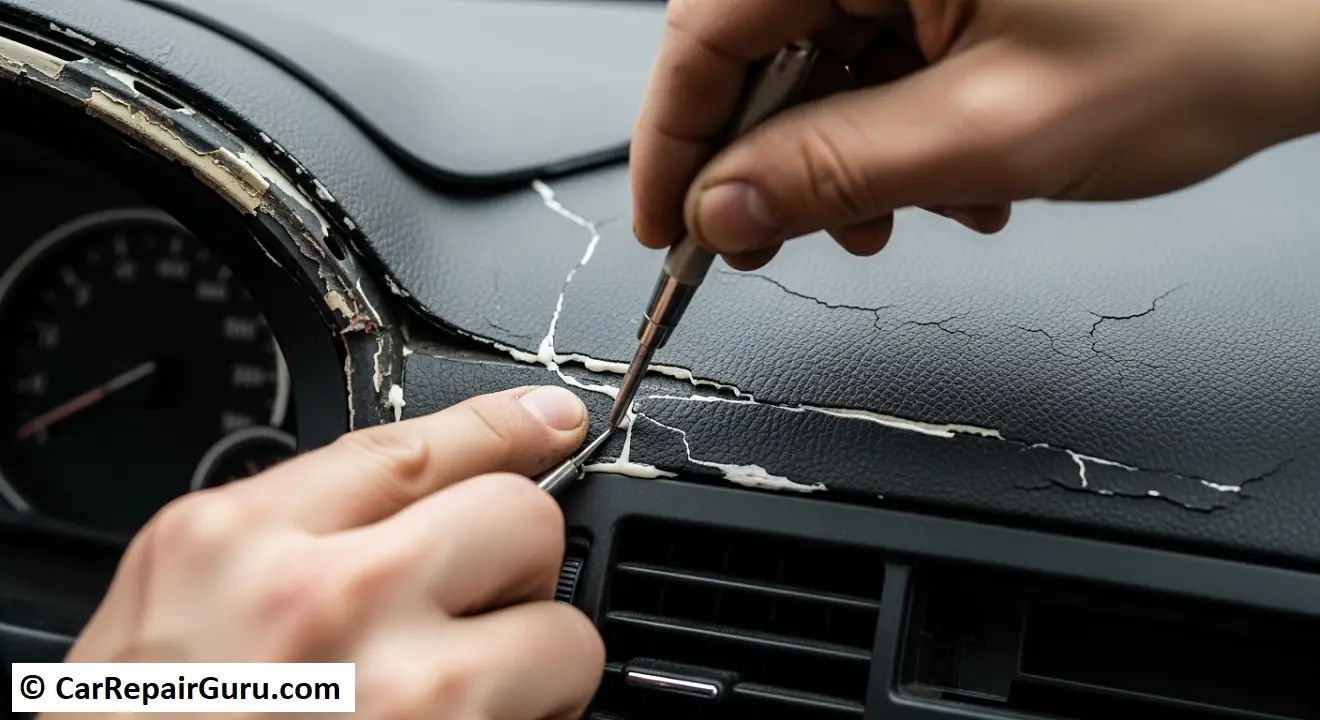
Step 3 – Apply the Filler
Now it’s time to fill the void.
- Follow the instructions on your filler product to mix it (if it’s a two-part epoxy).
- Using your spreader, press the filler firmly into the V-groove.
- Slightly overfill the crack so the filler sits just proud of the dashboard surface. This is important because it will shrink a little as it cures and you’ll be sanding it down.
- Let the filler cure completely. This can take anywhere from 30 minutes to several hours—read the product label!
Step 4 – Sand it Smooth
Patience is key here. Your goal is to make the repaired area perfectly flush with the surrounding dashboard.
- Start with the coarser 220-grit sandpaper. Gently sand down the overfilled area until it’s level with the dash. Use light pressure and check your progress frequently by feeling it with your fingertips.
- Switch to the finer 400-grit sandpaper to remove any scratches from the first pass and feather the edges of the repair into the original surface. The final result should be silky smooth.
Step 5 – Recreate the Texture
This is the magic step that separates an obvious patch from an invisible repair. Most dashboards have a slight leather-like grain or texture.
- Most repair kits come with several “graining papers” with different patterns. Find the one that most closely matches your dashboard’s texture.
- Apply a very thin layer of filler or the supplied texturing compound over your smooth repair.
- Immediately press the graining paper (texture side down) onto the compound. Tape it in place and let it cure as directed.
- Once cured, peel back the paper. The texture should be imprinted on the repair area.
Step 6 – Prime and Paint for a Perfect Match
The final step is to blend the color.
- Use masking tape and paper to completely mask off the area around your repair. You don’t want overspray on your windshield or seats.
- Apply one or two very light mist coats of a flexible surface primer if recommended by your paint.
- Using your color-matched vinyl spray paint, apply several very light coats over the repair. Hold the can about 10-12 inches away. It’s better to do 4-5 thin coats than 2 heavy ones to avoid runs.
- Blend the paint into the surrounding area by lightly feathering the edges of your spray pattern.
- Let it dry completely, remove the masking, and admire your work!
Top 3 Dashboard Repair Kits – A Buyer’s Guide
Choosing the right dashboard repair kit can make all the difference. Here are a few top-tier options for different needs.
What to Look For in a Dashboard Repair Kit
- Completeness: Does it have everything you need, including filler, texture papers, and an applicator?
- Filler Type: Flexible epoxy is great for structural repairs, while heat-cured compounds can offer a very durable finish.
- Color Matching: Does it provide a variety of tints and a color chart, or does it require a separate paint purchase?
1. Best for Beginners – Permatex Vinyl & Leather Repair Kit
- Overview: This is one of the most common and affordable all-in-one kits available at any auto parts store.
- Best For: Small cigarette burns, holes, and minor cracks. It’s an excellent choice for a first-timer.
- Pros: Very inexpensive, includes 7 color compounds for mixing, and comes with a variety of texture papers. The heat-cured repair is very strong.
- Cons: The color matching process can be a bit of an art, and using the small heating tool requires a steady hand to avoid damaging the surrounding vinyl.
2. Best for Larger Cracks – Polyvance or 3M Bondo Products
- Overview: Brands like Polyvance and 3M offer more professional-grade, two-part flexible epoxy fillers.
- Best For: Longer, deeper cracks that need more structural strength than a heat-cured compound can provide.
- Pros: Creates an incredibly strong yet flexible bond that resists re-cracking. The fillers are generally easy to work with and sand to a perfect finish.
- Cons: These are often just the filler, meaning you’ll need to buy sandpaper, primer, and color-matched paint separately.
3. Easiest Color Matching – SEM Repair & Refinishing Products
- Overview: SEM is a brand trusted by auto body professionals. They sell their products individually, allowing you to build a pro-level “kit.”
- Best For: Anyone who wants a guaranteed perfect color match without the guesswork of mixing tints.
- Pros: Their SEM Color Coat line offers hundreds of OEM-matched aerosol colors. You can find your car’s specific interior color code and buy a can that matches perfectly. Their flexible fillers and primers are also top-notch.
- Cons: This is the most expensive route, as you’re buying three or four separate products (filler, primer, paint) to complete the job.
Prevention is Key – How to Stop Dashboard Cracks Before They Start
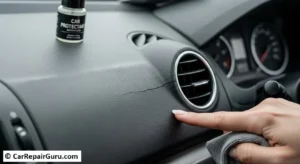
After you’ve repaired your dash—or if you’re lucky enough to have a crack-free one—the best strategy is preventing dashboard cracks in the first place.
- Use a Sunshade Religiously: This is the single most effective thing you can do. A quality, reflective sunshade dramatically lowers the interior temperature and blocks nearly all direct UV rays.
- Apply a Quality UV Protectant: Use a water-based protectant like 303 Aerospace Protectant every few weeks. It contains powerful UV blockers and nourishes the plastic and vinyl without leaving a greasy, dust-attracting film.
- Park in the Shade: Whenever possible, choose a shady spot or a garage. Less direct sun exposure means a longer life for your entire interior.
- Tint Your Windows: A quality ceramic window tint can block over 99% of UV rays and significantly reduce heat buildup inside your car, providing 24/7 protection.
Conclusion – A Dashboard You Can Be Proud Of
A cracked dashboard doesn’t have to be a permanent scar on your car’s interior. As you’ve seen, the primary culprits are sun, heat, and age—but the solutions are well within your grasp. Whether you choose a meticulous DIY repair, a quick and easy cover, or a professional restoration, you can get rid of that damage for good.
With the steps and products outlined here, you have the knowledge to restore your dashboard’s appearance and, more importantly, protect your investment for years to come.
Have a tip we missed? Share your dashboard repair success story in the comments below!
Frequently Asked Questions (FAQ)
Is a dashboard repair kit worth it?
Absolutely. For most DIYers, a good kit is the most cost-effective and straightforward way to get the job done. It provides all the specialized components, like texture paper and color compounds, that are hard to source otherwise.
How long does a dashboard repair last?
A repair done correctly with quality materials should last for many years. Its longevity really depends on whether you follow the prevention tips afterward. If the car continues to bake in the sun without protection, new cracks may eventually form elsewhere.
Can you fix large, spiderweb-style cracks?
While it’s technically possible, repairing extensive spiderweb cracking with filler is incredibly difficult and time-consuming for a DIYer. For this level of damage, a high-quality molded dashboard cover is almost always a better, faster, and more satisfying solution.
Does Armor All really cause dashboard cracks?
This is a hot topic. While it’s unlikely to be the sole cause, the long-term use of older, solvent-based protectants can contribute to the problem by leaching out the vinyl’s natural plasticizers. Modern, water-based formulas are much safer, but a dedicated UV protectant is always the superior choice for prevention.