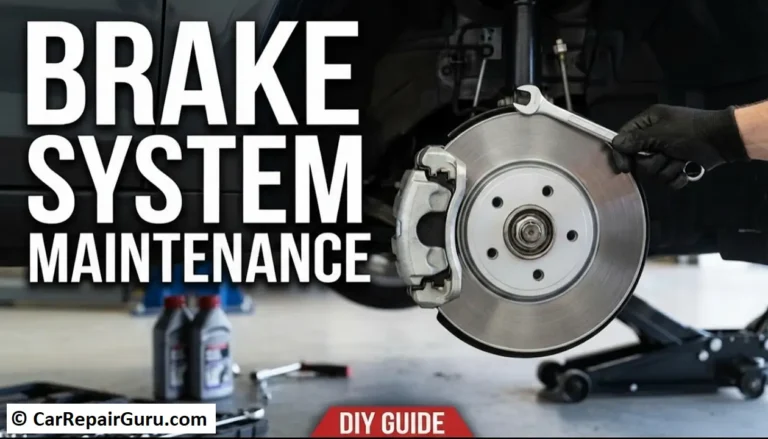
Feeling a spongy, soft, or downright mushy brake pedal when you press it? Does your car seem to take a little longer to come to a complete stop than it used to? That unsettling feeling is a classic sign that you have air trapped in your brake lines, and it’s a safety issue you shouldn’t ignore.
Fortunately, the fix is a straightforward and rewarding DIY project. The solution is to bleed your brakes, a process that removes trapped air bubbles from the hydraulic system and replaces old, contaminated fluid with fresh fluid. This restores a firm pedal feel and ensures your car’s stopping power is exactly what it should be.
Don’t be intimidated. This comprehensive guide will walk you through every step of the process. We’ll cover the classic two-person method, options for tackling the job solo, and everything you need to know to do the job safely and effectively right in your own garage. Let’s get that confidence back in your brake pedal.
- Why and When Should You Bleed Your Brakes?
- Essential Tools and Materials You’ll Need
- Step-by-Step Guide – How to Bleed Your Brakes
- Step 1 – Prepare Your Vehicle
- Step 2 – Determine the Correct Brake Bleeding Order
- Step 3 – Attach Your Bleeding Setup
- Step 4 – The “Pump and Hold” Process
- Step 5 – Repeat for All Four Wheels
- How to Bleed Brakes by Yourself (One-Person Methods)
- Method 1 – Using a Vacuum Bleeder Kit
- Method 2 – Using a Pressure Bleeder Kit
- Special Considerations – Bleeding Brakes with an ABS System
- Finishing the Job and Final Checks
- Drive with Confidence
- Frequently Asked Questions (FAQ)
- How often should I bleed my brakes?
- What type of brake fluid do I need?
- Can I mix different types of brake fluid?
- How much does it cost to have a mechanic bleed your brakes?
Why and When Should You Bleed Your Brakes?
To understand why you need to bleed your brakes, it helps to know how they work. Your car uses a hydraulic system, which means it relies on fluid to transfer force. When you press the brake pedal, you’re pushing fluid through the brake lines, which then activates the brake calipers to squeeze the pads against the rotors, stopping your car.
This system works perfectly because brake fluid is designed to be incompressible. Air, on the other hand, is highly compressible. If even a few small air bubbles get into the brake lines, that force from your foot is wasted on squishing the air instead of applying the brakes. The result is that dreaded spongy brake pedal and reduced stopping power.
So, how do you know it’s time? Watch for these key signs:
A Spongy or Mushy Brake Pedal: This is the most common symptom. The pedal feels soft underfoot and may sink further than usual.
Brake Pedal Goes to the Floor: In severe cases, the pedal might travel all the way to the floor with little braking effect.
Reduced Stopping Power: You notice it takes more distance to stop the vehicle.
After Replacing Brake Components: You should always perform a brake bleed after replacing a master cylinder, calipers, wheel cylinders, or brake lines, as these jobs introduce air into the system.
As Part of Routine Maintenance: Brake fluid is hygroscopic, meaning it absorbs moisture from the air over time. This moisture can cause corrosion and lower the fluid’s boiling point. For this reason, most manufacturers recommend a complete brake fluid change and bleed every 2-3 years.
Essential Tools and Materials You’ll Need
Getting your gear together before you start is the secret to a smooth, stress-free job. You don’t need a professional-grade workshop, but having the right tools on hand is non-negotiable for doing the job correctly and safely. Here’s your checklist:
- New, Unopened Brake Fluid: This is the most critical item. Check your owner’s manual or the cap on the master cylinder reservoir for the correct type (e.g., DOT 3, DOT 4). Never use a bottle that’s been open for a long time, as it will have absorbed moisture.
- Box-End Wrench or Flare Nut Wrench: You’ll need the correct size to fit the bleeder screw on each brake caliper. A six-point box-end wrench is good, but a flare nut wrench is even better as it grips the screw on more sides, reducing the chance of stripping it.
- Clear Plastic Tubing: A few feet of clear tubing that fits snugly over the end of the bleeder screw is essential for seeing the air bubbles as they exit the system.
- A Clean Jar or Bottle: This will be your catch container for the old, dirty brake fluid. Pouring a little clean fluid in the bottom first will help prevent air from being sucked back in.
- An Assistant: For the classic two-person method, you’ll need a reliable helper to pump and hold the brake pedal.
- OR a One-Person Brake Bleeding Kit: If you’re working alone, a vacuum pump or a pressure bleeder is a fantastic investment. These kits make it a simple one-person job.
- Jack and Jack Stands: Never work on a car supported only by a jack. Jack stands are an absolute must for safety.
- Lug Wrench: To remove the wheels.
- Turkey Baster (Optional): This is useful for removing some of the old, dark fluid from the master cylinder reservoir before you begin.
- Shop Rags or Paper Towels: For inevitable drips and spills. Brake fluid is corrosive to paint, so quick cleanup is key.
- Nitrile Gloves and Safety Glasses: Protect your hands and eyes. Brake fluid is not something you want on your skin or in your eyes.
Step-by-Step Guide – How to Bleed Your Brakes
This is the tried-and-true method that mechanics and DIYers have used for decades. It requires good communication between you and your assistant but is incredibly effective.
Step 1 – Prepare Your Vehicle
Safety and preparation are paramount.
- Park your car on a flat, level surface and engage the parking brake.
- Use your lug wrench to loosen the lug nuts on all four wheels before lifting the car.
- Using a floor jack, lift the car and securely place it on jack stands at the manufacturer’s recommended lift points.
- Remove the wheels to get clear access to the brake calipers.
- Pop the hood and locate the master cylinder. It’s usually a small, semi-transparent plastic reservoir near the back of the engine bay on the driver’s side.
- Wipe the cap and surrounding area clean to prevent any dirt from falling in. Open it and use a turkey baster to remove most of the old, dark fluid. Refill it to the “MAX” line with fresh, new brake fluid.
- Critical Rule: Throughout this entire process, you must never let the master cylinder run dry. If it does, you’ll suck more air into the system and have to start all over again. Keep it topped off.
Step 2 – Determine the Correct Brake Bleeding Order
To effectively push all the air out, you need to start with the brake caliper that is furthest from the master cylinder and work your way closer. For most vehicles with the driver on the left side, the sequence is:
- Rear Passenger Side
- Rear Driver Side
- Front Passenger Side
- Front Driver Side
This brake bleeding order is crucial. Always double-check your vehicle’s service manual for the specific sequence, as some cars can differ.
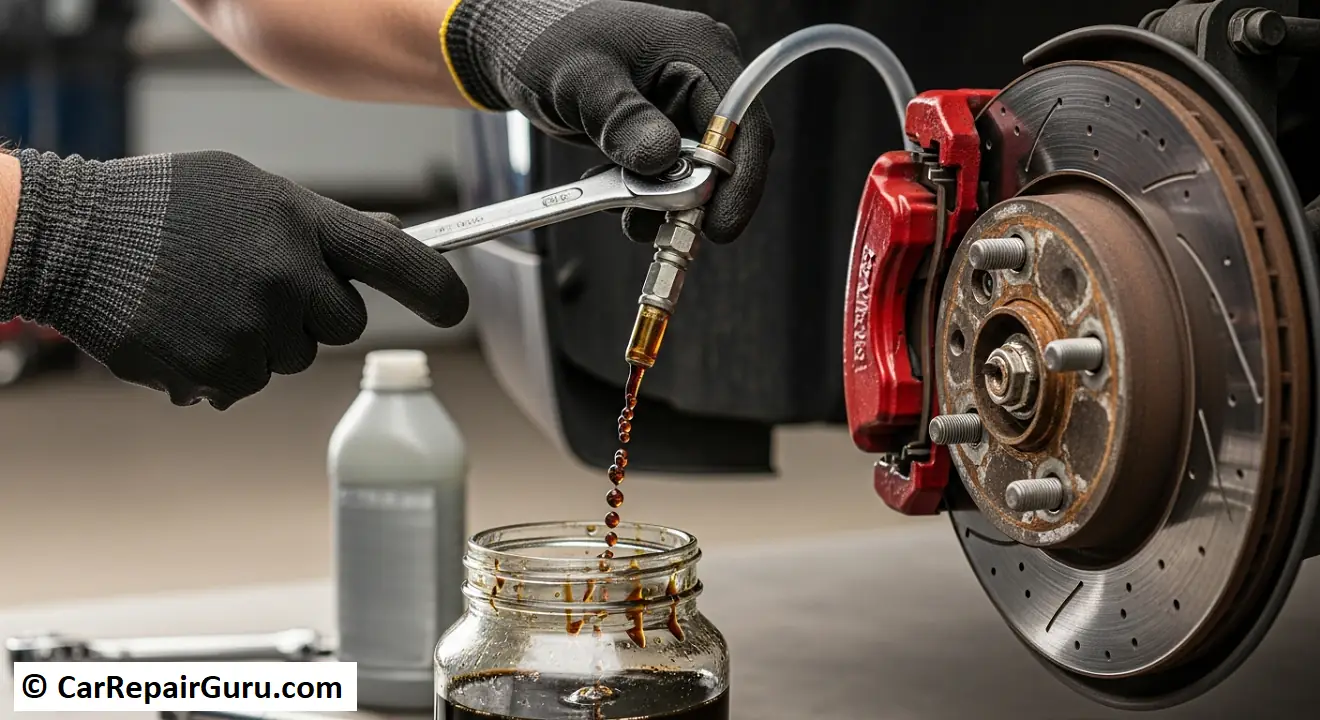
Step 3 – Attach Your Bleeding Setup
Head to the first wheel in your sequence (the rear passenger side).
- Locate the bleeder screw. It’s a small nipple-like valve, usually covered with a rubber cap, on the back of the brake caliper.
- Remove the rubber cap and place your box-end or flare nut wrench over the bleeder screw.
- Firmly push one end of your clear plastic tubing over the tip of the bleeder screw.
- Place the other end of the tube into your catch jar. Make sure the end of the tube is submerged in the small amount of clean brake fluid you added to the bottom of the jar.
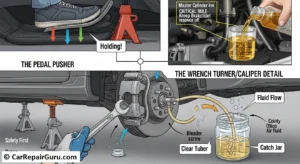
Step 4 – The “Pump and Hold” Process
This is where teamwork comes in. Designate one person as the “Pedal Pusher” inside the car and the other as the “Wrench Turner” at the wheel. Communicate clearly using simple commands.
- Wrench Turner: “Okay, pump the brakes.”
- Pedal Pusher: Slowly pumps the brake pedal three to four times to build pressure, then holds firm pressure on the pedal. They then announce, “Holding!”
- Wrench Turner: While the pedal is being held down, quickly turn the wrench about a quarter to a half turn to open the bleeder screw. You’ll see old fluid and air bubbles flow through the clear tube. The brake pedal will start to sink.
- Wrench Turner: Before the pedal hits the floor, tighten the bleeder screw snugly. Then announce, “Closed!”
- Pedal Pusher: Only after hearing “Closed!” should they slowly release their foot from the brake pedal.
- Repeat this cycle—pump, hold, open, close, release—several times until you see no more air bubbles in the clear tubing and the fluid running through is clean.
- After every 4-5 cycles, stop and check the master cylinder reservoir, topping it off with fresh brake fluid.
Step 5 – Repeat for All Four Wheels
Once the first wheel is done, ensure the bleeder screw is tight and replace the rubber cap. Move to the next wheel in the sequence (rear driver) and repeat the entire process from Step 3. Continue until all four brakes have been bled.
How to Bleed Brakes by Yourself (One-Person Methods)
Don’t have a helper? No problem. A brake bleeding kit makes it easy to bleed brakes by yourself. There are two common types:
Method 1 – Using a Vacuum Bleeder Kit
A vacuum bleeder is essentially a handheld pump that connects to the bleeder screw. Instead of pushing fluid out with the pedal, it pulls it out with suction.
To use it, you attach the container and tube to the bleeder screw, pump the handle to create a vacuum, and then crack the bleeder screw open. The vacuum draws the old fluid and air out into the container. The key is to maintain the vacuum and watch the fluid level in the master cylinder, as this method can empty it quickly.
Method 2 – Using a Pressure Bleeder Kit
Many professionals consider this the best way to bleed brakes. A pressure bleeder is a tank that you fill with fresh brake fluid. You then attach it to your master cylinder reservoir and pump it up to a low pressure (usually 10-15 PSI).
This creates a continuously pressurized system. All you have to do is go to each wheel, in the correct order, and open the bleeder screw. The pressure automatically forces the old fluid and air out. Just let it flow until the fluid runs clean, then tighten the screw and move to the next wheel. It’s fast, efficient, and eliminates the risk of the master cylinder running dry.
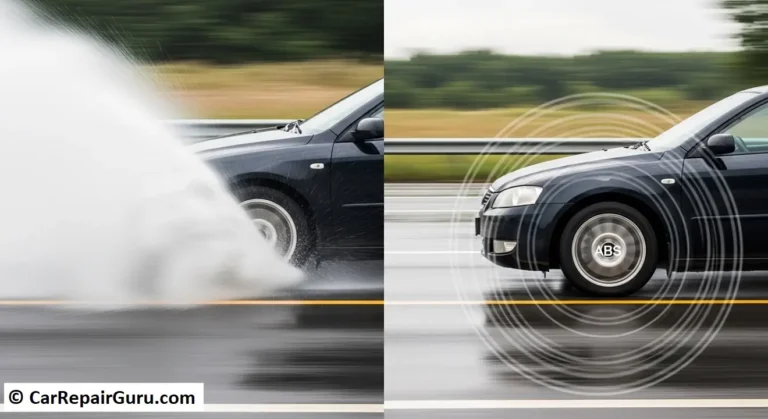
Special Considerations – Bleeding Brakes with an ABS System
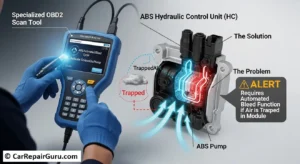
Most modern cars are equipped with an Anti-lock Braking System (ABS), and this can sometimes add a layer of complexity.
For routine fluid flushes or bleeding air out after a caliper change, you can typically bleed brakes with an ABS system using the standard methods described above without any issue. The air is in the main lines, not the module itself.
However, if you’ve introduced air deep into the system—for example, by replacing the master cylinder or letting the reservoir run completely dry—air can get trapped inside the intricate valves of the ABS pump.
In this situation, the only way to get it out is to use a special OBD2 scan tool with ABS/automated bleed functionality. This tool commands the ABS pump to cycle on and off, purging the trapped air.
The Golden Rule: Always consult your vehicle’s service manual first. If it specifies that a scan tool is needed for a full bleed, and you don’t own one, that part of the job is best left to a professional mechanic.
Finishing the Job and Final Checks
You’re almost there! Don’t skip these final steps to ensure everything is safe and secure.
- Final Torque Check: Go back to all four wheels and double-check that each bleeder screw is tightened snugly. Don’t overtighten and strip them, but make sure they are sealed. Replace all the rubber dust caps.
- Top Off the Master Cylinder: Fill the master cylinder reservoir one last time to the “MAX” line and securely replace the cap.
- Reinstall Wheels: Put all four wheels back on. Hand-tighten the lug nuts, then lower the car so the tires are just touching the ground. Use a torque wrench to tighten the lug nuts to your vehicle’s specified torque in a star pattern.
- The Pedal Test: Before you even start the engine, get in the car and pump the brake pedal. It should feel high and firm. If it feels soft or sinks to the floor, there is still air in the system, and you should not drive the car. You may need to repeat the bleeding process.
- Safe Test Drive: Once the pedal feels firm, start the car and perform a few slow, careful stops in your driveway or a safe, low-traffic area to ensure everything is working correctly.
- Clean Up: Use a rag to immediately wipe up any brake fluid that spilled on painted surfaces. Brake fluid will eat through paint. Finally, collect your old brake fluid and take it to an auto parts store or local recycling center for proper disposal.
Drive with Confidence
There you have it. You’ve successfully learned how to bleed your brakes, banished that spongy pedal, and restored one of your car’s most critical safety systems. It’s a project that not only saves you money but also empowers you with a deeper understanding of how your vehicle works. The peace of mind that comes from a firm, responsive brake pedal is invaluable. Now you can get back on the road and drive with renewed confidence.
Now that you’ve mastered this skill, why not check out our other DIY car maintenance guides to keep your vehicle running smoothly?
Frequently Asked Questions (FAQ)
How often should I bleed my brakes?
As a general rule, it’s a good idea to bleed your brakes and replace the fluid every 2-3 years. However, the most accurate answer is to follow the service interval recommended in your vehicle’s owner’s manual. You must also bleed them any time you replace a hydraulic brake component.
What type of brake fluid do I need?
Check your owner’s manual or look for text printed directly on the cap of the master cylinder reservoir. The most common types for modern cars are DOT 3 and DOT 4. Using the correct type is essential for safety and performance.
Can I mix different types of brake fluid?
Generally, no. While DOT 3 and DOT 4 are both glycol-based and technically compatible, it’s always best practice to use the specific fluid your car calls for. You should never mix DOT 5 fluid (which is silicone-based) with DOT 3, 4, or 5.1, as it will cause the fluid to gel and can lead to total brake failure.
How much does it cost to have a mechanic bleed your brakes?
Having a professional mechanic bleed your brakes typically costs between $100 and $200, though this can vary depending on your vehicle and local labor rates. By following this guide, you can save a significant amount of money and gain valuable experience.