That sinking feeling. You press the button, and… nothing. Or worse, the window goes down but refuses to come back up, leaving you exposed to the weather or wondering about security. It’s a frustrating problem we’ve all faced, and the first thought is often a dreaded, expensive trip to the mechanic.
But what if I told you that you have the power to fix this yourself?
I’m here to walk you through it. This isn’t just a set of instructions; this is your guide to saving a few hundred dollars, learning a valuable skill, and earning some serious bragging rights. We’re going to tackle this project together, step-by-step.
By the end of this guide, you’ll know exactly how to fix a power window and feel confident doing it. Let’s get started.
- 5-Minute Checks Before You Open the Door Panel
- Check the Child Lock
- Test All Switches
- Check the Fuse
- The “Slam and Hold” Trick (Temporary Fix)
- How to Reset Your Power Window
- Pinpointing the Cause – What is Your Window Doing?
- Symptom: Nothing Happens, No Noise
- Symptom: A Clicking or Whirring Sound from the Door
- Symptom: A Grinding or Crunching Noise
- Symptom: The Window Moves Slowly, Jerkily, or Struggles
- Symptom: The Window Falls Down Into the Door
- Common Mistakes to Avoid (Read This Before You Start!)
- Not Securing the Window Glass
- Breaking Plastic Trim Clips
- Forgetting to Disconnect the Battery
- Not Testing Before Reassembling
- Step-by-Step Guide – How to Fix Your Power Window
- Step 1 – Remove the Interior Door Panel
- Step 2 – Peel Back the Weather Barrier & Inspect
- Step 3 – Replacing the Faulty Component
- Step 4 – Test, Reassemble, and Reset
- How Much Does It Cost to Fix a Power Window?
- Preventative Maintenance to Keep Your Power Windows Working
- Know Your Limits – When to Leave It to the Pros
- You’ve Got This! Final Thoughts
- Your Power Window Questions, Answered
- What is the most common part that breaks on a power window?
- How can I temporarily close a stuck power window?
- Why did all my power windows stop working at once?
- Should I replace the motor and regulator together?
- Is a slow-moving window a sign it’s about to fail?
5-Minute Checks Before You Open the Door Panel
Alright, before we grab a single tool, let’s be smart and check the simple stuff first. You’d be amazed how often the “fix” is one of these easy solutions.
Check the Child Lock
I know, I know—it sounds too obvious. But trust me, the window lock button on the driver’s master control panel is the number one culprit for a rear window that suddenly “breaks.” Give it a press and try the window again.
Test All Switches
Try to operate the stuck window from its own door switch, and then try it from the driver’s master switch. If it works from one but not the other, you’ve likely just diagnosed a faulty switch, which is the easiest part to replace.
Check the Fuse
A blown fuse is another common and cheap fix. Pop open your car’s fuse box (check your owner’s manual for the location—it’s usually under the dashboard or in the engine bay). Find the fuse for the power windows, pull it out, and see if the thin metal wire inside is broken. If it is, replace it with a new fuse of the exact same amperage.
The “Slam and Hold” Trick (Temporary Fix)
If your window motor is old and worn out, sometimes it just needs a little jolt. Have a friend hold the window switch in the “up” or “down” position while you firmly (but not violently!) close the car door. This can sometimes be enough to get the motor moving one last time. It’s not a permanent solution, but it can get your window closed in a pinch.
How to Reset Your Power Window
If you’ve recently disconnected your car battery, your windows may need to be reset. The procedure is simple: roll the window all the way down and hold the button for 5 seconds. Then, roll it all the way up and hold the button for another 5 seconds. This often re-calibrates the system.
Pinpointing the Cause – What is Your Window Doing?
If the quick checks didn’t solve it, don’t worry. The window’s symptoms are clues that tell us exactly what’s wrong. Let’s put on our detective hats.
Symptom: Nothing Happens, No Noise
Likely Cause: This points to a lack of power. You’ve already checked the fuse, so the most likely culprits are a dead power window switch or broken wiring inside the door. A completely dead motor is also possible.
Symptom: A Clicking or Whirring Sound from the Door
Likely Cause: Great news, in a way! This means your switch is working and the motor is getting power. The problem is mechanical. The motor is spinning, but the window regulator (the lifting mechanism) is broken or has stripped gears.
Symptom: A Grinding or Crunching Noise
Likely Cause: This is the classic sound of a failed window regulator. The steel cable that lifts the glass has likely snapped, tangled, or come off its pulley.
Symptom: The Window Moves Slowly, Jerkily, or Struggles
Likely Cause: This usually means the power window motor is dying a slow death. It could also be caused by old, dry, or dirty window tracks that are creating too much friction for the motor to overcome.
Symptom: The Window Falls Down Into the Door
Likely Cause: This is a clear sign that the regulator has completely failed. Either a plastic clip holding the glass has snapped or a cable has broken entirely.
Common Mistakes to Avoid (Read This Before You Start!)
Before we dive in, let’s go over a few common missteps. Avoiding these will make your DIY power window fix smooth and successful.
Not Securing the Window Glass
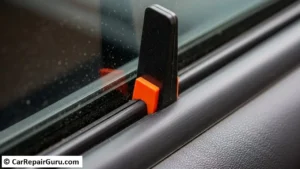
This is the most important rule. If the regulator is broken, nothing is holding the heavy glass in place. Before you unbolt anything, tape the window firmly in the “up” position with strong painter’s tape. A falling window can shatter or cause serious injury.
Breaking Plastic Trim Clips
Your door panel is held on by fragile plastic clips. Using a metal screwdriver to pry it off will almost certainly break them. Invest in an inexpensive plastic trim removal tool kit—it’s the right tool for the job.
Forgetting to Disconnect the Battery
It’s a simple safety step. Disconnecting the negative battery terminal prevents any electrical shorts and is crucial if your door contains an airbag.
Not Testing Before Reassembling
Imagine putting the entire door back together only to find the new part doesn’t work. The frustration is real! Always plug the new switch or motor in and test it before you bolt the door panel back on.
Step-by-Step Guide – How to Fix Your Power Window
Alright, time for the fun part. Grab your tools, put on some music, and let’s get this done.
Tools & Materials You’ll Need
- Trim removal tool kit
- Socket/ratchet set
- Screwdriver set (Phillips and flathead)
- Painter’s tape or duct tape
- Work light or headlamp
- Your new part (switch, motor, or regulator assembly)
Step 1 – Remove the Interior Door Panel
This part can feel intimidating, but it’s just a puzzle.
- Find the Screws: Look for hidden screws inside the armrest, behind the door handle, and sometimes along the edges of the panel.
- Pry with Care: Once the screws are out, use your plastic trim tool to gently pry around the edges of the door panel, releasing the plastic clips. You’ll hear them pop—that’s normal.
- Lift Up and Out: The panel usually hooks over the top of the door frame by the window. Lift it straight up to unhook it.
- Disconnect Electronics: Don’t yank the panel away! It will still be connected by wires for the window switch, speakers, and door lights. Carefully disconnect these clips.
Pro Tip: Take a quick photo with your phone of where the wires connect before you unplug them. It makes reassembly foolproof.
Step 2 – Peel Back the Weather Barrier & Inspect
You’ll see a plastic or foam sheet glued to the door. This is a moisture barrier. Carefully peel it back—don’t rip it—just enough to access the inner workings of the door. Now you can clearly see the motor, regulator, and wiring.
Step 3 – Replacing the Faulty Component
Based on your diagnosis, here’s how to tackle the specific power window repair.
How to Replace a Power Window Switch: This is the easiest job. The switch is usually held in the door panel by a few clips. Simply unclip the old one, plug in the new one, and snap it into place.
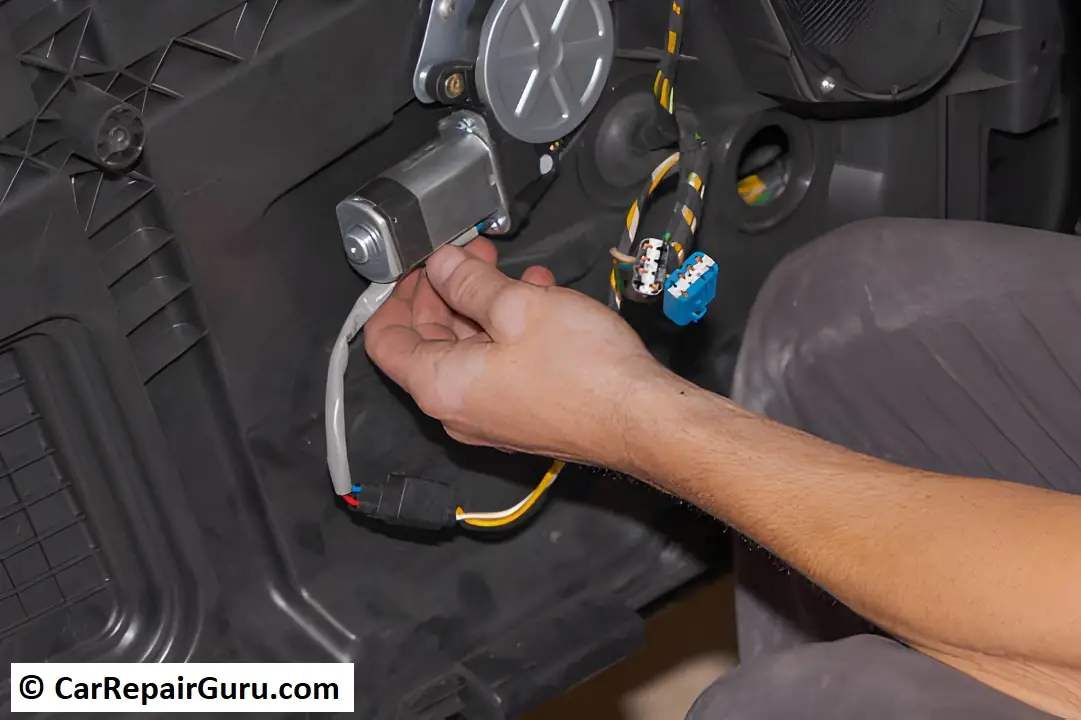
How to Replace the Power Window Motor:
-
- Make sure the window glass is securely taped up.
- Locate the motor. It’s usually held onto the regulator by three or four bolts.
- Unplug the electrical connector.
- Unbolt the old motor, install the new one, and plug it in.
How to Replace the Window Regulator Assembly:
Pro Tip: For most modern cars, the motor and regulator are sold as a single, pre-assembled unit. This is highly recommended as it’s much easier than trying to re-spool cables on an old regulator.
-
- With the glass taped up, locate the bolts that hold the window glass to the regulator clips. Loosen them enough to slide the glass free.
- Unbolt the entire regulator track from the inside of the door frame.
- Carefully maneuver the old assembly out through the access hole.
- Install the new assembly, bolt it in, and then carefully re-attach the glass to the new clips.
Step 4 – Test, Reassemble, and Reset
Remember our #1 rule? Test it! Reconnect the master switch to the door panel wiring harness. Reconnect your car battery and test the window’s up and down movement. If it works perfectly, you’re golden.
Now, simply reverse the process: re-apply the weather barrier, reconnect the panel’s electronics, hook the panel onto the top of the door, snap the clips back in, and replace the screws. Give the window one final reset, and you’re done!
How Much Does It Cost to Fix a Power Window?
Let’s look at the numbers. This is where you get to see the real value of your hard work.
- DIY Repair Costs:
- New Window Switch: $20 – $70
- New Window Motor: $50 – $150
- New Motor & Regulator Assembly: $75 – $250
- Professional Repair Costs (Mechanic):
- Total Estimated Cost: $300 – $600+, with a significant portion of that being labor.
Look at that difference! That’s your reward for a job well done.
Preventative Maintenance to Keep Your Power Windows Working

Now that your window is working perfectly, let’s keep it that way.
- Clean and Lubricate Window Tracks: Every six months, spray a silicone lubricant onto a rag and wipe down the inside of the rubber window tracks. This reduces friction and strain on the motor.
- Avoid “Powering Through” Ice: In the winter, let your car warm up and the ice melt before trying to lower a frozen window. Forcing it is the fastest way to burn out a motor or snap a regulator cable.
Know Your Limits – When to Leave It to the Pros
Hey, there’s no shame in calling for backup. While this is a very doable DIY project, you should consider a professional if:
- You suspect the problem is in a complex computer module (BCM).
- You’re uncomfortable working around airbags or complex wiring.
- You’re working on a high-end luxury vehicle with very complicated door systems.
You’ve Got This! Final Thoughts
Look at that—you did it. You started with a broken, frustrating window and are now armed with the knowledge to tackle the job with confidence. You didn’t just learn a series of steps; you learned how to diagnose the problem, what to look for, and how to avoid the common pitfalls along the way.
More importantly, you took control of the situation. You decided that you wouldn’t let a simple mechanical failure cost you hundreds of dollars or a trip to the shop. You now know exactly how to fix a power window, and that’s a skill you’ll have for life. Be proud of the work you’re about to do.
Was this guide helpful? Drop a comment below and let us know how your repair went! We’d love to hear your success story.
Great work. Now, go enjoy that perfectly working window.
Your Power Window Questions, Answered
What is the most common part that breaks on a power window?
The window regulator is the most common failure. Its plastic clips and steel cables simply wear out from constant use, leading to grinding noises or the window falling into the door.
How can I temporarily close a stuck power window?
After removing the door panel, you can often push the glass up by hand. Secure it in the closed position with strong painter’s tape or a rubber wedge as a temporary fix until you can replace the part.
Why did all my power windows stop working at once?
This usually points to a single electrical issue, not four broken windows. Check the main power window fuse, the system’s relay, or the driver’s master switch panel first.
Should I replace the motor and regulator together?
Yes, it is highly recommended. They experience the same amount of wear, and replacing them as a single, pre-assembled unit is far easier and prevents you from having to do the job twice.
Is a slow-moving window a sign it’s about to fail?
Yes, a slow, jerky, or struggling window is often the first sign of a dying motor or excessive friction in the window tracks. Addressing it early can prevent a complete failure later on.