Let’s be honest—there are few things that make a car owner’s stomach drop quite like the grating sound or the sudden discovery of a new scratch on their car’s otherwise perfect paint. It’s frustrating. That single ugly line can feel like it’s a mile wide, drawing your eye every time you walk past.
Car scratches aren’t just an eyesore; they can lower your vehicle’s resale value and, if deep enough, can lead to rust and corrosion. The good news? You don’t always have to rush to an expensive body shop. Many common scuffs and scratches can be fixed right in your own driveway with a little bit of knowledge and the right tools.
This is your all-in-one guide. We’re going to walk you through everything you need for effective DIY car scratch repair. You’ll learn how to identify the severity of the scratch, gather the right supplies, and follow step-by-step methods for making those blemishes disappear.
- Before You Start – You MUST Identify the Type of Scratch
- Understanding Your Car’s Paint Layers
- The Fingernail Test – A Quick and Easy Diagnosis
- Your Scratch Removal Toolkit – What You’ll Need
- For All Scratches (The Basics)
- For Light / Clear Coat Scratches
- For Deeper Scratches
- How-To – Removing Light Clear Coat Scratches (The 5-Step Method)
- How-To – Fixing Deeper Scratches (Advanced DIY Repair)
- Common Myths and “Hacks” Debunked
- Know Your Limits – When to Call a Professional
- Prevention is the Best Cure – How to Avoid Future Scratches
- Wrapping Up
- Your Scratch Repair Questions, Answered
- What is the best car scratch remover?
- How long does it take to fix a car scratch yourself?
- Will polishing make the scratch worse?
- Is it harder to remove scratches from a black car?
Before You Start – You MUST Identify the Type of Scratch
This is the single most important step. Treating a deep scratch with a light polish will do nothing, and treating a light scratch with an aggressive compound can make the problem much, much worse. The method you choose depends entirely on how deep the damage goes.
Understanding Your Car’s Paint Layers
Think of your car’s paint like skin—it has multiple layers, each with a specific job.
- Clear Coat: The topmost, transparent layer. It’s the tough, protective shield for the paint underneath. It provides the gloss and protects against UV rays and minor abrasions. Most light scratches are only in this layer.
- Base Coat (Color Coat): This is the layer that gives your car its actual color. It has no shine or durability on its own.
- Primer: This is the layer between the color and the bare metal. It helps the paint adhere properly and provides a smooth surface. It’s often a dull grey, white, or black color.
- Metal Panel: The steel or aluminum body of your car.
The Fingernail Test – A Quick and Easy Diagnosis
Here’s a simple trick used by professionals and enthusiasts alike. Gently run your fingernail across the scratch. Pay close attention to the feeling.
Level 1: Clear Coat Scratch: If your fingernail glides over it without catching, the scratch is likely confined to the clear coat. These often look like fine, white-ish lines. This is the best-case scenario and the easiest for a light car scratch repair.
Level 2: Base Coat / Primer Scratch: If your fingernail distinctly catches in the groove, the scratch has gone through the clear coat and into the color or even the primer layer. You’ll know it’s in the primer if you see a different color (like grey) at the bottom of the scratch.
Level 3: Deep Scratch to the Metal: If you can see shiny, bare metal, the scratch has penetrated all layers of paint. These are the most serious and require the most intensive repair to prevent rust.
Your Scratch Removal Toolkit – What You’ll Need
Having the right tools makes all the difference. You don’t need a professional-grade garage, but a few key items are essential.
For All Scratches (The Basics)
- Two Buckets with Grit Guards: One for soapy water, one for rinsing your wash mitt. This is key to preventing new scratches while you clean.
- Quality Car Wash Soap: Don’t use dish soap! It strips wax and can dry out your paint.
- Multiple Clean Microfiber Towels: You’ll need them for washing, drying, and buffing away product residue.
- Clay Bar or Clay Mitt: This removes embedded contaminants from the paint that washing alone can’t, ensuring you’re working on a perfectly clean surface.
- Isopropyl Alcohol (IPA) Solution: A 50/50 mix of IPA and distilled water in a spray bottle is perfect for wiping down the area to remove any oils or polish residue.
For Light / Clear Coat Scratches
- Polishing Compound or a Quality Car Scratch Remover: These have fine abrasives that gently level the clear coat around the scratch, making it disappear.
- Microfiber or Foam Applicator Pads: For applying the compound by hand.
- (Optional but Recommended) Dual-Action (DA) Polisher: For more serious clear coat scratches or for achieving the best possible finish, a DA polisher is a fantastic investment.
For Deeper Scratches
- Automotive Touch-Up Paint: You MUST get the exact color-matched paint for your vehicle. You can find your car’s paint code on a sticker in the driver’s side doorjamb or in your owner’s manual.
- Fine-Tipped Paint Applicators or a Toothpick: For precisely applying paint inside the scratch.
- 2000-3000 Grit Wet/Dry Sandpaper: This is for the advanced step of leveling the touch-up paint.
- Rubbing Compound: This is more aggressive than a polishing compound and is used to remove the fine sanding marks.
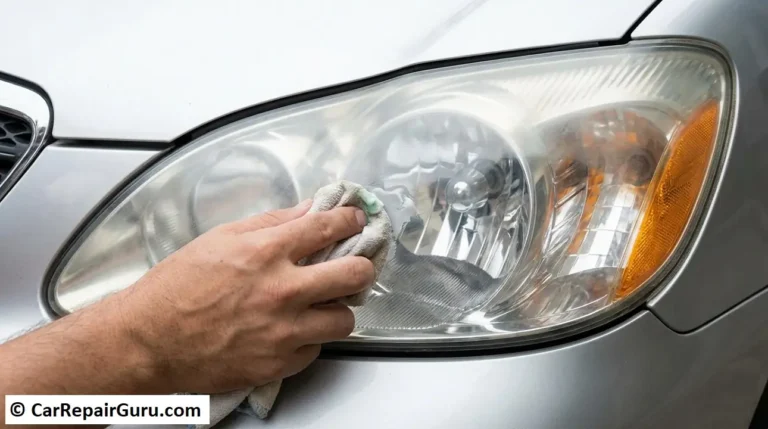
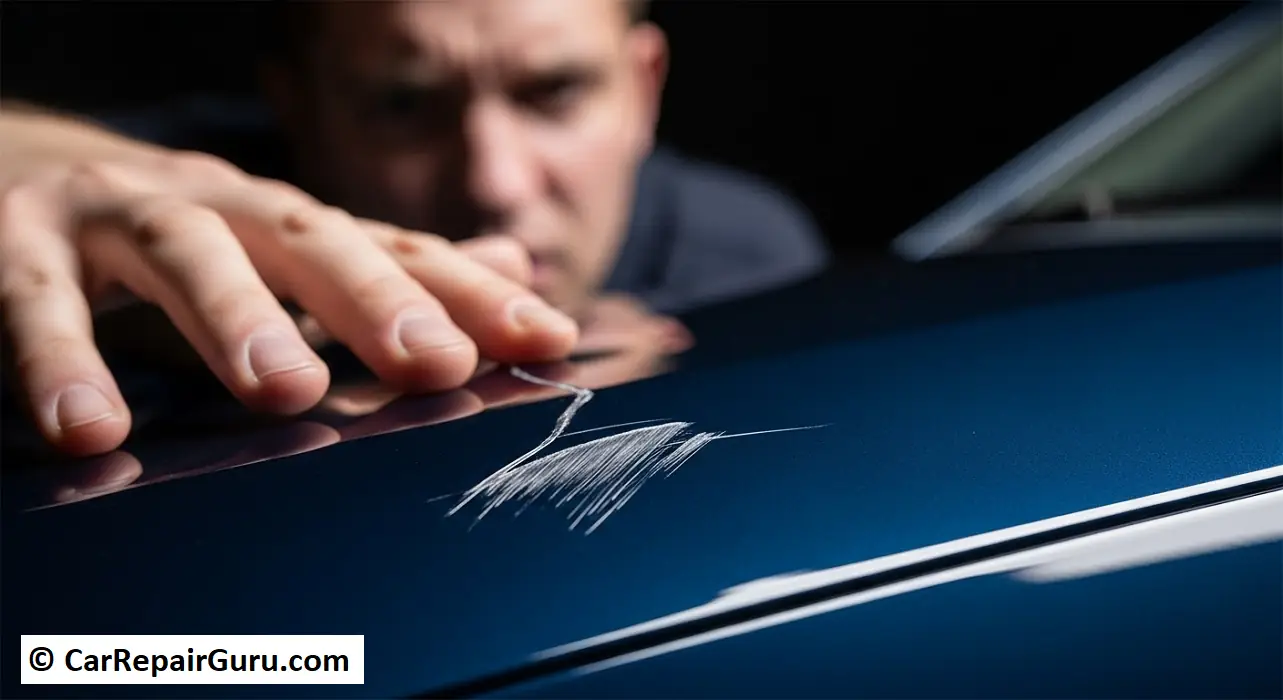
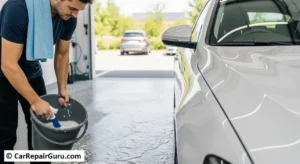
How-To – Removing Light Clear Coat Scratches (The 5-Step Method)
![]()
This process is perfect for those annoying scuffs from fingernails, bushes, or light car park bumps. If you’ve done the fingernail test and it glides right over, this is the method for you.
Step 1: Wash and Dry the Area Thoroughly
You cannot skip this. Any dirt or grit left on the surface will be ground into your paint during polishing, creating a web of new, finer scratches. Wash the entire panel, rinse it well, and dry it with a clean microfiber towel.
Step 2: Decontaminate with a Clay Bar
Even after washing, your paint has bonded contaminants. Spray a clay lubricant (or a soapy water mix) on the area and gently glide the clay bar over the surface. It should move smoothly. If you feel any grittiness, that’s the clay doing its job. Wipe the area dry.
Step 3: Apply Polishing Compound
Place a small, pea-sized amount of a car scratch remover or polishing compound onto your foam or microfiber applicator pad. You don’t need to slather it on; a little goes a long way.
Step 4: Polish the Area
Working on a small section (about 2×2 feet), begin to work the polish into the paint.
- By Hand: Use firm, even pressure and work in overlapping circular or straight-line motions. Focus on the scratched area, but blend your movements into the surrounding paint.
- By Machine (DA Polisher): Set the polisher to a low-to-medium speed. Work in a cross-hatch pattern (side-to-side, then up-and-down) with light pressure, letting the machine do the work.
The polish will start to turn clear as it breaks down.
Step 5: Wipe Clean and Inspect
Use a clean, plush microfiber towel to gently wipe away the residue. Now, inspect your work in good lighting. The clear coat scratch should be gone or significantly less visible. If it’s still there, you can repeat the process 1-2 more times. Once you’re happy, apply a coat of wax or sealant to protect your freshly polished paint.
How-To – Fixing Deeper Scratches (Advanced DIY Repair)
Disclaimer: This method involves touch-up paint and potentially wet sanding, which carries a higher risk. If done incorrectly, you can damage the surrounding paint. Be patient, take your time, and if you’re not confident, this is the time to call a professional.
Step 1: Clean and Prep the Scratch
Just like before, wash, dry, and clay the area. Afterward, take your IPA solution and spray it on a microfiber towel, then carefully wipe inside the scratch. This removes all waxes and oils, ensuring the new paint will stick properly.
Step 2: Apply Touch-Up Paint
Shake the touch-up paint bottle thoroughly. Using a very fine-tipped applicator (a toothpick works great), carefully apply a very thin layer of paint only inside the scratch. The goal is to build up the paint from the bottom of the scratch. Don’t blob it on. Let this thin layer dry completely (check the product instructions, usually 30-60 minutes). Apply another thin layer, and repeat until the new paint is sitting slightly higher than the surrounding paint surface. This may take 3-5 coats. Let it cure for at least 24 hours.
Step 3: (Optional but Recommended) Wet Sanding
This is the most critical step for a seamless deep car scratch repair. Its purpose is to level the slightly raised touch-up paint with the factory clear coat.
- Soak a small piece of 2000-3000 grit sandpaper in a bucket of soapy water for about 10 minutes.
- Wrap it around a small, firm block (a rubber eraser works well).
- Making sure the surface is very wet, use extremely light pressure to gently sand down the raised touch-up paint. You should see a milky white slurry—that’s the clear coat you’re leveling.
- Sand for only a few seconds at a time, wipe clean, and check your progress. Stop as soon as the surface feels perfectly smooth.
Step 4: Compounding and Polishing
Wet sanding will leave the area looking dull and hazy. Don’t panic! This is normal. Now, use a more aggressive rubbing compound on an applicator pad (or DA polisher) to remove the fine sanding marks. Once the sanding marks are gone, switch to a finer polishing compound to restore that deep gloss and clarity.
Step 5: Protect Your Repair
Wipe the area clean with your IPA solution one last time. After letting the paint cure for another day or two, apply a good coat of wax or paint sealant to protect your hard work.
Common Myths and “Hacks” Debunked
You’ve probably seen these online. Here’s the truth about popular but ineffective “fixes.”
- Does Toothpaste Remove Car Scratches? No. Toothpaste is a crude abrasive that isn’t designed for automotive clear coats. It might slightly dull the edges of a very fine scratch, making it look less noticeable, but it often just creates a hazy patch of even finer micro-scratches.
- Can WD-40 or Magic Eraser Fix Scratches? Absolutely not. WD-40 is an oily filler. It will temporarily hide a very light scratch, but it will wash away in the first rain, and the scratch will be back. A Magic Eraser is a highly abrasive melamine foam that will permanently damage and dull your clear coat. Avoid it at all costs.
Know Your Limits – When to Call a Professional
A successful DIY car scratch repair is incredibly rewarding, but it’s crucial to know when you’re out of your depth. It’s time to call a professional detailer or body shop if:
- The scratch is clearly down to the bare metal. This needs proper priming and painting to prevent rust.
- The panel is dented or creased along with the scratch.
- The scratched area is very large, like a key mark running the full length of a door.
- You simply don’t have the time, tools, or confidence to tackle the job without risking further damage.
A professional repair can range from $150 for a minor spot repair to over $1,000 for respraying an entire panel, but it guarantees a perfect, factory-quality finish.
Prevention is the Best Cure – How to Avoid Future Scratches
Now that your car is looking great again, let’s keep it that way.
- Master the Two-Bucket Car Wash: This is the #1 way to prevent wash-induced swirls and scratches.
- Apply Protection: A good car wax, paint sealant, or ceramic coating acts as a sacrificial barrier, taking the brunt of minor abrasions before they can reach your clear coat.
- Park Smart: Avoid parking under sap-dropping trees, in tight spaces next to other cars, or near high-traffic walkways.
- Always Use Clean Microfiber: Whether you’re washing, drying, or dusting, make sure your towels are clean and high-quality.
Wrapping Up
That unsightly scratch doesn’t have to be a permanent mark on your car. By following the right process—Identify, Clean, Repair, and Protect—you have the power to restore your car’s finish and take immense pride in your ride. With a bit of patience and the correct technique, you can save money and achieve professional-looking results right at home.
Have a success story or a question we didn’t cover? Drop it in the comments below
Your Scratch Repair Questions, Answered
What is the best car scratch remover?
It depends on the scratch. For very light scuffs, products like Meguiar’s ScratchX 2.0 or Chemical Guys VSS are excellent for hand application. For a more comprehensive kit that can handle slightly deeper scratches, a 3M Scratch Removal System is a popular choice.
How long does it take to fix a car scratch yourself?
A simple clear coat scratch can be fixed in 15-30 minutes. A deeper scratch requiring touch-up paint and curing time can take a few hours of work spread out over 2-3 days.
Will polishing make the scratch worse?
Not if done correctly on a clear coat scratch. Polishing works by removing a microscopic layer of clear coat to level the surface. The danger comes from being too aggressive, using the wrong product, or trying to polish a scratch that is too deep, which can burn through the paint.
Is it harder to remove scratches from a black car?
The process of removing car scratches is the same regardless of color. However, black paint is the least forgiving—it shows every single tiny imperfection, swirl mark, and haze. You must be extra meticulous with your cleaning and use a very fine finishing polish as your final step to achieve a flawless, mirror-like finish.