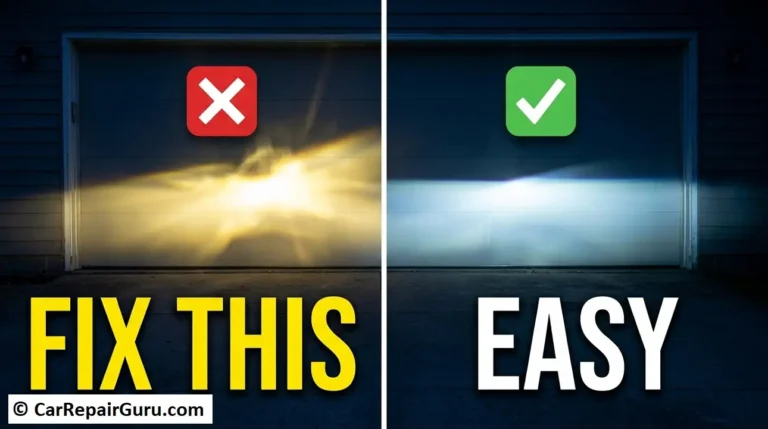
That dreaded orange bubble under your car’s paint isn’t just an eyesore—it’s a warning sign. Rust, often called “car cancer,” is a relentless chemical process. If ignored, it can spread, compromise the structural integrity of your vehicle, and turn a small, fixable issue into a major, expensive problem.
But don’t panic. The good news is that you’ve caught it. For most common rust problems, a proper car rust repair is a very achievable DIY project. You don’t need a professional’s workshop—just the right tools, a bit of patience, and a solid plan.
This guide is that plan. We’ll walk you through everything you need to know to remove rust from a car body effectively, stop it permanently, and achieve a great-looking finish.
- First, Identify the Type of Rust on Your Car
- Type 1: Surface Rust
- Type 2: Scale Rust
- Type 3: Penetrating Rust (Rot)
- DIY vs. Professional Rust Repair: When to Make the Call
- When DIY is a Great Option:
- When to Call a Professional Body Shop:
- Your Complete DIY Car Rust Removal Toolkit
- Safety Essentials (Non-Negotiable)
- Preparation & Rust Removal
- Metal Repair & Finishing
- The 7-Step Process – How to Repair Surface & Scale Rust
- Step 1: Wash, Degrease, and Mask the Area
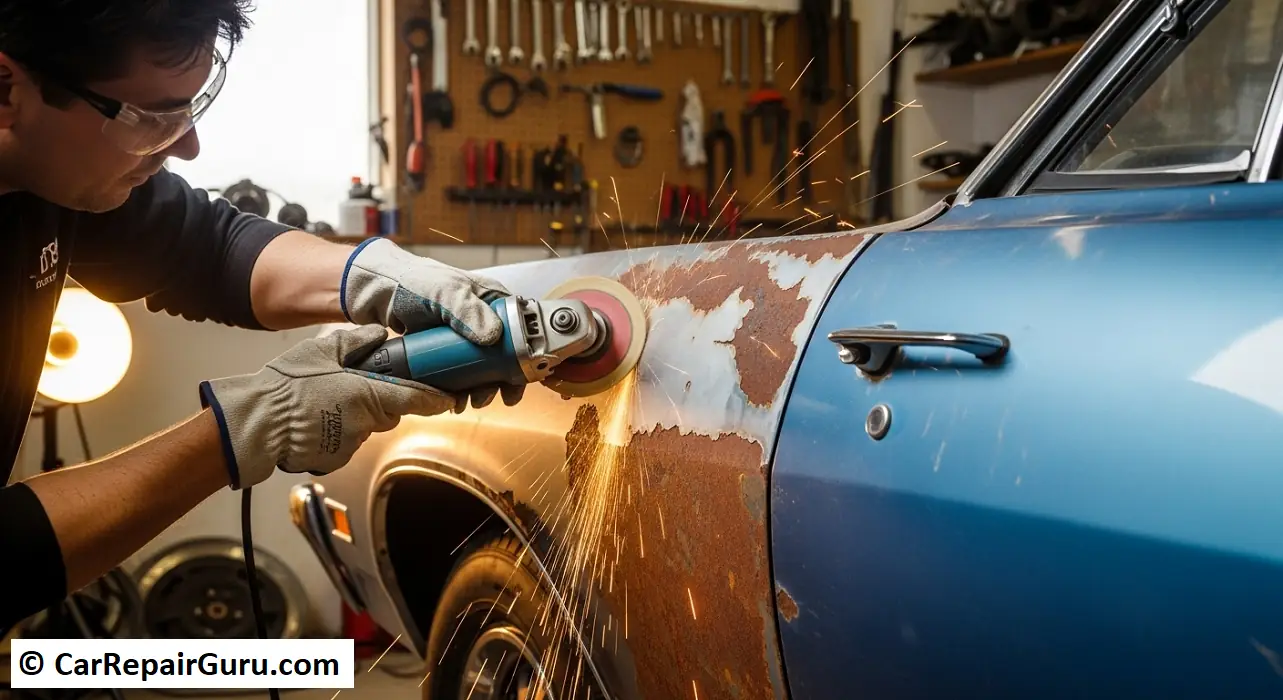
- Step 2: Remove All Rust Down to Bare Metal
- Step 3: Treat the Metal with a Rust Converter
- Step 4: Apply Body Filler (If Needed for Pitting)
- Step 5: Apply High-Build Primer and Sand Smooth
- Step 6: Apply the Color-Matched Base Coat Paint
- Step 7: Apply Clear Coat, Cure, and Polish
- Advanced Repair – How to Fix Penetrating Rust Holes
- Method 1 – Using a Fiberglass Patch Kit (No-Weld)
- Method 2 – Welding in a New Metal Patch (Professional)
- Preventing Future Rust – The Best Defense is a Good Offense
- Protect Your Investment and Enjoy Your Ride
- Your Car Rust Removal (FAQ)
- Can I just paint over rust?
- How much does professional rust repair cost?
- Does vinegar or WD-40 remove car rust?
- How do I find my car’s exact paint code?
- Is it worth fixing rust on an old car?
First, Identify the Type of Rust on Your Car
Before you buy a single sheet of sandpaper, the most critical step is to correctly diagnose the problem. The method you use to fix rust on a car depends entirely on how deep the corrosion goes.
Type 1: Surface Rust
This is the most common and easiest type of rust to fix, often starting from a small rock chip or scratch that has broken the paint’s protective layer.
- What it Looks Like: Small, orange-colored specks or a light, fuzzy-looking stain on the paint’s surface. The paint around it might be just starting to bubble, but the underlying metal is still solid.
- Difficulty: Easy. This is the perfect project for a DIY beginner.
Type 2: Scale Rust
This is a more advanced stage of corrosion where the rust has eaten through the paint and has begun to pit the surface of the sheet metal itself.
- What it Looks Like: The paint is actively bubbling, blistering, and flaking off. The metal underneath has a rough, scaly texture and is pitted, but not yet eaten all the way through.
- Difficulty: Intermediate. This repair is more involved and will require sanding away more material and using body filler.
Type 3: Penetrating Rust (Rot)
This is the most severe form of rust. The corrosion has successfully eaten a hole completely through the body panel.
- What it Looks Like: A literal hole. You can see through it, and the metal around the edges is often thin, brittle, and flaky. This is common in rocker panels, wheel wells, and lower fender edges.
- Difficulty: Advanced. Repairing this requires cutting out the rotten metal and patching the area, which can be a serious safety issue on structural parts.
DIY vs. Professional Rust Repair: When to Make the Call
Now that you’ve identified your rust, it’s time for an honest assessment.
When DIY is a Great Option:
You should feel confident tackling the job yourself if:
- You have surface rust or moderate scale rust.
- The rusted area is relatively small (smaller than your fist is a good rule of thumb).
- The rust is on an easy-to-access panel like a hood, door, or fender.
- You have a weekend, a well-ventilated space, and the patience to follow each step carefully.
When to Call a Professional Body Shop:
Sometimes, the job is too big for a home garage. Get a professional quote if:
- You have penetrating rust (holes) on any panel.
- The rust is on a crucial structural component like the car’s frame, subframe, or suspension mounts. Repairing these improperly is a major safety hazard.
- The rust is on a complex body line, a seam between panels, or covers a large area.
- You own a high-value classic, a new car, or a leased vehicle where a flawless finish is essential.
Your Complete DIY Car Rust Removal Toolkit
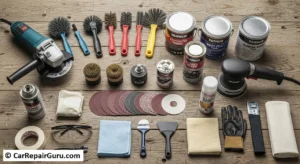
Having the right materials on hand is key to a successful repair. Here is your checklist.
Safety Essentials (Non-Negotiable)
- Safety Goggles or Face Shield
- Respirator/Dust Mask (P95 or better)
- Nitrile Gloves
Preparation & Rust Removal
- Automotive Soap and Water
- Grease and Wax Remover (or Isopropyl Alcohol)
- Masking Tape and Paper/Plastic
- Sandpaper Assortment (Coarse 80-grit, Medium 180-grit, Fine 320/400-grit)
- Sanding Block and/or an Orbital Sander
- Wire Brush (Handheld or Drill Attachment)
- Tack Cloth
Metal Repair & Finishing
- Rust Converter
- Automotive Body Filler (e.g., Bondo) and Plastic Spreader
- High-Build Automotive Filler Primer
- Color-Matched Automotive Base Coat Paint (Aerosol)
- Automotive Clear Coat (2K clear coat is highly recommended for durability)
- Polishing Compound & Microfiber Towels
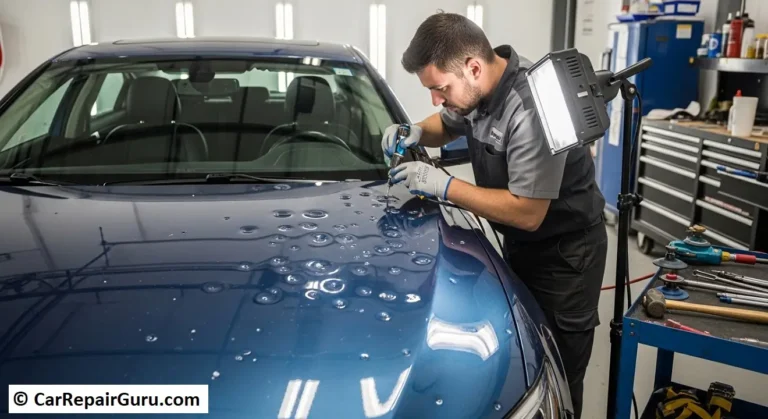
The 7-Step Process – How to Repair Surface & Scale Rust
This is the heart of the operation. Follow these steps meticulously—your prep work determines the quality of your final result.
Step 1: Wash, Degrease, and Mask the Area
Thoroughly wash the rusted area with soap and water, then dry it completely. Wipe it down with a grease and wax remover to ensure your sandpaper and new paint will adhere properly. Use masking tape and paper to create a large border (at least a foot in every direction) around the repair to protect the good paint.
Step 2: Remove All Rust Down to Bare Metal
This is the most important part. Start sanding rust off the car using coarse 80-grit sandpaper. Your goal is to remove every trace of rust and bubbling paint until you see nothing but clean, shiny, bare metal. Feather the edges by sanding the surrounding paint with a finer 180-grit paper to create a smooth, gradual transition.
Step 3: Treat the Metal with a Rust Converter
Wipe the sanded area with a tack cloth to remove all dust. Now, apply a thin coat of a rust converter. This crucial step chemically neutralizes any microscopic rust particles you can’t see, turning the area black and preventing rust from ever returning from underneath your repair. Let it dry completely.
Step 4: Apply Body Filler (If Needed for Pitting)
Note: If you only had light surface rust with no pitting, you can skip this step.
- Mix & Apply: Mix a small amount of body filler with its hardener. Apply a thin, tight coat over the pitted bare metal, slightly overfilling the area.
- Cure: Let the filler harden completely (usually 20-30 minutes).
- Sand: Sand the cured filler down, starting with 80-grit and progressing to 180-grit, until it is perfectly smooth and flush with the surrounding metal.
Step 5: Apply High-Build Primer and Sand Smooth
Clean the area again with a degreaser and tack cloth. Apply 2-3 light coats of high-build filler primer over the entire repair. Let it dry completely. Then, using 400-grit sandpaper and water (wet sanding), gently sand the primer until it’s glassy-smooth to the touch.
Step 6: Apply the Color-Matched Base Coat Paint
After a final wipe-down, it’s time for color. The key is to use very light, sweeping motions, holding the can 10-12 inches away. Apply 3-4 light coats rather than one heavy one, allowing 15-20 minutes of drying time between each. This prevents runs and ensures even coverage.
Step 7: Apply Clear Coat, Cure, and Polish
The clear coat provides the shine and protection. After the base coat is dry to the touch, apply 2-3 even coats of clear coat in the same manner.
- Cure: Let the clear coat cure for at least 24-48 hours.
- Polish: The new paint will likely have a slightly rough texture. Use a quality automotive polishing compound and a microfiber towel to gently polish the repaired area and the blended edge until the shine is uniform and the repair is virtually invisible.
Advanced Repair – How to Fix Penetrating Rust Holes
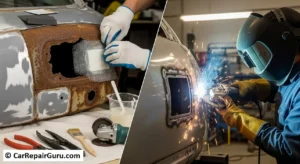
If you have a rust hole, the goal is to replace the missing metal.
Disclaimer: This is an advanced repair. Welding should only be performed by those with the proper experience and safety equipment.
Method 1 – Using a Fiberglass Patch Kit (No-Weld)
For small holes, a fiberglass patch is a viable DIY option.
- Cut Away all the thin, flaky metal with tin snips until you are back to a solid edge.
- Sand the area thoroughly, inside and out.
- Cut a piece of fiberglass matting slightly larger than the hole.
- Mix the fiberglass resin and apply it to the mat.
- Apply the patch from the backside of the hole, pressing it firmly against the panel.
- Finish by applying body filler to the front side to smooth the repair before priming and painting.
Method 2 – Welding in a New Metal Patch (Professional)
This is the best and most durable way to fix a rust hole in a car. It involves cutting a new piece of sheet metal to perfectly match the hole, welding it into place, grinding the welds smooth, and finishing with a very thin layer of body filler to hide the seam.
Preventing Future Rust – The Best Defense is a Good Offense
After all that hard work, protect your vehicle from future rust.
- Wash Your Car Frequently: Especially in winter to remove corrosive road salt from the undercarriage.
- Wax or Seal Your Paint: A good coat of wax every few months creates a protective barrier.
- Fix Paint Chips Immediately: Use a touch-up paint pen to seal new chips from moisture.
- Keep Drain Plugs Clear: Make sure drains in your doors and trunk aren’t clogged with leaves.
- Consider an Annual Undercoating: If you live in a snowy climate, a professional oil-based undercoating is an excellent investment.
Protect Your Investment and Enjoy Your Ride
Removing rust is more than a cosmetic fix—it’s about preserving the life, safety, and value of your vehicle. By following these steps, you’ve not only erased an ugly blemish but also taken a proactive step in caring for your car.
Now, stand back, admire your work, and enjoy your rust-free ride.
Have a before-and-after photo of your rust repair? Share your success story in the comments below!
Your Car Rust Removal (FAQ)
Can I just paint over rust?
Absolutely not. Painting over rust traps moisture and allows the corrosion to accelerate unseen, creating a much bigger problem later. You must remove it completely.
How much does professional rust repair cost?
Costs vary widely. A small surface rust spot could be $200-$500. A larger area of scale rust might be $500-$1,500. A rotted-out rocker panel that requires cutting and welding can easily exceed $2,500.
Does vinegar or WD-40 remove car rust?
No. These are myths. Vinegar is an acid that can damage good paint, and WD-40 is a lubricant, not a rust remover. Always use products specifically designed for automotive rust treatment.
How do I find my car’s exact paint code?
Look for a sticker in the driver’s side door jamb, under the hood, or in the trunk. The sticker will be labeled “PAINT” or “C/TR”. You can also give your car’s VIN to a dealership or automotive paint supplier to find the code.
Is it worth fixing rust on an old car?
For minor rust, a DIY repair is always worth it to stop it from getting worse. For major rust, weigh the repair cost against the car’s value. If the rust is on a structural component, it becomes a critical safety issue that must be addressed regardless of the car’s age.