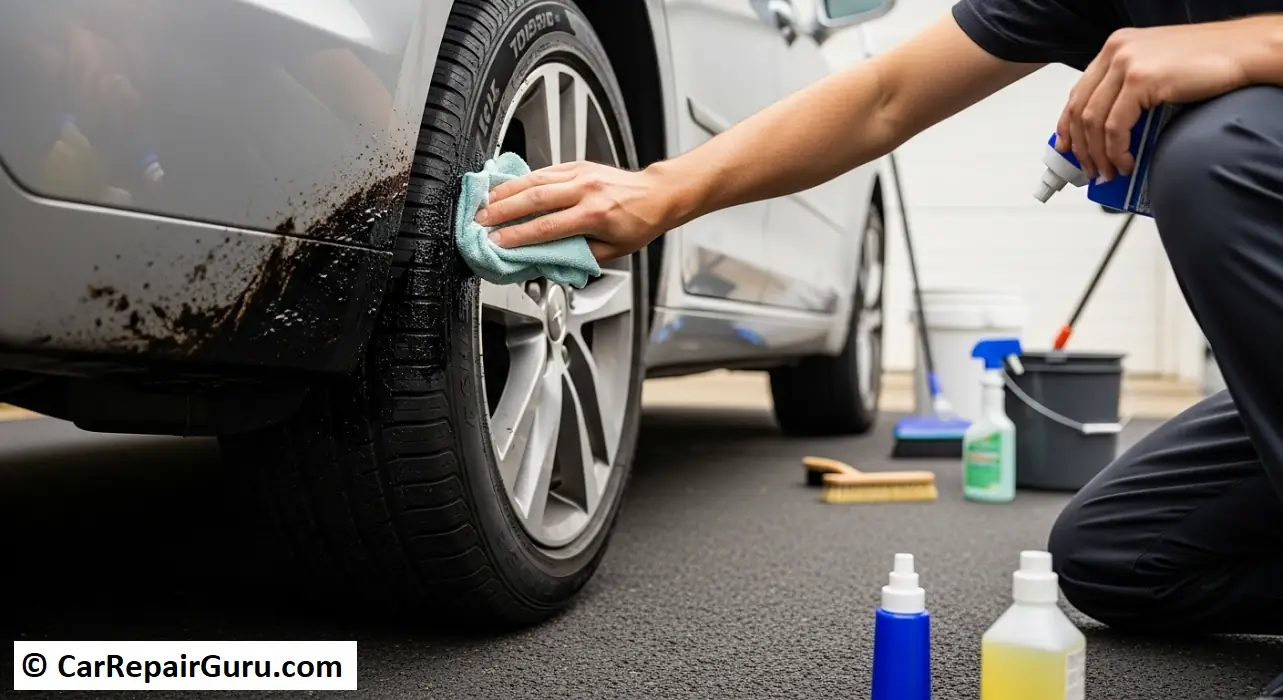
There are few things more frustrating for a car owner. You’ve just spent time washing your vehicle, it’s gleaming in the sun, and then you spot them: a spray of stubborn, black specks clinging to your paint, especially along the lower panels. That, my friend, is road tar.
It’s a common problem, especially after driving through a construction zone or on a hot summer day when asphalt gets soft. While it looks terrible, the good news is that with the right knowledge and a little patience, you can completely remove it. This guide will walk you through everything you need to know, from identifying the tar to removing it safely and preventing it from coming back.
- First, Let’s Be Sure – How to Identify Road Tar on Your Car
- Why You Must Remove Road Tar Immediately
- Safety First – Important Precautions Before You Begin
- The Pre-Removal Prep – What You’ll Need
- The Step-by-Step Method – How to Remove Tar the Right Way
- Step 1 – Confirm the Area is Clean and Dry
- Step 2 – Apply the Tar Remover
- Step 3 – Let it Dwell (But Not Dry)
- Step 4 – Gently Wipe Away the Tar
- Step 5 – Address Stubborn Spots
- Step 6 – Rinse the Area Thoroughly
- Step 7 – Re-Wash and Dry
- Choosing Your Weapon – Commercial vs. DIY Tar Removers
- Best Commercial Bug & Tar Removers
- Effective DIY Tar Remover Solutions (Use With Caution)
- The Most Important Final Step – Protect Your Paint
- The Best Defense – How to Prevent Road Tar from Sticking
- A Clean Car is a Happy Car
- Frequently Asked Questions (FAQ)
- Can WD-40 damage car paint?
- How long can you leave tar on your car?
- Will a clay bar remove road tar?
- Can a pressure washer remove road tar?
- How do I remove tar from plastic trim or glass?
First, Let’s Be Sure – How to Identify Road Tar on Your Car
Before you start any removal process, you need to be certain you’re dealing with road tar and not something else like bug guts, tree sap, or industrial fallout.
What Does Road Tar Look Like? Road tar typically appears as small, raised black or dark brown specks. It can range from tiny dots to larger, glob-like splatters. Unlike a bug splatter which often has a distinct impact shape, tar looks more like it was flung from the road.
Feel and Texture: If you were to (gently) touch it, fresh tar is tacky and sticky. Older, baked-on tar will feel hard and crusty, almost like a tiny piece of gravel glued to your paint.
Common Locations: Gravity and tire-fling are the culprits here. You’ll almost always find road tar concentrated on the lower sections of your car: behind the front and rear wheel wells, on the rocker panels (the area beneath your doors), and across the rear bumper.
Why You Must Remove Road Tar Immediately
Seeing those black spots is annoying, but is tar bad for car paint? The answer is a definitive yes. Leaving tar on your vehicle is more than just a cosmetic issue; it can cause lasting damage.
Road tar is a petroleum-based substance, full of oils and harsh chemicals. When it sits on your car’s surface, especially when baked by the sun, these chemicals begin to bond with and penetrate your car’s clear coat. This process can lead to:
- Clear Coat Staining: The tar can leave a permanent yellow or brownish stain on the paint, which is impossible to simply wash off.
- Etching: In severe cases, the acidic components can slowly eat into the clear coat, creating a dull, rough spot.
- Increased Difficulty: The longer tar sits, the harder it becomes, making the removal process much more difficult and increasing the risk that you’ll scratch your paint trying to get it off.
In short, you want to address tar spots as soon as you notice them.
Safety First – Important Precautions Before You Begin
Patience and preparation are key to a successful, scratch-free removal. Before you grab a product and start rubbing, follow these crucial safety tips.
Work in a Well-Ventilated Area: Whether you’re using a commercial car tar remover or a household solvent like WD-40, the fumes can be strong. Always work outdoors or in a garage with the door wide open.
Avoid Direct Sunlight and Hot Surfaces: Never attempt to remove tar from a hot panel. The heat will cause the cleaning chemicals to evaporate almost instantly, making them ineffective and potentially leaving behind a residue that’s even harder to remove. Work in the shade on a panel that is cool to the touch.
Wear Protective Gloves: The chemicals that dissolve tar can be harsh on your skin. A simple pair of nitrile or latex gloves will keep your hands protected.
The Golden Rule: Test in an Inconspicuous Spot: Before applying any remover to a visible area, test it first on a hidden spot like a door jamb or the inside of a fender well. Apply a small amount, wait a minute, wipe it off, and check to make sure it hasn’t discolored or softened the paint.
Use Clean Microfiber Towels: This cannot be overstated. A dirty towel has trapped grit and particles that will act like sandpaper on your paint. Always start with fresh, clean microfiber towels.
The Pre-Removal Prep – What You’ll Need
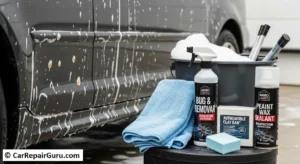
Gathering your supplies beforehand will make the job go smoothly.
- A Thorough Car Wash: This is the most critical first step. You must wash your car, or at least the affected panels, with car wash soap and water. This removes the loose surface dirt and grime that could cause scratches during the tar removal process.
- Your Chosen Tar Remover: This can be a dedicated bug and tar remover or one of the DIY options discussed below.
- Two or Three Clean, Dry Microfiber Towels: You’ll need one for application/wiping and another for buffing dry.
- A Bucket of Clean Water and Car Soap: For re-washing the area after treatment.
(Optional) Automotive Clay Bar: For embedded contaminants.
(Recommended) Car Wax or Paint Sealant: For restoring protection after you’re done.
The Step-by-Step Method – How to Remove Tar the Right Way
With your car clean and your supplies ready, here is the safe and effective way to get the job done.
Step 1 – Confirm the Area is Clean and Dry
Even if you washed the whole car, run your hand over the area to make sure it’s free of any grit. The panel must be completely dry for the remover to work effectively.
Step 2 – Apply the Tar Remover
Following the product’s instructions, lightly spray the remover directly onto the tar spots. Alternatively, you can spray the chemical onto a folded microfiber towel and then dab it onto the tar. This second method gives you more control and prevents overspray on windows or plastic trim.
Step 3 – Let it Dwell (But Not Dry)
This is where the magic happens. You need to give the chemical time to work—typically 30 to 90 seconds. You may even see the tar spots begin to “bleed” or dissolve, running down the panel. Do not let the product dry on the surface.
Step 4 – Gently Wipe Away the Tar
Take a clean, soft microfiber towel and gently wipe the area. Do not scrub! Use a light, dabbing motion or a straight-line wipe in a single direction. The goal is to lift the dissolved tar off the surface, not grind it in. After each wipe, fold the towel to a fresh, clean side to avoid smearing the tar back onto the paint.
Step 5 – Address Stubborn Spots
For very thick or old tar spots, you may need to repeat steps 2-4. Be patient. It’s better to do two or three gentle applications than one aggressive one. If you’ve removed the main spots but still feel a slight roughness, this is when you might consider using a clay bar with plenty of lubricant to pull out any remaining embedded bits.
Step 6 – Rinse the Area Thoroughly
Once the tar is gone, rinse the entire panel thoroughly with water to neutralize and wash away any remaining chemical residue.
Step 7 – Re-Wash and Dry
Using your bucket of car soap and a clean wash mitt, wash the entire panel one last time. This ensures all traces of the tar remover are gone. Dry the area completely with a fresh microfiber drying towel.
Choosing Your Weapon – Commercial vs. DIY Tar Removers
You have a few options when it comes to what product to use.
Best Commercial Bug & Tar Removers
For most people, this is the safest and most effective choice. Products specifically labeled as a “Bug & Tar Remover” are pH-balanced and formulated to dissolve these contaminants without harming your car’s clear coat. They are engineered to be tough on tar but gentle on paint. Look for well-regarded brands at your local auto parts store.
Effective DIY Tar Remover Solutions (Use With Caution)
Some common household items can work in a pinch, but they come with warnings.
- WD-40 or Kerosene: These are effective solvents and will dissolve tar quickly. However, they are also aggressive degreasers that will completely strip any wax or sealant from your paint, leaving it unprotected. If you use them, use them sparingly and be absolutely certain to re-wash and re-wax the area immediately afterward.
- Peanut Butter or Mayonnaise: It sounds strange, but the high oil content in these products can slowly break down and soften very light tar spots. This is a very mild, slow-acting method that is safe but may not be effective on anything but the freshest, smallest specks.
The Most Important Final Step – Protect Your Paint
You did it! The tar is gone. But you’re not quite finished. The process of using chemical solvents has almost certainly removed the protective layer of wax or sealant from that area of your car. Leaving it bare exposes your paint to UV rays, acid rain, and, you guessed it, more tar.
Apply a fresh coat of your favorite car wax or paint sealant to the treated panels. This will restore the glossy shine and create a slick, protective barrier that makes future cleaning much easier.
The Best Defense – How to Prevent Road Tar from Sticking
The old saying “an ounce of prevention is worth a pound of cure” is especially true here. While you can’t always avoid road construction, you can make your car a much less welcoming target for tar.
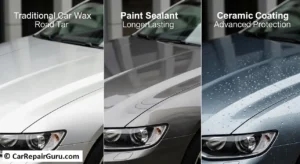
A slick, hydrophobic surface makes it incredibly difficult for contaminants like tar to get a strong grip. Your prevention options fall into a “good, better, best” structure:
- Good: Car Wax. A traditional carnauba wax provides a good layer of protection and a great shine. It will need to be reapplied every 1-3 months.
- Better: Paint Sealant. A synthetic paint sealant creates a more durable, longer-lasting bond with your paint, often providing 4-6 months of solid protection.
- Best: Ceramic Coating. This is the ultimate in paint protection. A ceramic coating is a liquid polymer that creates a semi-permanent, incredibly hard and slick sacrificial layer over your paint. Protection can last for years, and tar often can be removed with little more than a regular wash.
A Clean Car is a Happy Car
Dealing with road tar doesn’t have to be a nightmare. By correctly identifying it, working safely, using the right product gently, and always protecting your paint afterward, you can keep your car looking its absolute best. A little preventative maintenance with a good wax or sealant will make your life even easier the next time you have an unfortunate encounter with freshly laid asphalt.
Have another car cleaning challenge? Let us know in the comments below
Frequently Asked Questions (FAQ)
Can WD-40 damage car paint?
For short-term use on modern factory paint, WD-40 is generally safe and will not cause immediate damage. However, it will strip all wax and protection, and if left on plastic trim, it can cause it to dry out and fade over time. It must be washed off thoroughly after use.
How long can you leave tar on your car?
The sooner you remove it, the better. In cool, cloudy weather, you might have a week or two. In the hot sun, tar can begin to stain the clear coat in just a few days. Make it a habit to remove it during your next car wash.
Will a clay bar remove road tar?
A clay bar is a fantastic tool for removing fine, embedded contaminants after the heavy spots are gone. Using a clay bar to try and remove large, thick blobs of tar is inefficient and can cause the tar to smear across the paint. Use a chemical remover first, then use the clay bar for a perfectly smooth finish.
Can a pressure washer remove road tar?
It is not recommended to use a pressure washer to remove road tar. Tar is an adhesive, oily substance. High-pressure water is more likely to damage or lift the edges of your paint’s clear coat than it is to remove the bonded tar. The correct method is to use a chemical solvent to dissolve the tar, allowing it to be wiped away gently, rather than trying to remove it with physical force.
How do I remove tar from plastic trim or glass?
The process is similar, but requires extra care. For unpainted plastic trim, avoid harsh solvents like kerosene that can cause fading. Stick to a dedicated commercial tar remover and test it on a hidden spot first. For glass, a tar remover is safe, but for a truly stubborn spot, you can carefully use a new, flat razor blade held at a low angle after lubricating the glass with a cleaner. Never use a razor blade on your car’s paint.