That sickening crunch. Whether it was a rogue shopping cart, a misjudged parking post, or a minor fender bender, a cracked car bumper is an instant eyesore. Your eyes are drawn to it every time you walk to your car, and the thought of a costly body shop bill can be just as painful as the initial impact.
But what if you could fix it yourself for a fraction of the cost?
Welcome to your definitive guide to a professional-quality DIY bumper repair. Fixing a cracked plastic bumper isn’t just about saving hundreds of dollars; it’s a deeply satisfying project that restores your car’s appearance and your pride in it. This guide will walk you through every step, from assessing the damage to applying the final, glossy clear coat.
Forget the intimidating jargon. We’re breaking it down so that even a complete beginner can achieve a flawless finish.
- Before You Start – Assessing the Damage
- Is Your Bumper a Good Candidate for DIY Repair?
- Understanding Your Bumper’s Material
- Bumper Repair vs. Replacement – A Quick Cost Analysis
- The DIY Bumper Repair Toolkit – Tools & Materials
- Preparation & Cleaning
- Repair Materials
- Sanding & Finishing
- Painting
- The Step-by-Step Guide – How to Fix a Cracked Bumper
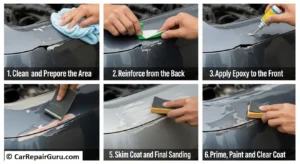
- Step 1 – Clean and Prepare the Area
- Step 2 – Create a V-Groove and Drill Stop Holes
- Step 3 – Reinforce from the Back
- Step 4 – Apply Epoxy to the Front
- Step 5 – Sand, Sand, Sand
- Step 6 – Skim Coat and Final Sanding
- Step 7 – Prime, Paint, and Clear Coat
- Alternative Repair Method – When to Consider Plastic Welding
- Common Mistakes to Avoid & Troubleshooting Tips
- Pro Tips for a Professional Finish
- Final Thoughts
- Frequently Asked Questions (FAQ)
- How long does a DIY bumper repair last?
- Can I repair a bumper without removing it from the car?
- What is the best bumper crack repair kit?
- Can you use super glue or Gorilla Glue on a car bumper?
Before You Start – Assessing the Damage
Before you start ordering supplies, let’s take a hard look at the bumper. Not all damage is a good candidate for a home repair. Being honest about the scope of the work is the first step to success.
Is Your Bumper a Good Candidate for DIY Repair?
- When to DIY: You’re in a great position to tackle this yourself if you’re dealing with:
- Small to medium cracks (less than 6-8 inches long).
- Hairline fractures or spiderwebbing cracks.
- Scuffs, gouges, and small punctures (the size of a quarter or less).
- When to Call a Professional: It’s best to head to a body shop if your bumper has:
- Major structural damage: Large, shattered pieces or a bumper that is severely deformed.
- Damage near sensors: Modern bumpers house parking sensors, cameras, and crucial ADAS (Advanced Driver-Assistance Systems) equipment. A bad repair can misalign or damage these sensitive electronics.
- Complex curves and body lines: Repairing a crack over a sharp, complex crease is extremely difficult to sand and finish perfectly.
- Hidden damage: If the impact was hard enough to crack the plastic cover, it may have damaged the metal reinforcement bar underneath.
Understanding Your Bumper’s Material
Most modern car bumpers are made from a thermoplastic. Knowing the type helps you choose the right repair materials. Look on the back of the bumper for a stamp inside a small triangle. You’ll likely see:
- PP (Polypropylene)
- TPO (Thermoplastic Olefin)
- PPO (Polyphenylene Oxide)
Most cracked plastic bumper repair kits are designed to be flexible and work with these common types, but for methods like plastic welding, matching the material is crucial.
Bumper Repair vs. Replacement – A Quick Cost Analysis
Still on the fence? Let the numbers talk. This comparison clearly answers the common question about the cost to repair a cracked bumper.
| Repair Option | Estimated Cost Range | Best For |
|---|---|---|
| DIY Repair | $50 – $150 | Minor to moderate cracks and holes. |
| Professional Repair | $300 – $700 | Larger cracks, damage on complex lines, or if you lack the time/confidence. |
| Full Replacement | $500 – $1,500+ | Shattered bumpers or when repair costs exceed replacement value. |
The choice is clear: for most common cracks, a DIY approach offers incredible savings.
The DIY Bumper Repair Toolkit – Tools & Materials
Gathering everything you need beforehand makes the process smooth and enjoyable. Here’s your shopping list.
Essential Safety Gear
- Safety Glasses: Non-negotiable. Protect your eyes from debris and chemicals.
- Respirator/Mask: You’ll be sanding plastic and spraying paint. A good mask is essential.
- Nitrile Gloves: Protect your hands from epoxies, fillers, and paints.
Preparation & Cleaning
- Automotive Degreaser (or just soap and water)
- Isopropyl Alcohol
- Clean Microfiber Towels
Repair Materials
- Cracked Plastic Bumper Repair Kit: This is your hero product. Look for a kit that includes a two-part epoxy or urethane adhesive. Brands like 3M are industry standards.
- Fiberglass or Plastic Reinforcement Mesh: This is critical for giving the repair strength from behind.
- Plastic Adhesion Promoter: A clear spray that helps primer and paint stick to slick plastic.
Sanding & Finishing
- Rotary Tool (like a Dremel) with a V-groove bit: This is the secret to a strong repair.
- Sandpaper (various grits): You’ll need coarse (80-grit), medium (180-grit), and fine (320-grit, 400-grit).
- Sanding Block: Ensures a flat, even surface.
- Body Filler / Glazing Putty: For filling any tiny pinholes or imperfections before painting.
Painting
- Automotive Primer (Spray Can): Creates a uniform surface for the paint.
- Color-Matched Automotive Base Coat (Spray Can): Find your car’s paint code (usually on a sticker in the driver’s side doorjamb) and order a can from a reputable auto parts store or online supplier.
- Automotive Clear Coat (Spray Can): A 2K (two-part) clear coat in a can offers a much more durable, gas-resistant, and professional finish than a standard 1K clear coat. It’s worth the extra cost.
The Step-by-Step Guide – How to Fix a Cracked Bumper
With your tools ready, it’s time for the magic. Follow these steps carefully for a repair that will last.
Step 1 – Clean and Prepare the Area
First, give the entire bumper a thorough wash with soap and water to remove loose dirt. Then, focus on the damaged area. Use a degreaser or isopropyl alcohol on a clean towel to remove all wax, road grime, and oils. The repair will only be as strong as the surface it sticks to.
Step 2 – Create a V-Groove and Drill Stop Holes
This is the most important step for structural integrity.
- Drill Stop Holes: Using a small drill bit, drill a tiny hole at the very end of each crack. This relieves the stress and prevents the crack from spreading further.
- Create the V-Groove: With your rotary tool, carefully grind a “V” shaped channel along the entire length of the crack. Don’t go all the way through. This V-groove dramatically increases the surface area for the epoxy to grab onto, creating a powerful bond. If possible, do this on both the front and back of the bumper.
Step 3 – Reinforce from the Back
The real strength of a bumper repair comes from the inside.
- Sand the area around the crack on the inside of the bumper with 80-grit sandpaper to rough it up.
- Clean it with alcohol.
- Mix your two-part epoxy and apply a thin layer over the crack.
- Press your fiberglass mesh firmly into the wet epoxy.
- Apply another layer of epoxy over the mesh, making sure to fully saturate it. Let it cure completely according to the manufacturer’s instructions.
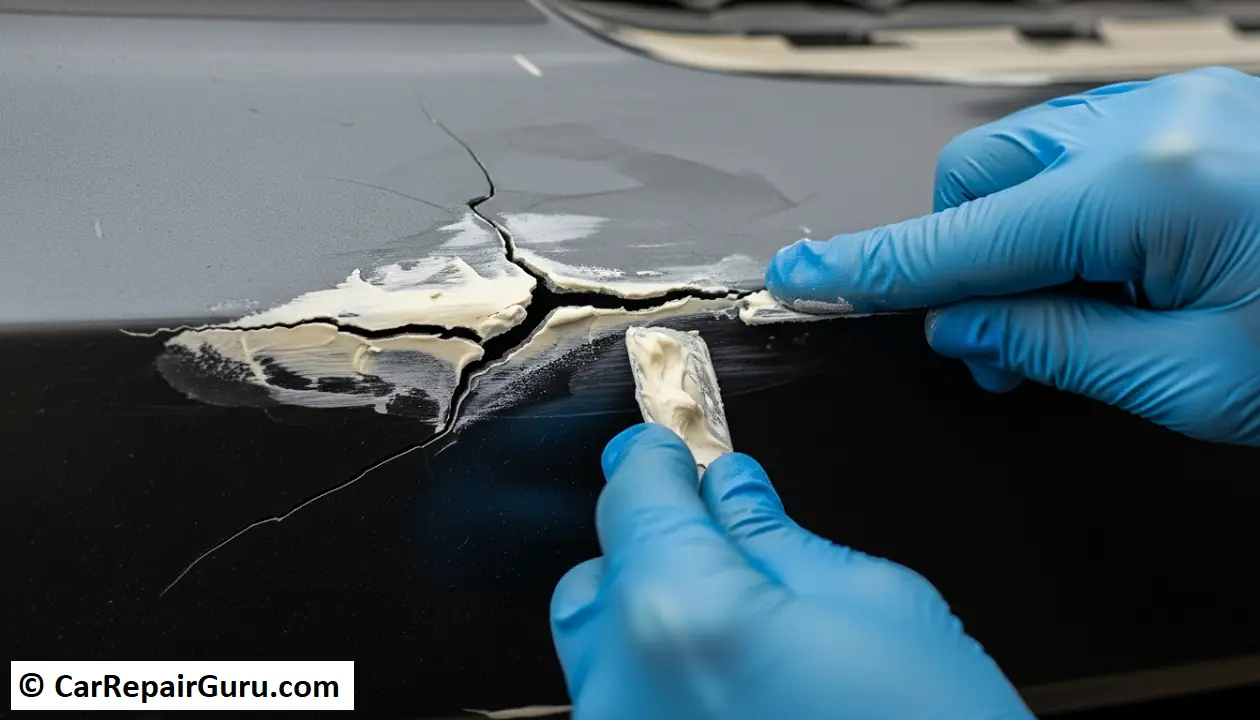
Step 4 – Apply Epoxy to the Front
Now, let’s fix the visible side.
- Mix a new batch of your two-part epoxy.
- Using a small plastic spreader, press the epoxy firmly into the V-groove you created.
- Slightly overfill the area. It’s much easier to sand down excess material than it is to fill in low spots later. Let it cure fully (this can take several hours).
Step 5 – Sand, Sand, Sand
Patience is your best tool here.
- Start with 80-grit sandpaper on a sanding block. Your goal is to sand the cured epoxy down until it is perfectly flush with the surface of the bumper.
- Once it’s level, switch to 180-grit sandpaper to remove the deep scratches from the 80-grit.
- Finally, use 320-grit sandpaper to smooth the entire area. Feather the edges by sanding slightly beyond the repair area to create a seamless transition between the repair and the original bumper.
Step 6 – Skim Coat and Final Sanding
Wipe the area clean. You might notice tiny pinholes or low spots.
- Apply a very thin layer of glazing putty or body filler over the entire repair area.
- Once it’s dry, use 400-grit sandpaper for the final sanding. When you run your hand over it (with your eyes closed!), it should feel perfectly smooth.
Step 7 – Prime, Paint, and Clear Coat
The final transformation!
- Mask: Use masking tape and paper to mask off everything around the repair area. Create a “soft edge” by rolling the tape back on itself to avoid a hard paint line.
- Prime: Wipe the area one last time with alcohol. Spray 2-3 light coats of automotive primer, letting each coat dry for about 10-15 minutes.
- Paint: Apply your color-matched base coat in several light, sweeping coats. Don’t try to cover it all at once. Build the color up gradually until it’s uniform.
- Clear Coat: This is what provides the gloss and protection. Apply 2-3 wet coats of clear coat. The first coat should be light, and the following coats a bit heavier. Overlap your passes by about 50% for an even finish.
Let it all cure for at least 24 hours before removing the masking tape. Avoid washing the car for about a week.
Alternative Repair Method – When to Consider Plastic Welding
For those wanting the absolute strongest repair, there’s another option: plastic welding bumper repair. This method uses a specialized hot air tool to melt the plastic of the bumper and a compatible plastic filler rod together, essentially fusing the crack back into one solid piece.
- Pros of Plastic Welding:
- Creates an incredibly strong, flexible bond.
- Excellent for repairing torn mounting tabs or reconstructing missing pieces.
- No need for chemical adhesives.
- Cons of Plastic Welding:
- Requires a dedicated plastic welding kit, which is more expensive than an epoxy kit.
- Has a steeper learning curve to master the correct temperature and speed.
- When to Choose It: Opt for plastic welding if you’re dealing with a long, structural crack in a high-flex area or if you need to re-attach a critical mounting bracket.
Common Mistakes to Avoid & Troubleshooting Tips
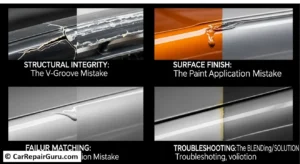
Avoid these pitfalls to ensure your repair is perfect the first time.
- Mistake 1: Insufficient Cleaning & Prep
- Problem: The epoxy peels away, or the paint bubbles up because it couldn’t stick.
- Solution: Be meticulous. Degrease, sand, and clean with alcohol at every stage.
- Mistake 2: Skipping the V-Groove
- Problem: The epoxy is just a surface patch, and the crack reappears under stress.
- Solution: Always grind the V-groove. It’s the key to a bond that holds.
- Mistake 3: Rushing Curing Times
- Problem: Sanding into soft epoxy or painting over tacky primer ruins the finish.
- Solution: Read the instructions on your products and obey them. Temperature and humidity affect curing times, so give it extra time in cool or damp weather.
- Mistake 4: Incorrect Paint Application
- Problem: Paint runs, drips, or has an “orange peel” texture.
- Solution: Keep the spray can about 6-8 inches from the surface. Apply light coats and keep the can moving.
- Troubleshooting: My Paint Doesn’t Match!
- Solution: Double-check you ordered the right paint code. Car paint also fades over time. Sometimes, a perfect match is impossible. You can “blend” the new paint into the surrounding area by lightly spraying your final coats over a wider area to create a gradual transition.
Pro Tips for a Professional Finish
- Work in a Clean, Calm Space: Wind and dust are your enemies when painting. Work in a garage on a calm day if possible.
- Temperature Matters: Try to work in temperatures between 60-80°F (15-27°C). Products don’t cure well when it’s too cold, and paint can dry too fast when it’s too hot.
- Practice Your Spraying: Before painting your bumper, practice your spray can technique on a piece of cardboard to get a feel for the nozzle and spray pattern.
Final Thoughts
Repairing a cracked car bumper is more than just a task; it’s a project that builds confidence and skill. By following this guide, you’ve transformed an ugly crack into an invisible repair, saved a significant amount of money, and learned a valuable new skill. The next time you see that smooth, glossy finish where a crack used to be, you’ll feel an immense sense of satisfaction.
Now that your bumper looks factory-fresh, maybe it’s time to tackle another project. Check out our guide on how to restore your foggy headlights to complete your car’s front-end makeover!
Have a question or want to show off your amazing results? Drop a comment below
Frequently Asked Questions (FAQ)
How long does a DIY bumper repair last?
When done correctly using the steps above—especially the V-groove and backside reinforcement—the repair is permanent and should last for the life of the car.
Can I repair a bumper without removing it from the car?
Yes, for most small, easily accessible cracks, you can repair it on the car. However, removing it makes it much easier to clean and reinforce the back, which results in a significantly stronger, better repair.
What is the best bumper crack repair kit?
Kits from brands like 3M, SEM, or Permatex that use a two-part urethane or epoxy adhesive are highly recommended. They are flexible, strong, and designed specifically for automotive plastics.
Can you use super glue or Gorilla Glue on a car bumper?
Absolutely not. These glues are brittle and have no flexibility. A car bumper constantly flexes from wind pressure and temperature changes. Super glue will crack and fail almost immediately. You must use a specialized, flexible adhesive.