There’s nothing quite like that sinking feeling. You walk back to your car and see it—a nasty scuff, a spiderweb crack, or an ugly dent in your bumper. It’s frustrating, it makes your whole car look shabby, and your first thought is probably, “Well, this is going to cost a fortune.” But what if I told you it doesn’t have to? What if you could fix it yourself and get a result you can be proud of?
Welcome to your complete guide to DIY plastic bumper repair. Think of me as your mentor in the garage. I’m here to walk you through every step, demystify the process, and show you that with a little patience, you absolutely have the skill to do this. We’re going to turn that frustrating damage into a satisfying project that saves you money and teaches you a valuable new skill. You’ve got this.
- Before You Begin – Assess the Damage & Gather Your Gear
- Can This Bumper Be Repaired? (DIY vs. Professional)
- Safety First: Essential Precautions
- Essential Tools & Materials Checklist
- Understanding Your Bumper – What Type of Plastic Is It?
- Why Plastic Type Matters for a Lasting Repair
- How to Identify Your Bumper’s Plastic Type
- Choosing the Right Repair Products for Your Plastic
- Step-by-Step Repair Guides for Common Bumper Damage
- How to Fix Light Scratches and Scuffs (Scuffed Bumper Repair)
- How to Repair a Cracked Plastic Bumper (Bumper Crack Repair)
- How to Fix a Minor Dent (Plastic Bumper Dent Repair)
- Special Case – Repairing Textured (Unpainted) Black or Gray Bumpers
- The Challenge: You Can’t Just Sand and Paint
- Step 1: Repairing Scuffs and Gouges on Textured Plastic
- Step 2: Restoring Color and Recreating Texture
- The Finishing Touches – How to Make Your Repair Invisible
- The Art of Sanding for a Flawless Finish
- Priming, Painting, and Clear Coating Like a Pro
- Common Mistakes to Avoid in DIY Bumper Repair
- Enjoy Your Restored Bumper and a Job Well Done
- Your Plastic Bumper Repair Questions Answered
- Can you repair a cracked plastic bumper permanently?
- What is the best filler for plastic bumpers?
- Do I need to remove the bumper to repair it?
- How much does a plastic bumper repair kit cost?
Before You Begin – Assess the Damage & Gather Your Gear
Alright, before we jump in, let’s make a game plan. A great repair starts with good preparation. This is where we figure out exactly what we’re up against and make sure we have the right tools for the job.
Can This Bumper Be Repaired? (DIY vs. Professional)
First things first, let’s be realistic. Most common bumper issues are perfect for a DIY fix.
- Good for DIY: Surface scratches, deep scuffs, small punctures, hairline cracks, and minor, flexible dents. If it’s cosmetic, you can probably handle it.
- Call a Professional: Is the bumper shattered into pieces? Are the mounting tabs that hold it to the car broken off? Is the damage near sensitive parking sensors or driver-assist cameras? If so, it’s best to let a body shop handle it to ensure everything functions safely.
Safety First: Essential Precautions
Your safety is non-negotiable. We’re working with chemicals and creating dust, so let’s do it right.
- Work in a well-ventilated space, like an open garage or outdoors.
- Always wear safety glasses and nitrile gloves.
- When sanding or painting, wear a respirator mask. Trust me, you don’t want to be breathing that stuff in.
Essential Tools & Materials Checklist
Here’s your shopping list. Having everything ready will make the whole process smooth and stress-free.
- Cleaning: Automotive degreaser, car soap, and a few clean microfiber towels.
- Repair:
- A quality plastic bumper repair kit (a two-part epoxy or urethane is fantastic).
- Reinforcing mesh tape (for cracks).
- A heat gun (for dents).
- Sanding: A sanding block and sandpaper in various grits (I recommend 180, 320, and 400 for shaping, and 600-grit wet/dry for finishing).
- Finishing:
- Glazing putty (for filling tiny pinholes).
- Adhesion promoter (this is a crucial, don’t-skip-it step!).
- Sandable automotive primer.
- Automotive paint matched to your car’s color code (you can find this on the sticker inside your driver’s side door).
- Automotive clear coat.
Understanding Your Bumper – What Type of Plastic Is It?
Okay, here’s a pro tip that many guides skip. Not all plastics are the same, and knowing what you’re working with helps ensure your repair lasts forever.
Why Plastic Type Matters for a Lasting Repair
Different plastics need slightly different repair materials to bond properly. Using the wrong filler can cause your hard work to crack or peel off down the road. We don’t want that!
How to Identify Your Bumper’s Plastic Type
This is easier than it sounds. If you can, look on the back of your bumper cover. You’ll find a code stamped into the plastic. It will look like >PP<, >TPO<, or >ABS<. These are the most common types.
Choosing the Right Repair Products for Your Plastic
When you buy your repair kit, just check the label to see if it’s compatible with your plastic type. Most modern kits are designed for common types like TPO and PP, but it never hurts to double-check.
Step-by-Step Repair Guides for Common Bumper Damage
Alright, time for the fun part! Let’s get our hands dirty. We’ll tackle the most common types of damage one by one. Find the one that matches your situation and let’s get started.
How to Fix Light Scratches and Scuffs (Scuffed Bumper Repair)
Let’s start with the easiest win. If you just have light paint scuffs or clear coat scratches, you might not even need to paint.
- Clean the Area: Wash the bumper with soap and water, then wipe it down with a degreaser to remove any wax or oils.
- Wet Sand: Wet a piece of very fine-grit sandpaper (1500 or 2000-grit) and lightly sand the scuffed area. Keep the surface wet. The goal is just to smooth out the scratch, not remove a lot of paint.
- Compound & Polish: Apply a bit of automotive polishing compound to a microfiber cloth and rub the area in a circular motion to buff away the sanding marks and restore the shine.
- Wax: Finish with a coat of wax to protect your work. See? Good as new.
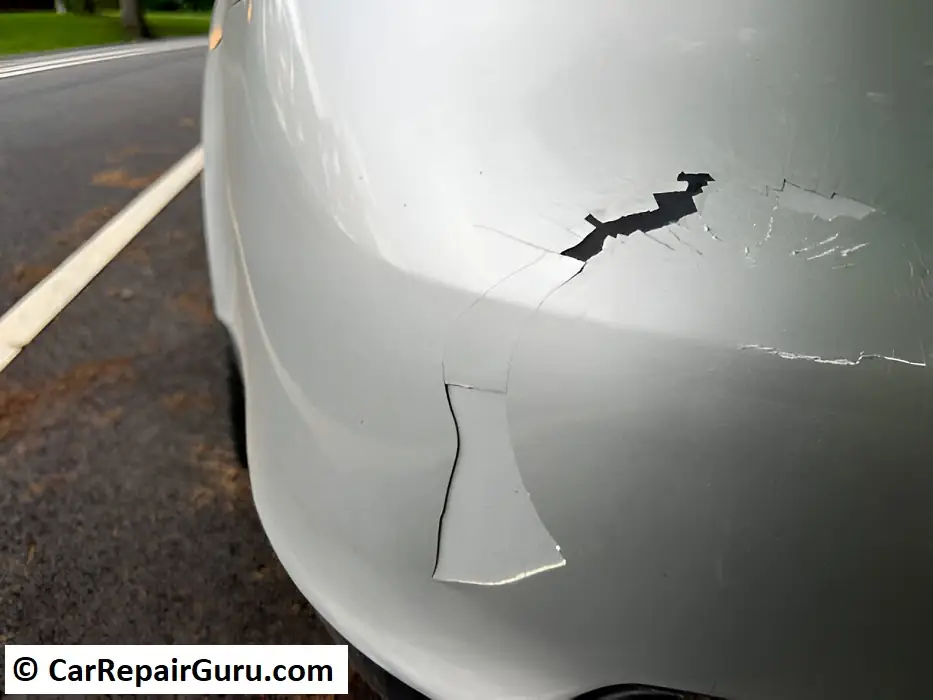
How to Repair a Cracked Plastic Bumper (Bumper Crack Repair)
A crack looks scary, but don’t worry, this is totally manageable. The key is to make it strong from the inside out.
- Preparation is Key: Clean the area thoroughly. Now, take a small drill bit and drill a tiny hole at the very end of the crack. This is a pro technique called “stop-drilling,” and it prevents the crack from spreading any further.
- Groove the Crack: Using a rotary tool (like a Dremel), carefully grind a V-shaped groove along the crack on the outside. This gives your filler a perfect channel to sit in and grab onto.
- Repair from Behind: This is the most important step for strength. On the backside of the bumper, sand the area around the crack to rough it up. Cut a piece of reinforcing mesh to cover the crack, mix your two-part epoxy, and apply it over the mesh. This acts like a splint and makes the repair incredibly strong.
- Fill the Crack: Now, move to the front. Mix and apply your plastic filler into the V-groove, slightly overfilling it.
- Sand Smooth: Once the filler is rock hard, it’s time to shape it. Start with 180-grit sandpaper on a sanding block to knock down the high spots, then move to 320-grit to refine the shape until it’s perfectly flush with the bumper.
How to Fix a Minor Dent (Plastic Bumper Dent Repair)
This part is actually pretty cool. Modern plastic bumpers have memory, and we can use that to our advantage.
- Clean Up: You know the drill—make sure the area is clean.
- Apply Heat: Grab your heat gun. On a low-to-medium setting, gently warm the dented area. Keep the gun moving constantly, about 6-8 inches away. You’re not trying to melt it, just make it soft and pliable.
- Push it Out: If you can reach behind the bumper, now is the time to gently push the dent out with your hands (wear gloves!). It should pop back into its original shape with a little encouragement.
- Cool it Down: To help the plastic lock into its new shape, you can rapidly cool it with a damp cloth.
Special Case – Repairing Textured (Unpainted) Black or Gray Bumpers
Got one of those rugged, unpainted bumpers on your SUV or truck? No problem. The repair process is a bit different, but just as doable.
The Challenge: You Can’t Just Sand and Paint
The trick here is that sanding will remove that unique, grainy texture. Standard paint and filler will look obviously out of place. We need a different approach.
Step 1: Repairing Scuffs and Gouges on Textured Plastic
- For light scuffs: Often, just gently heating the scuffed area with a heat gun is enough. The heat can bring the natural oils and color back to the surface and hide the mark completely.
- For deeper gouges: Fill the gouge with a flexible black plastic filler. Once it’s cured, sand it as smooth as you can.
Step 2: Restoring Color and Recreating Texture
This is the magic. After your repair, use a dedicated “black trim restorer” product to even out the color of the entire bumper. For filled areas, you can buy “textured aerosol spray” paint that mimics that grainy factory finish. Apply it in light coats until it blends perfectly.
The Finishing Touches – How to Make Your Repair Invisible
You’ve done the hard work. Now it’s time for the artistry. This is how we make the repair completely disappear.
The Art of Sanding for a Flawless Finish
Your goal is to “feather the edges” of your repair area. After shaping with 320-grit, switch to 400 or 600-grit wet/dry sandpaper. Sand the repair and the surrounding 2-3 inches of paint. This will create a seamless transition so you don’t see any lines after painting.
Priming, Painting, and Clear Coating Like a Pro
- Mask the Area: Use painter’s tape and newspaper to mask off everything you don’t want painted.
- Apply Adhesion Promoter: Spray one light coat over the entire repair area. This is the chemical handshake that ensures your primer and paint stick to the plastic. Do not skip this!
- Prime: Apply 2-3 light coats of sandable primer. Let each coat dry for about 10 minutes.
- Wet Sand the Primer: Once dry, lightly wet sand the primer with 600-grit paper until it feels glass-smooth.
- Apply Base Coat (Color): Now for the color! Apply several very light coats of your color-matched paint, overlapping each pass. It’s better to do 4 light coats than 2 heavy ones.
- Apply Clear Coat: After the color is dry to the touch (usually about 30-60 minutes), finish with 2-3 medium coats of clear coat. This provides the gloss and protection.
Common Mistakes to Avoid in DIY Bumper Repair
Let me share some wisdom I learned the hard way so you can get it right the first time.
- Skipping the Cleaning: Dirt, oil, or wax is the #1 enemy of a good repair. Clean it, then clean it again.
- Using the Wrong Filler: Never use standard Bondo on a flexible bumper. It will crack. Make sure your product is for plastic.
- Forgetting Adhesion Promoter: I’m mentioning it again because it’s that important. Without it, your paint will peel.
- Applying Paint Too Heavily: This leads to runs and drips. Light, patient coats are the secret.
Enjoy Your Restored Bumper and a Job Well Done
And that’s it! Take a step back and admire your work. The dent is gone, the crack has vanished, and your car looks fantastic again. You didn’t just fix a piece of plastic; you took on a challenge, learned a new skill, and saved a ton of money.
Following these steps for plastic bumper repair proves that with the right guidance and a little bit of effort, you can achieve professional-quality results right in your own driveway. Be proud of what you’ve accomplished. Now, go for a drive. You’ve earned it.
Your Plastic Bumper Repair Questions Answered
Can you repair a cracked plastic bumper permanently?
Absolutely. When you use reinforcing mesh and a quality two-part epoxy from behind, the repaired area can actually be stronger than the rest of the bumper.
What is the best filler for plastic bumpers?
Look for a flexible, two-part filler specifically designed for automotive plastics. Urethane or epoxy-based products are excellent choices.
Do I need to remove the bumper to repair it?
For minor scuffs, no. But for cracks and dents, removing the bumper makes life so much easier. It gives you access to the back for reinforcement and prevents overspray on the rest of your car.
How much does a plastic bumper repair kit cost?
You can get a great kit for between $30 and $70, depending on how comprehensive it is. Compare that to the hundreds you’d spend at a body shop!