We’ve all been there. That sickening crunch as your side mirror makes unfortunate contact with a garage frame, a rogue recycling bin, or another car in a tight parking lot. Your stomach drops, and your mind immediately jumps to dollar signs. A broken car side mirror isn’t just an eyesore; it’s a serious safety issue that can create dangerous blind spots.
But here’s the good news: you don’t necessarily have to hand over a blank check to a mechanic. Replacing a car side mirror is one of the most manageable and rewarding DIY car repair jobs you can tackle.
This ultimate guide will walk you through everything you need to know. We’ll cover how to diagnose the damage, find the right part, and provide step-by-step instructions for a full replacement. Whether you’re a first-time DIYer or just want to be informed before heading to the shop, we’ve got you covered.
- Is It Legal and Safe to Drive with a Broken Side Mirror?
- DIY vs. Professional Replacement – Which is Right for You?
- Understanding Your Needs – Replace Side Mirror Glass Only vs. Full Assembly
- When to Replace Just the Glass –
- When to Replace the Full Assembly –
- How to Find the Right Replacement Mirror for Your Car
- Step-by-Step Guide – How to Replace a Full Side Mirror Assembly
- Before You Begin – Safety First
- Part 1 – Tools and Materials Needed
- Part 2 – Removing the Interior Door Panel
- Part 3 – Disconnecting and Removing the Old Mirror
- Part 4 – Installing the New Mirror
- Part 5 – Testing and Reassembly
- Quick Guide – How to Replace Side Mirror Glass Only
- Car Side Mirror Replacement Cost Breakdown
- You’ve Got This!
- Frequently Asked Questions (FAQ)
Is It Legal and Safe to Drive with a Broken Side Mirror?
Before we grab our tools, let’s address the big question: Can you even drive like this?
The short answer is: it’s risky. Legally, most states and countries require your vehicle to have at least two functioning mirrors that provide a clear view to the rear. This typically includes the driver-side mirror and the interior rearview mirror. While a broken passenger-side mirror might not get you a ticket immediately, a missing or shattered driver-side mirror almost certainly will.
More importantly, it’s a matter of safety. Your side mirrors are essential for changing lanes, parking, and being aware of the traffic around you. Driving without one is like trying to run with one eye closed—you can do it, but you’re missing a huge piece of the picture.
DIY vs. Professional Replacement – Which is Right for You?
Deciding whether to tackle this yourself or call a professional comes down to cost, complexity, and your comfort level. Let’s break it down.
| Factor | DIY Replacement | Professional Replacement |
|---|---|---|
| Cost | Low. You only pay for the part ($20 – $300+). | High. You pay for the part plus labor ($75 – $200+ per hour). |
| Time | 30-90 minutes, depending on your skill. | Usually done in under an hour. |
| Best For | Basic manual or power mirrors. Anyone comfortable with simple hand tools. | Complex mirrors with cameras, sensors, and auto-dimming. People with no time or desire to do it themselves. |
| Pros | Huge cost savings, sense of accomplishment. | Fast, convenient, and the work is usually guaranteed. |
| Cons | You need to buy the right part and have the right tools. Risk of breaking a plastic clip. | Can be very expensive, especially for luxury or feature-heavy vehicles. |
For most standard cars, a DIY side mirror replacement is one of the most manageable DIY car repair jobs you can tackle to save a few hundred dollars.
Understanding Your Needs – Replace Side Mirror Glass Only vs. Full Assembly
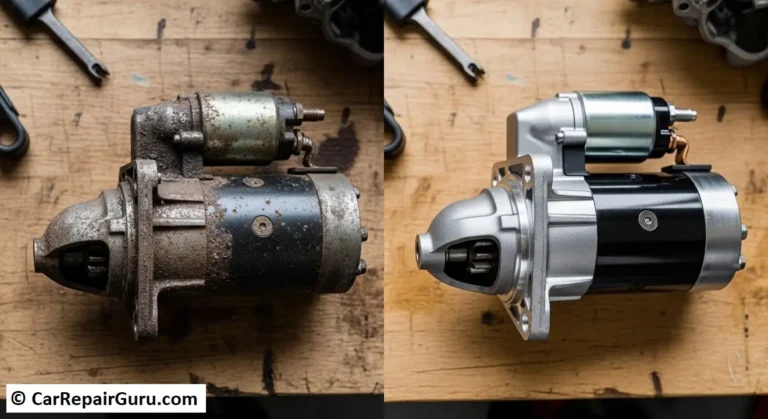
First, assess the damage. What’s actually broken? This determines which part you need to buy.
When to Replace Just the Glass –
This is the easiest and cheapest fix. You should replace the side mirror glass only if:
- The glass is cracked or shattered, but the outer shell (the colored housing) is perfectly fine.
- The mirror motor still works—you can hear it whirring and trying to adjust when you use the switch inside the car.
- The turn signal (if equipped) on the mirror still lights up.
When to Replace the Full Assembly –
You’ll need a complete side mirror assembly replacement if:
- The plastic housing is cracked, shattered, or completely knocked off.
- The mirror is dangling by its wires.
- The mirror won’t adjust at all, and you don’t hear the motor working.
- The base that connects the mirror to the door is broken.
How to Find the Right Replacement Mirror for Your Car
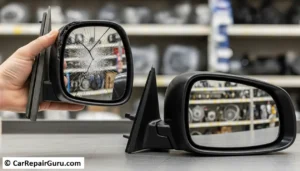
Ordering the wrong part is the #1 mistake in DIY repair. To avoid it, get your vehicle’s exact details:
- Year, Make, and Model (e.g., 2018 Honda Civic)
- Identify Your Mirror’s Features. Modern mirrors are more than just glass. Check if yours has:
- Power Adjust: Most cars have this.
- Heated: A small squiggly icon on the glass. Essential for winter driving conditions.
- Turn Signal Indicator: An arrow that flashes in the housing or on the glass.
- Blind Spot Monitor: A light that illuminates when a car is in your blind spot.
- Puddle Light: A small light on the bottom that illuminates the ground.
- Auto-Dimming or Camera: Usually found on higher-end models.
Where to Buy Parts:
- Online Retailers (RockAuto, 1A Auto, PartsGeek): Often the best balance of price and selection for aftermarket parts.
- Local Auto Parts Stores (AutoZone, O’Reilly, NAPA): Great if you need the part today.
- Dealership: They sell OEM (Original Equipment Manufacturer) parts that are a perfect match but are also the most expensive.
- Salvage/Junkyard: The cheapest option, but the part is used and may have cosmetic flaws.
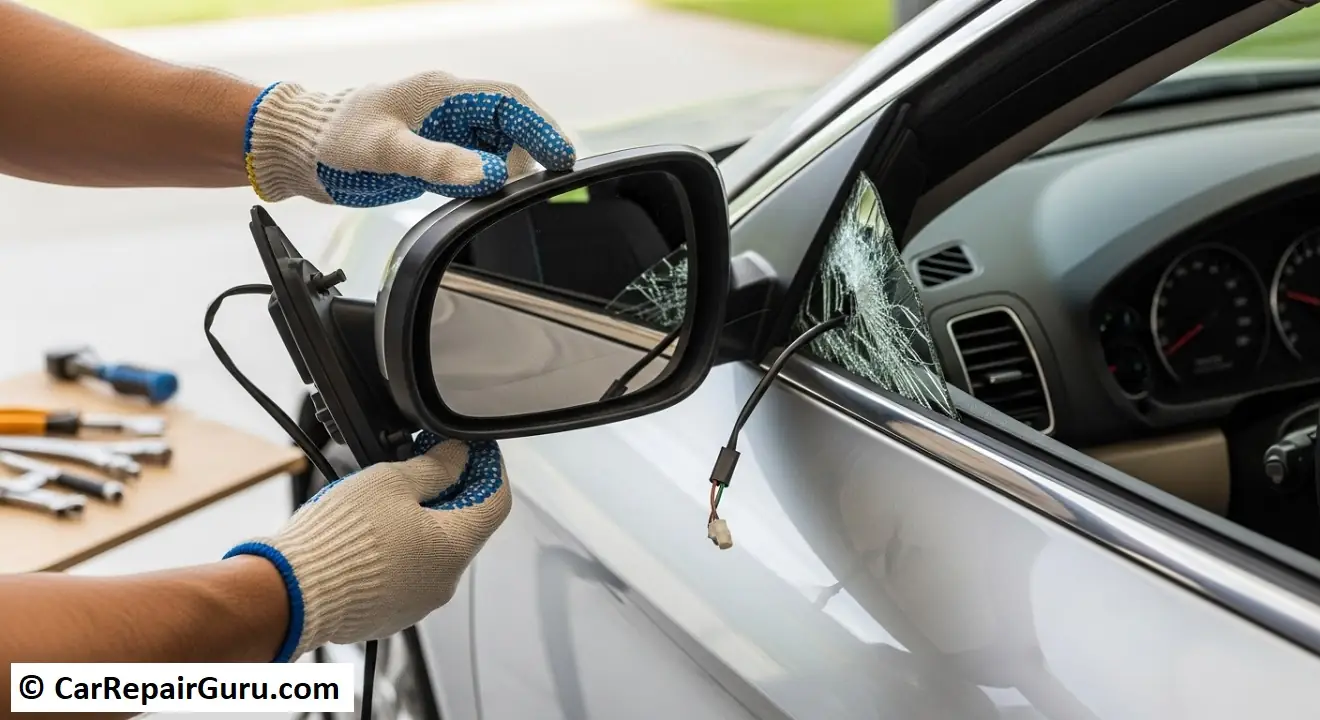
Step-by-Step Guide – How to Replace a Full Side Mirror Assembly
Ready to get started? This is the core of the project. It may seem intimidating, but it’s just a few simple steps. We’ll focus on a typical modern car where you need to remove the interior door panel.
Before You Begin – Safety First
- Park your car on a level surface and engage the parking brake.
- Roll the window all the way down. This gives you a better grip on the door panel.
Part 1 – Tools and Materials Needed
Gather everything before you start to avoid multiple trips to the garage.
- New side mirror assembly
- Socket and ratchet set (10mm is a very common size for this job)
- Plastic trim removal tool kit (This is a must-have! It prevents you from scratching or breaking the plastic panels. A flathead screwdriver wrapped in tape is a poor substitute.)
- Phillips head screwdriver
- Needle-nose pliers (optional, but helpful)
- Work gloves and safety glasses
Part 2 – Removing the Interior Door Panel
The mirror is bolted on from the inside, so the door panel has to come off. Don’t worry, it’s held on by a few screws and some simple plastic clips.
- Find the Hidden Screws: Look for screws inside the door handle cavity and in the armrest pull-cup. There might be a small plastic cover you need to pop off with your trim tool to access them.
- Pop Off the Trim: Starting at the bottom corner of the door, slide your plastic trim tool between the door panel and the metal door frame. Gently pry outwards until you hear a pop. That’s the first clip releasing.
- Work Your Way Around: Continue sliding the tool and prying every 6-8 inches. You’ll hear several pops as the clips release.
- Lift the Panel Up and Off: Once all the clips are free, the panel will be hanging from the top of the window sill. Lift it straight up and then out, towards you.
- Disconnect the Wires: The panel is still connected by wires and cables. Carefully unclip the electrical connectors for the power window and lock switches. The door handle usually has a small cable with a plastic clip; unhook it. Now you can set the panel aside.
Part 3 – Disconnecting and Removing the Old Mirror
With the panel off, you have a clear view of the prize.
- Access the Bolts: You’ll see a small, triangular plastic piece or a section of foam insulation covering the mirror bolts. Gently pop this cover off or peel back the foam.
- Unplug the Connector: Find the electrical connector for the mirror. Press the small tab on it and pull it apart to disconnect.
- Unbolt the Old Mirror: You should now see three nuts or bolts (usually 10mm). While holding the broken mirror on the outside with one hand so it doesn’t fall and scratch your paint, use your socket wrench to remove the nuts.
- Remove the Mirror: Once the last nut is off, carefully guide the mirror and its wiring out of the door.
Part 4 – Installing the New Mirror
You’re on the home stretch!
- Clean the Area: Wipe down the mounting surface on the door to ensure a good fit.
- Position the New Mirror: Carefully feed the wiring of the new mirror assembly through the hole in the door. Align the mounting studs with the holes and press it into place.
- Secure the Bolts: Hand-tighten the nuts first to make sure everything is aligned. Then, use your wrench to snug them down. Don’t overtighten—just firm is fine.
- Reconnect the Wiring: Plug the new mirror’s electrical connector back into the door harness. You should hear a click.
Part 5 – Testing and Reassembly
This is the most important step. Do not put the door panel back on yet!
- TEST EVERYTHING: Temporarily reconnect the window and lock switch connectors to the door panel. Turn the car’s power on (you don’t need to start the engine).
- Use the switch to adjust the mirror up, down, left, and right to ensure full range of motion.
- If you have a heated mirror, turn on your rear defroster and feel if the glass gets warm.
- Test the turn signal and any blind-spot monitors.
- Reassemble: If everything works perfectly, you can put it all back together. Installation is the reverse of removal.
- Reconnect the door handle cable and all electrical connectors to the panel.
- Hook the top of the door panel over the window sill first.
- Line up the plastic clips with their holes and give the panel a firm push to snap them back into place.
- Reinstall the screws in the armrest and door handle.
- You’re done! Step back and admire your work.
Quick Guide – How to Replace Side Mirror Glass Only
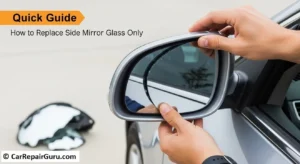
If only your glass is cracked, you’re in luck. This is a 15-minute job.
- Tools: New mirror glass (make sure it comes with the plastic backing plate attached), a heat gun or hairdryer, gloves, and a pry tool.
- Apply Gentle Heat: Wear gloves! Use a heat gun on a low setting (or a hairdryer on high) and wave it across the broken glass for about 30-60 seconds. This softens the adhesive holding it to the motor.
- Pry Off the Old Glass: Carefully work your pry tool behind the broken glass and gently pry it away from the housing. It should pop off the motor mount.
- Snap on the New Glass: Your new mirror glass will have a plastic backing plate designed to snap onto the motor. Align it carefully and press firmly in the center. You will hear and feel a solid click when it’s securely attached.
Car Side Mirror Replacement Cost Breakdown
Curious about how much you just saved? Here’s a typical cost comparison.
| Item / Service | DIY Cost Range | Professional Cost Range |
|---|---|---|
| Mirror Glass Only | $15 – $50 | $75 – $150 |
| Basic Manual Assembly | $30 – $100 | $150 – $250 |
| Power/Heated Assembly | $75 – $300+ | $250 – $700+ |
| Advanced (Camera/Sensor) | $200 – $1000+ | $500 – $2,000+ |
Disclaimer: Costs are estimates and can vary widely based on vehicle make, model, and local labor rates.
You’ve Got This!
Replacing a broken car side mirror is the perfect project to build your confidence and save a significant amount of money. By following these steps and taking your time, you can get your car looking great and, more importantly, make it safe to drive again.
Have questions about your specific car? Drop a comment below, and we’ll do our best to help
Frequently Asked Questions (FAQ)
How long does it take to replace a side mirror?
For a first-timer, plan on about 60-90 minutes for a full assembly replacement. If you’re just replacing the glass, it will only take about 15 minutes. An experienced mechanic can do the full job in under 30 minutes.
Can I just use glue to fix my broken side mirror?
It’s not recommended. Gluing shattered glass back together is a temporary fix at best and will distort your view, creating a safety hazard. Superglue won’t hold up to weather and vibrations. It’s always better to replace the glass or the full unit.
Do I need to paint my new side mirror?
Most affordable aftermarket mirrors come in a standard matte or gloss black plastic finish, which looks fine on most cars. If you want a perfect color match, you’ll need to buy a “paint-to-match” version and have a body shop paint it, or buy a more expensive pre-painted OEM part from a dealership.
Will a replacement mirror have the “Objects in mirror are closer than they appear” text?
Yes, any quality aftermarket or OEM replacement for the passenger side (right side) will have this convex glass and the safety warning printed on it, just like the original.