Your car is full of complex systems, but none are more critical to your safety than your brakes. The ability to slow down and stop reliably is something we take for granted—until it’s compromised. Knowing when to replace brake pads isn’t just a matter of good car maintenance; it’s a fundamental skill for every responsible driver. It protects you, your passengers, and your wallet from more expensive repairs down the road.
So, how do you know it’s time? While most brake pads last between 30,000 and 70,000 miles, mileage is an unreliable guide. The most accurate way to know when to replace your brake pads is by recognizing the clear warning signs your car gives you. These symptoms range from specific sounds and changes in your brake pedal’s feel to a simple visual inspection.
This complete guide will walk you through everything you need to know. We’ll cover the 10 tell-tale signs your brakes need attention, what affects their lifespan, how to choose the right pads, typical replacement costs, and whether a DIY approach is right for you.
- How Do Brake Pads Work? A 60-Second Explainer
- The 10 Telltale Signs You Need New Brake Pads
- 1. High-Pitched Squealing or Screeching
- 2. Deep, Metallic Grinding Noise
- 3. Clicking Noises
- 4. Vibration or Pulsing in the Pedal or Steering Wheel
- 5. Your Car Pulls to One Side When Braking
- 6. A “Spongy” or Soft Brake Pedal
- 7. It Takes Longer to Stop (Reduced Performance)
- 8. The Brake Pad Warning Light is On
- 9. The Brake Pads Look Visibly Thin (< 3-4mm)
- 10. Excessive Brake Dust
- How Long Do Brake Pads Last? Mileage and Time Guidelines
- The High Cost of Delay – Consequences of Ignoring Worn Brake Pads
- 1. Critical Safety Risks and Reduced Stopping Power
- 2. Drastically Increased Repair Costs
- 3. Damage to Other Vehicle Components
- Ceramic vs. Semi-Metallic vs. Organic: Choosing the Right Brake Pads
- Ceramic Brake Pads
- Semi-Metallic Brake Pads
- Organic Brake Pads
- How to Visually Check Your Brake Pads (and When to Do It)
- Minimum Brake Pad Thickness Explained
- Step-by-Step Visual Inspection Guide
- How Often Should You Check?
- Breaking Down the Cost of Brake Pad Replacement
- Cost Factor 1: The Parts
- Cost Factor 2: The Labor
- Why a “Cheap” Brake Job Can Cost You More
- DIY vs. Professional Brake Replacement – What’s Right for You?
- The Case for DIY Replacement
- When to Call a Professional Mechanic
- Your Brakes Are Your Lifeline – Don’t Ignore the Signs
- Frequently Asked Questions (FAQ)
- Should I Replace Rotors at the Same Time as Brake Pads?
- Do Front or Rear Brake Pads Wear Out Faster?
- What Should I Do if My Brakes are Grinding?
- Can I Just Replace the Brake Pads on One Wheel?
How Do Brake Pads Work? A 60-Second Explainer
Before we dive into the warning signs, let’s quickly understand what’s happening every time you press the brake pedal. The simplest way to think about it is to picture the brakes on a bicycle. When you squeeze the lever, two rubber pads clamp down on the wheel’s rim, and the friction slows you down.
Your car’s braking system works on the same principle, just with more robust parts:
- Brake Rotor: A heavy, shiny metal disc that spins with your wheel.
- Brake Caliper: A hydraulic clamp that fits over the rotor.
- Brake Pads: Housed inside the caliper, these are blocks of high-friction material with a steel backing plate.
When you push the brake pedal, hydraulic fluid pressurizes the caliper, which squeezes the brake pads against the spinning rotor. The immense friction created converts the car’s kinetic energy into heat, slowing the vehicle down. This process naturally wears away a tiny bit of the friction material on the pad each time, which is why they eventually need to be replaced.
The 10 Telltale Signs You Need New Brake Pads
Your car is designed to communicate with you, and its braking system has several built-in ways to tell you it needs service. Learning to listen and feel for these signs is the key to catching worn pads early.
1. High-Pitched Squealing or Screeching
This is the most common and earliest warning sign. That sharp, high-pitched squeal you hear when you apply the brakes is often intentional. Most brake pads are manufactured with a small metal tab called a “wear indicator.” When the pad material wears down to a certain thinness, this tab makes contact with the brake rotor, creating that unmistakable screech. Think of it as your car’s built-in alarm system telling you, “Hey, it’s time to schedule a brake inspection soon!”
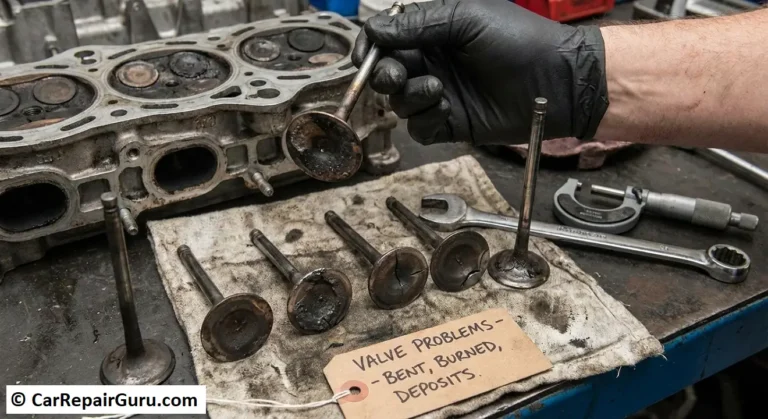
2. Deep, Metallic Grinding Noise
If the squealing has been ignored, it will eventually turn into a much harsher, louder sound: a deep, metallic grinding or growling. This is a critical warning. Grinding brakes mean the friction material on the pads is completely gone, and the metal backing plate is now grinding directly against the metal rotor. This is not only extremely dangerous—significantly reducing your stopping power—but it’s also causing severe and expensive damage to your brake rotors. If you hear this sound, stop driving the car immediately and have it towed to a mechanic.
3. Clicking Noises
A distinct clicking sound when you press or release the brake pedal can point to a couple of issues. Most commonly, it means the brake pads are loose or the hardware (clips and shims) that holds them in place has worn out or broken. While not as immediately dangerous as grinding, it indicates that the brake assembly isn’t secure and needs to be inspected and serviced promptly.
4. Vibration or Pulsing in the Pedal or Steering Wheel
Do you feel a shaking or vibrating sensation through the brake pedal or steering wheel when you slow down? This “pulsing” is a classic symptom of warped rotors. Rotors can become warped from the intense heat of heavy braking, but it’s often accelerated by driving on thin pads. The worn pads can’t absorb and distribute heat properly, leading to uneven wear and distortion on the rotor’s surface. New pads on a warped rotor won’t fix the problem; the rotor will need to be resurfaced or, more commonly, replaced.
5. Your Car Pulls to One Side When Braking
When you apply the brakes, your car should slow down in a straight, predictable line. If it consistently veers or pulls to the left or right, you have an issue in your braking system. This can be caused by unevenly worn brake pads (one side is more worn than the other) or, more frequently, a stuck brake caliper. A stuck caliper piston or slide pin can cause one pad to remain in constant contact with the rotor, wearing it out prematurely and causing the imbalance you feel.
6. A “Spongy” or Soft Brake Pedal
Your brake pedal should feel firm and responsive. If it feels soft, “spongy,” or you have to push it much further toward the floor than usual to engage the brakes, this is a serious safety concern. It often indicates there is air or moisture in the brake fluid lines, a problem known as a “brake bleed” issue. While not directly a sign of worn pads, it’s a critical braking system problem that is often discovered and remedied during a full brake service.
7. It Takes Longer to Stop (Reduced Performance)
This sign can be subtle and creep up on you over time. You might notice that you need to apply the brakes earlier than you used to or that your typical stopping distance has increased. This reduction in braking performance is a direct result of worn-out friction material. Thin pads simply can’t create the friction needed to stop your car efficiently. If you feel like your car isn’t stopping like it used to, trust your gut and get the brakes checked.
8. The Brake Pad Warning Light is On
Many modern vehicles are equipped with an electronic wear monitoring system. A small sensor is embedded in the brake pad material. When the pad wears down to a predetermined minimum level, the sensor circuit is broken or makes contact with the rotor, triggering a warning light on your dashboard. This light often looks like a circle with parentheses on the outside (()) and may contain an exclamation point or the word “BRAKE”.
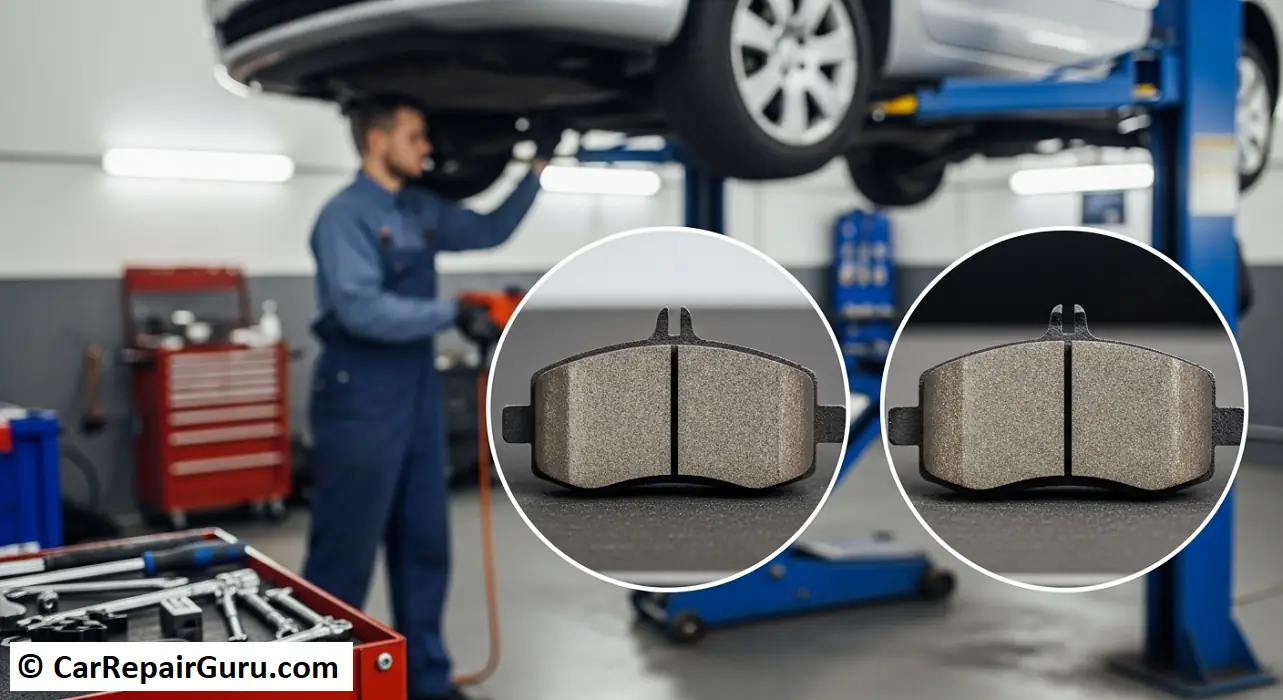
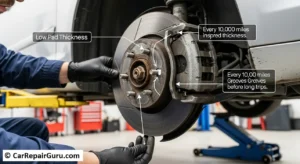
9. The Brake Pads Look Visibly Thin (< 3-4mm)
You don’t always need to be a mechanic to perform a basic visual check. In many cars, you can look through the spokes of your wheel and see the brake caliper assembly. The brake pad is the material pressed between the caliper and the shiny rotor. New pads are fairly thick (around 10-12mm). If you see that the friction material is less than a quarter of an inch (about 6mm) thick, it’s time to plan for a replacement. If it’s down to 3mm or less, it’s time to act now.
10. Excessive Brake Dust
All brakes produce dust as the pads wear. However, if you suddenly notice that one wheel is consistently much dirtier than the others, it can be an early sign of a problem. This often points to a stuck caliper that isn’t releasing properly, causing that one brake pad to wear down much faster than the rest.
How Long Do Brake Pads Last? Mileage and Time Guidelines
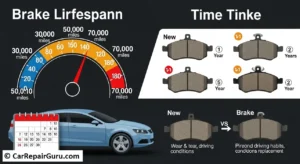
One of the most common questions drivers ask is, “How long do brake pads last?” The honest answer is: it depends. The industry standard is a very wide range of 30,000 to 70,000 miles. Some high-quality pads on a gently driven car might even last longer. This variability is why relying on physical signs is so much more important than just watching the odometer.
Several key factors dramatically influence your brake pad lifespan:
- Driving Habits: This is the single biggest factor. A driver who navigates stop-and-go city traffic and brakes aggressively will wear through pads far faster than someone who drives primarily on the highway with smooth, gradual stops.
- Vehicle Type: Heavier vehicles like trucks, vans, and SUVs require more force to stop, putting greater strain on the brake pads and wearing them out more quickly than those on a lightweight compact car.
- Towing & Hauling: If you frequently tow a trailer or haul heavy loads, the added weight significantly increases the workload on your brakes, shortening pad life.
- Environment: Driving in a hilly or mountainous region requires constant braking on descents, which generates tremendous heat and wear. In contrast, driving on flat terrain is much easier on your brakes.
- Brake Pad Material: The composition of the pad itself plays a huge role, which we’ll explore next.
The High Cost of Delay – Consequences of Ignoring Worn Brake Pads
Putting off a brake pad replacement might seem like a way to save a little money or time in the short term, but it’s one of the most dangerous and costly gambles you can make with your vehicle. The friction material on your pads is a finite resource, and once it’s gone, a cascade of negative consequences begins.
Here’s exactly what happens when you ignore the warning signs.
1. Critical Safety Risks and Reduced Stopping Power
This is the most important consequence. Worn brake pads lose their ability to create the friction needed to stop your car effectively.
- Increased Stopping Distance: Your reaction time might be perfect, but if your pads are worn, the distance your car travels before coming to a complete stop will increase dramatically. In an emergency situation, those extra feet can be the difference between a close call and a serious collision.
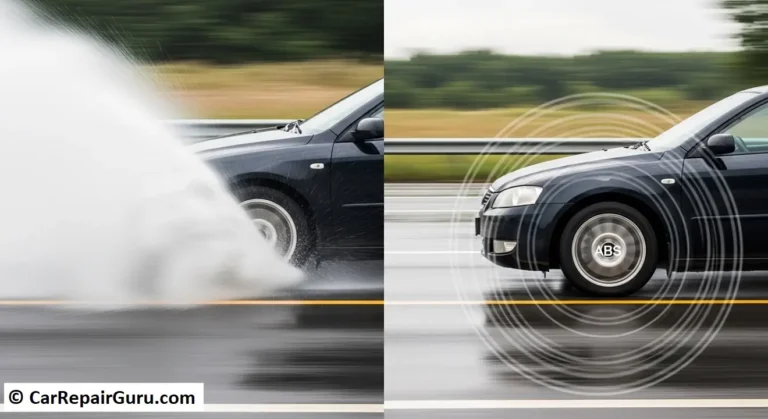
- Brake Fade: Thin pads can’t dissipate heat properly. Under heavy or prolonged braking (like going down a long hill), they can overheat, causing a dangerous condition called “brake fade.” This is where the pedal feels firm, but the brakes have temporarily lost almost all of their stopping power.
- Complete Brake Failure: In the worst-case scenario, the worn pad’s metal backing plate can break apart or, if a caliper piston over-extends, it can cause a catastrophic loss of brake fluid and hydraulic pressure, leading to complete brake failure.
2. Drastically Increased Repair Costs
Ignoring the initial high-pitched squeal is like turning down a $200 problem and waiting for it to become an $800 one.
- Guaranteed Rotor Damage: The grinding noise is the sound of the pad’s metal backing plate destroying your brake rotor. A smooth rotor becomes deeply scored and grooved. At this point, the rotor cannot be saved and must be replaced. This can easily double the cost of your brake job.
- Caliper Damage: The grinding metal-on-metal contact generates immense heat, which can damage the rubber seals inside the brake caliper. Furthermore, as the pad thins, the caliper’s piston has to extend further and further out to compensate. If it over-extends, it can damage the caliper itself, adding another several hundred dollars to the repair bill.
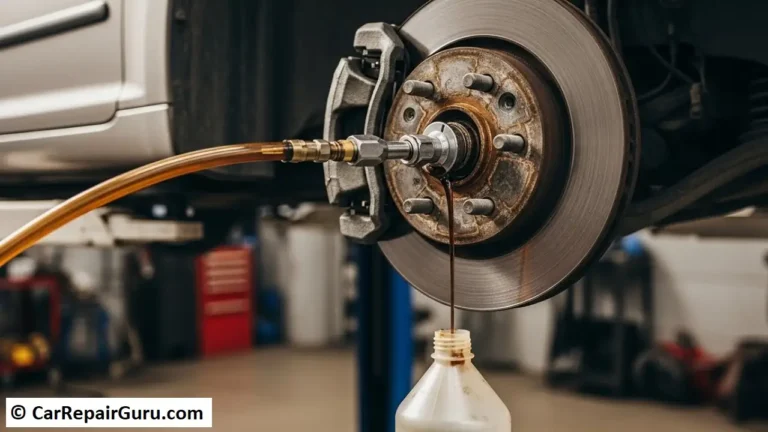
- Boiling Brake Fluid: The extreme heat generated by worn brakes can be transferred to the brake fluid, causing it to boil. This introduces air bubbles into the hydraulic lines, leading to a “spongy” pedal and severely compromised braking performance. This will require a full brake fluid flush to fix.
3. Damage to Other Vehicle Components
The problems don’t always stay confined to the braking system. The intense vibrations from warped rotors and grinding pads can be felt throughout the car. Over time, this constant vibration can put unnecessary stress on your vehicle’s wheel bearings, suspension components (like ball joints and tie rods), and steering system, potentially leading to premature wear on those parts as well.
In short, a timely brake pad replacement is a simple, routine maintenance item. An ignored brake pad problem quickly snowballs into a major, multi-component repair that jeopardizes both your safety and your finances. The initial squeal is a helpful reminder; the subsequent grind is a final, costly warning.
Ceramic vs. Semi-Metallic vs. Organic: Choosing the Right Brake Pads
When it’s time for a brake pad replacement, you’ll find there are three main types to choose from. The choice between ceramic vs. semi-metallic brake pads is a common decision point for many drivers.
Ceramic Brake Pads
Made from a dense ceramic material mixed with copper fibers, these are often considered the premium option for most daily drivers.
- Pros: They are exceptionally quiet, produce very fine, light-colored dust that doesn’t stick to wheels, and offer a long service life.
- Cons: They are typically the most expensive option and may not have the same aggressive initial “bite” as metallic pads, especially in very cold weather.
Semi-Metallic Brake Pads
These pads are made from a mixture of metal fibers (like steel, iron, or copper) and friction modifiers. They are a popular choice for performance vehicles, trucks, and those who prioritize stopping power.
- Pros: They offer excellent braking performance across a wide range of temperatures and are great at dissipating heat. They are also very durable.
- Cons: They tend to be noisier and produce more black brake dust than ceramic pads. They can also cause more wear on the brake rotors over time.
Organic Brake Pads
Also known as Non-Asbestos Organic (NAO) pads, these are made from a mixture of materials like rubber, glass, and fibers bound together with resin.
- Pros: They are very quiet, soft on rotors, and generally the least expensive option.
- Cons: They wear out much faster and create more dust than other types. Their performance can suffer under high heat, making them unsuitable for aggressive driving or heavy vehicles.
Recommendation: For the average daily driver of a car, crossover, or light SUV, ceramic brake pads offer the best all-around combination of quiet operation, low dust, and long life. For those with heavy-duty trucks or performance cars, semi-metallic pads are often the better choice for their superior stopping power.
How to Visually Check Your Brake Pads (and When to Do It)
You don’t need to be a mechanic to get a rough idea of your brake pad life. A quick visual check can give you peace of mind or confirm that it’s time to call a professional.
Minimum Brake Pad Thickness Explained
Mechanics use a simple measurement to gauge pad life. Here are the numbers to know:
- 10-12mm: The thickness of a new brake pad.
- 6mm: The pad is about half-worn. You’re still in good shape.
- 3-4mm: This is the “caution zone.” Mechanics will recommend replacement at this point.
- 2mm or less: This is the critical, unsafe limit. Replace them immediately.
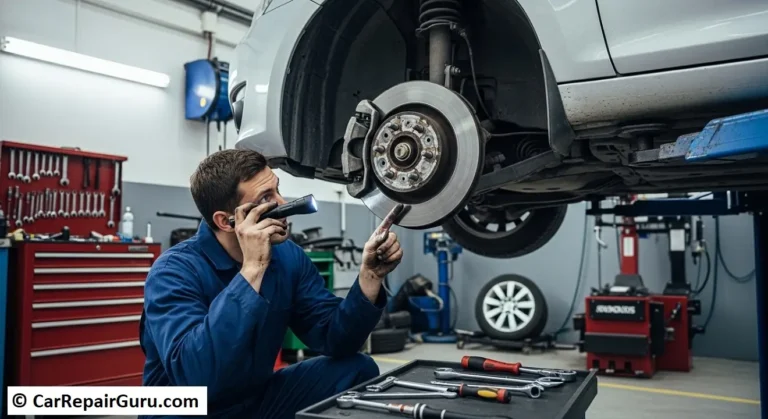
Step-by-Step Visual Inspection Guide
- Park Safely: Park your car on a level surface and wait for it to cool down completely. Brakes get extremely hot.
- Look Through the Wheel: Turn your steering wheel all the way to one side to get a better view of the front brake assembly. You can often see the components right through the spokes of the wheel.
- Identify the Parts: Locate the shiny metal rotor. The large component clamped over it is the caliper. The brake pad is the material sandwiched between the caliper and the rotor.
- Estimate the Thickness: Look at the thickness of the outer pad. Use the guidelines above to estimate how much friction material is left. If it looks very thin, it’s time to schedule a professional inspection.
How Often Should You Check?
A great habit to get into is asking your mechanic to check your brake pad thickness every time you get an oil change or tire rotation. These are perfect opportunities for a quick, expert assessment.
Breaking Down the Cost of Brake Pad Replacement
The cost to replace brake pads can vary significantly. A realistic budget for replacing the pads and rotors on a single axle (front or rear) is typically between $300 and $800.
Several factors influence the final brake job cost:
Cost Factor 1: The Parts
- Brake Pads: As discussed, ceramic pads cost more than semi-metallic or organic.
- Brake Rotors: It is almost always recommended to replace or resurface rotors with new pads. This is a major part of the cost. New rotors can range from $50 to $150+ each.
- Hardware: New clips, shims, and electronic wear sensors add to the parts bill.
Cost Factor 2: The Labor
- Labor rates vary by region and the type of shop. A dealership will almost always charge more than a trusted independent mechanic.
- The job typically takes 1-2 hours per axle for a professional.
Why a “Cheap” Brake Job Can Cost You More
Be wary of quotes that seem too good to be true. A “pads-only” job that skips rotor service is a recipe for disaster. The new pads will wear out incredibly fast on the old, uneven rotor surface, and you’ll experience vibrations and poor performance. Investing in quality parts and professional labor ensures the job is done right once, saving you money and headaches in the long run.
DIY vs. Professional Brake Replacement – What’s Right for You?
With plenty of online tutorials available, a DIY brake pad replacement can seem tempting. But is it a good idea?
The Case for DIY Replacement
- Pros: The primary benefit is cost savings. You only pay for the parts, potentially saving you several hundred dollars in labor.
- Cons: This is not a beginner’s task. It requires specific tools (like a torque wrench, caliper piston tool, and jack stands), mechanical aptitude, and a significant time commitment. Most importantly, a mistake can have catastrophic safety consequences.
When to Call a Professional Mechanic
- Pros: You are paying for expertise, safety, and peace of mind. A professional has the right tools and experience to diagnose any related issues (like a stuck caliper or leaking brake line) and ensure everything is torqued to factory specifications. The work is usually warrantied.
- Recommendation: If you are not 100% confident in your ability to perform the job safely and correctly, leave brake service to the professionals. Your safety, and the safety of others on the road, is worth the cost of professional labor.
Your Brakes Are Your Lifeline – Don’t Ignore the Signs
Your vehicle’s braking system is its most important safety feature. Being proactive about maintenance isn’t just about avoiding a costly repair bill; it’s about ensuring you, your family, and everyone else on the road remains safe.
Listen to your car. Pay attention to new sounds like squealing or grinding, and feel for changes like pulling or vibrating. By recognizing these early warning signs and understanding what they mean, you can address brake issues before they become dangerous problems.
Experiencing any of these issues? Don’t wait and wonder. Your safety is too important to risk.
Frequently Asked Questions (FAQ)
Should I Replace Rotors at the Same Time as Brake Pads?
Almost always, yes. At a minimum, rotors should be measured and resurfaced if they are within spec. However, most modern rotors are thinner and not designed to be resurfaced, making replacement the standard and recommended practice. Putting new pads on old, grooved rotors is a waste of money.
Do Front or Rear Brake Pads Wear Out Faster?
The front brake pads perform about 70% of the braking. As your car slows, its weight shifts forward, putting much more strain on the front brakes. As a result, front pads almost always wear out faster than rear pads, often at a ratio of 2:1.
What Should I Do if My Brakes are Grinding?
Stop driving the car immediately and safely. The grinding sound is metal-on-metal contact, which means your brakes are not functioning properly and you are severely damaging the rotors and potentially the calipers. Call a tow truck to take your car to a repair shop.
Can I Just Replace the Brake Pads on One Wheel?
No. Brakes must be serviced in pairs. You should always replace the pads on both front wheels or both rear wheels at the same time. Replacing only one side will cause severe braking imbalance, making the car pull dangerously to one side.