Suddenly, your radio goes silent. Your phone charger stops working. Or maybe one of your headlights decides to take an unscheduled night off. Before you start dreading a costly trip to the mechanic, take a deep breath. The culprit is often a tiny, inexpensive component that you can fix yourself in under 15 minutes: a blown car fuse.
Replacing a car fuse is one of the easiest and most satisfying DIY auto repairs you can do. It requires no special mechanical skills, saves you time and money, and empowers you to understand your vehicle a little better.
This comprehensive guide will walk you through every step, from identifying the problem and understanding the parts involved, to finding the right fuse and getting your electronics back up and running.
- Is a Blown Fuse Really the Problem? Common Symptoms
- Before You Begin – Safety & Tools
- What You’ll Need (The Right Tools & Parts)
- Understanding the Different Types of Car Fuses
- Blade Fuses (The Modern Standard)
- Other Fuse Types You Might See
- How to Replace a Car Fuse in 5 Simple Steps
- Step 1 – Locate the Fuse Box(es)
- Step 2 – Identify the Correct Fuse Using the Fuse Diagram
- Step 3 – Remove the Blown Fuse
- Step 4 – Inspect the Fuse to Confirm It’s Blown
- Step 5 – Install the New Fuse and Test
- Troubleshooting & Common Pitfalls
- What If the New Fuse Blows Immediately?
- The Danger of Using the Wrong Amperage Fuse
- Why Do Car Fuses Blow in the First Place?
- 1. A Simple Circuit Overload
- 2. A Short Circuit
- 3. A Failing Component
- Conclusion – You’ve Mastered a New DIY Skill!
- Frequently Asked Questions (FAQ)
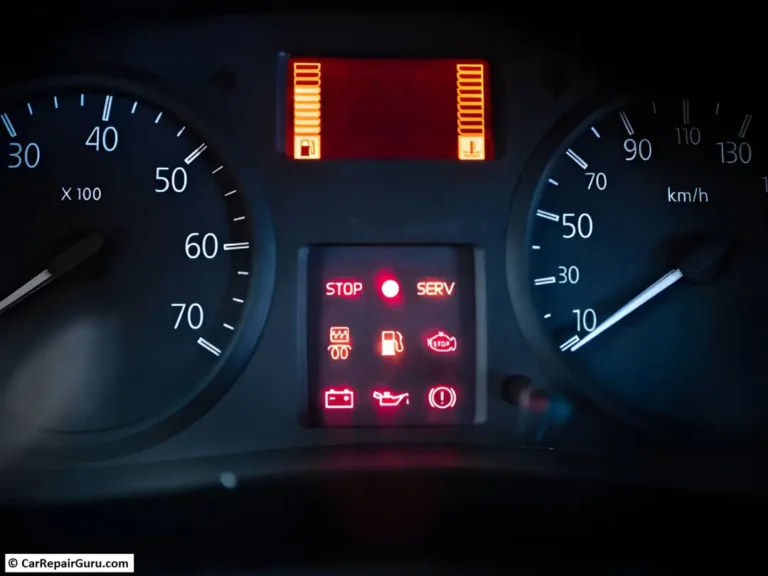
Is a Blown Fuse Really the Problem? Common Symptoms
Before you start opening things up, let’s confirm if a blown fuse is the likely issue. The good news is that the symptoms of a blown fuse are usually very specific and easy to spot. A single fuse is designed to protect a single electrical component or a small group of related components.
You might have a blown fuse if:
- A specific electronic feature stops working. This is the number one sign. Your radio, interior dome lights, power windows, or windshield wipers suddenly die.
- Your car’s power outlets or cigarette lighter are dead. If you can’t charge your phone, a blown fuse is the most common reason.
- A specific cluster of lights goes out. For example, your dashboard lights won’t turn on, or both of your tail lights are out (but your brake lights still work).
- The turn signals stop working or start flashing at a very rapid pace.
If multiple, unrelated systems fail at once, it could signal a more significant electrical problem. But if the issue is isolated to one area, checking the fuse is always the best first step.
Before You Begin – Safety & Tools
This is a simple job, but a little preparation makes it safer and smoother. Let’s gather what you need.
Safety First!
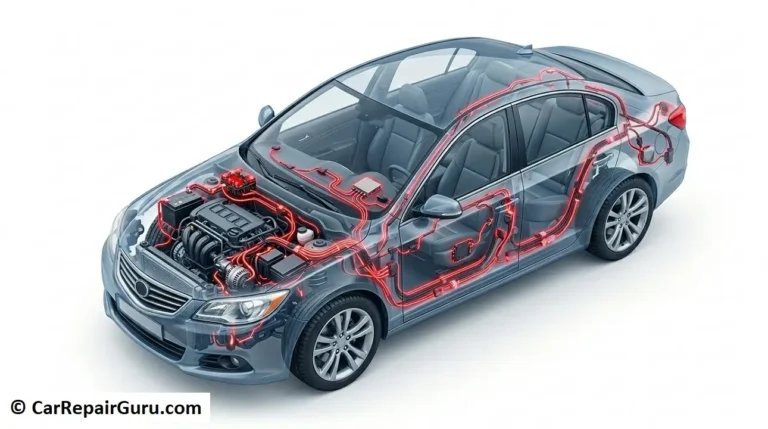
Your car’s electrical system is low voltage, but it’s always smart to be safe.
- Turn off the car completely. Make sure the ignition is in the “off” position and remove the key. This de-energizes most of the electrical circuits.
- Work in a well-lit area. Garages are great, but if you’re outside, use a flashlight or a headlamp. Fuse box diagrams have tiny print!
- Consider disconnecting the battery. While not strictly necessary for changing a fuse, disconnecting the negative battery terminal is the 100% foolproof way to prevent any accidental shorts. It’s a great habit for beginners to develop.
What You’ll Need (The Right Tools & Parts)
You don’t need a full mechanic’s toolbox for this.
- Your Car’s Owner’s Manual: This is your most valuable tool. It will tell you the exact car fuse box location(s) and show you a diagram of what each fuse controls.
- A Pack of Replacement Automotive Fuses: You need to replace the blown fuse with a new one of the exact same amperage. It’s wise to buy an assortment kit to have various sizes on hand for the future.
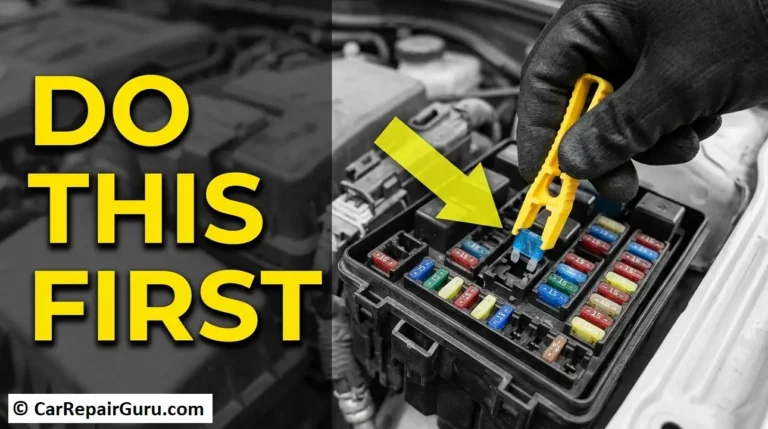
- A Fuse Puller: This small plastic tool is designed to safely grip and remove fuses. Often, a fuse puller is clipped right inside the fuse box cover itself! If not, most fuse kits include one.
- Needle-Nose Pliers (Optional): If you can’t find a fuse puller, small pliers can work in a pinch. Just be gentle so you don’t damage the surrounding fuses.
Understanding the Different Types of Car Fuses
When you head to the auto parts store, you’ll see a wall of different automotive fuses. While their function is the same, their shape and size can vary. Using the right type is just as important as using the right amperage. Here’s a quick guide to the most common ones you’ll encounter.
Blade Fuses (The Modern Standard)
If your car was made in the last 30 years, it almost certainly uses blade fuses. These are the colorful, plastic-encased fuses with two metal prongs (blades) that plug into the fuse box. They are the easiest to identify and replace. However, even blade fuses come in several sizes:
- Standard (ATO/ATC): For decades, this was the go-to size. They are about ¾ of an inch wide and are still very common in many vehicles.
- Mini (ATM): As car electronics became more complex and compact, manufacturers needed to save space. The Mini fuse is smaller and is now the most prevalent type in modern cars.
- Low-Profile Mini: An even more compact version of the Mini fuse. They sit more flush in the fuse box, making them a bit harder to grip with pliers, which is why a proper fuse puller is so helpful.
- Maxi (MAX): These are the oversized heavyweights of the blade fuse world. You’ll find these larger fuses in the engine bay fuse box, protecting high-current circuits like your alternator, starter, and radiator fans.
Other Fuse Types You Might See
While less common today, you may run into these, especially in older or specialty vehicles:
- Glass Tube Fuses: Also known as Bosch or Buss fuses, these are small cylindrical glass tubes with a metal cap on each end and the fuse element visible inside. They were the standard in classic cars (think pre-1980s).
- Cartridge Fuses (J-Case / FMX): These look like large, blocky plastic cartridges and are also used for high-amperage applications. They are common in the engine bay fuse boxes of many trucks and SUVs.
The Easiest Way to Know What You Need? Your best bet is always to pull the blown fuse and take it with you to the store. A visual comparison is foolproof.
How to Replace a Car Fuse in 5 Simple Steps
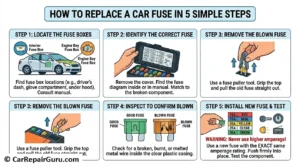
Alright, let’s get to it. Follow these steps, and you’ll be done in no time.
Step 1 – Locate the Fuse Box(es)
Most modern cars have at least two fuse boxes. Your owner’s manual is your best guide, but here are the most common places to look:
- Interior Fuse Box: This box powers most of your car’s cabin accessories. Check under the dashboard on the driver’s side, behind a small plastic panel on the side of the dashboard, or inside the glove compartment.
- Engine Bay Fuse Box: This one handles the more heavy-duty components like the engine fans and headlights. You’ll find it under the hood, usually in a black rectangular plastic box with a cover that clips on.
Step 2 – Identify the Correct Fuse Using the Fuse Diagram
Once you’ve found the right fuse box, remove the cover. On the inside of that cover (or in your owner’s manual), you will find the all-important car fuse diagram. This map tells you what each fuse protects. Look for a label that matches the broken component, like “RADIO,” “PWR OUTLET,” or “WIPER.”
Step 3 – Remove the Blown Fuse
Take your fuse puller and fit it over the top of the fuse. Squeeze it firmly and pull straight out. The fuse should pop out of its slot without too much effort.
Step 4 – Inspect the Fuse to Confirm It’s Blown
This is the moment of truth. Hold the fuse up to the light and look closely inside the clear plastic housing.
- A Good Fuse: You will see an unbroken, S-shaped metal wire running through the middle.
- A Blown Car Fuse: The metal strip inside will be visibly broken or melted. You might even see a dark, smoky smudge on the inside of the plastic.
If the wire is broken, congratulations! You’ve found the problem.
Step 5 – Install the New Fuse and Test
This is the most critical step. You must replace the blown fuse with a new one of the exact same amperage rating. The amperage is the large number printed on top of the fuse (e.g., 10, 15, 20).
CRITICAL WARNING: Never, ever replace a fuse with one of a higher amperage. Fuses are safety devices. A 15-amp fuse is designed to blow to protect the wiring. If you install a 25-amp fuse in its place, you could allow the circuit to overheat, melt wires, and create a serious fire hazard.
Automotive fuses are also color-coded for easy identification:
- 10 Amp = Red
- 15 Amp = Blue
- 20 Amp = Yellow
- 25 Amp = Clear/White
- 30 Amp = Green
Match the number and color, then simply push the new fuse firmly into the empty slot. Put the fuse box cover back on, reconnect your battery, and start the car. Now, test the component that wasn’t working.
Troubleshooting & Common Pitfalls
What If the New Fuse Blows Immediately?
If you install the new fuse and it blows right away, this means the fuse did its job. It indicates a deeper electrical problem, like a short circuit. Do not keep putting new fuses in. This is a sign that it’s time to have the vehicle inspected by a qualified mechanic.
The Danger of Using the Wrong Amperage Fuse
We mentioned it before, but it’s worth repeating. Using a fuse with a lower amperage rating isn’t dangerous; it will just blow under a normal load. But using a fuse with a higher rating is extremely dangerous and is one of the leading causes of vehicle electrical fires. Always match the amperage.
Why Do Car Fuses Blow in the First Place?
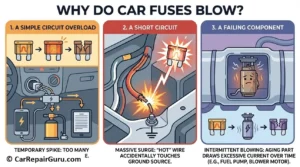
A blown fuse is a symptom, not the root problem. The fuse didn’t fail; it actually succeeded! It sacrificed itself to protect a more expensive part of your car’s electrical system. Understanding why it blew can help you determine if it was a random fluke or a sign of a bigger issue.
1. A Simple Circuit Overload
This is the most common and least worrisome reason. It happens when a circuit is temporarily asked to provide more power than it’s designed for, like plugging a powerful tire inflator into an outlet already charging a tablet. That combined draw spikes the amperage, and the fuse blows. In this case, simply replacing the fuse and avoiding the overload will solve the problem.
2. A Short Circuit
This is a more serious cause. A short circuit occurs when a “hot” wire accidentally touches a ground source, like the car’s metal frame. This creates an unrestricted path for electricity, causing a massive surge that instantly blows the fuse. Common causes include frayed wiring insulation, water getting into a connector, or a faulty component. If your new fuse blows the second you install it, you almost certainly have a short circuit.
3. A Failing Component
Sometimes, an electrical component starts to fail and draws more current over time as it struggles to work. A common example is an aging fuel pump or A/C blower motor. It might blow a fuse, you replace it, and it works for another week before blowing again. This intermittent blowing is a classic sign that the component the fuse is protecting is on its way out.
Conclusion – You’ve Mastered a New DIY Skill!
That’s it! You’ve successfully learned how to change a car fuse. You followed the steps—locate, identify, pull, inspect, and replace—and you fixed the problem yourself. You saved a trip to the shop, saved some money, and are now more confident in handling your vehicle’s basic needs. Give yourself a pat on the back.
Frequently Asked Questions (FAQ)
How do I know what kind of car fuse I need?
The best way is to look at the old fuse. The amperage number is printed on top, and you can match its size and shape (Standard, Mini, Maxi, etc.) visually. Your owner’s manual will also specify the correct types.
Can I drive a car with a blown fuse?
It depends entirely on what the fuse is for. If it’s for the radio or a power outlet, it’s perfectly safe to drive. However, if the fuse controls a critical system like the fuel pump, headlights (at night), or engine control unit (ECU), the car may not start or could be unsafe to operate.
How much does it cost to replace a car fuse?
If you do it yourself, the cost is minimal. A multi-pack of assorted automotive fuses typically costs less than $10. A mechanic will likely charge a minimum diagnostic fee ($50-$100) to do the same simple task.