Your car’s brake fluid might not be the first thing on your maintenance checklist, but it plays a vital role in keeping you safe on the road. Without it, your braking system can’t function effectively, putting you and others at risk. Over time, brake fluid absorbs moisture, which reduces its efficiency and could lead to brake failure.
In this guide, we’ll walk you through everything you need to know about changing your car brake fluid when to do it, what tools you’ll need, and a step-by-step process to ensure you do it right. Whether you’re a seasoned DIYer or a beginner, you’ll find actionable advice to keep your vehicle’s braking system in top shape.
By the end, you’ll not only understand why regular brake fluid maintenance is crucial but also feel confident handling it yourself or knowing what to ask a mechanic.
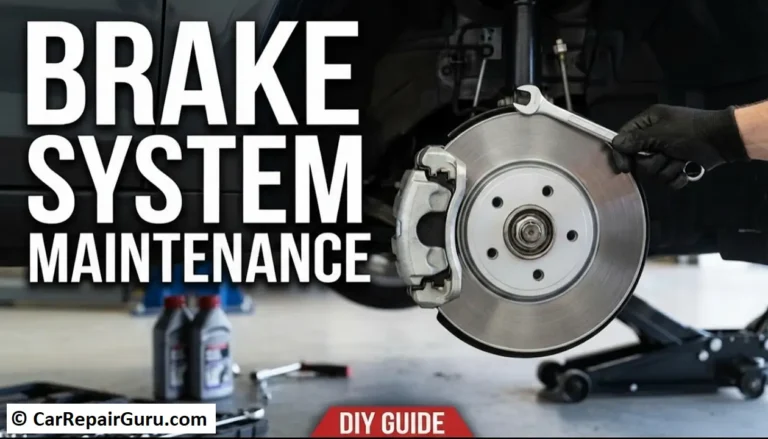
Understanding Brake Fluid
The Role of Brake Fluid in the Braking System
Brake fluid is the unsung hero of your vehicle’s braking system. It transfers the force from your foot pressing the brake pedal into the pressure needed to stop your car. Without brake fluid, the hydraulic system that operates your brakes simply wouldn’t work.
When you press the brake pedal, the brake fluid flows through the brake lines, amplifying the pressure and engaging the brake pads or shoes against the rotors or drums. This friction slows your car and eventually brings it to a stop. However, brake fluid is hygroscopic, meaning it absorbs moisture over time, which can lead to corrosion, reduced boiling points, and brake failure under heavy use.
Types of Brake Fluid and Their Differences
Brake fluids are classified by their DOT (Department of Transportation) rating, which indicates their chemical composition and performance.
- DOT 3: Common in older vehicles, it’s glycol-based and affordable but absorbs moisture quickly.
- DOT 4: Similar to DOT 3 but with a higher boiling point, making it suitable for modern vehicles and more resistant to heat.
- DOT 5: Silicone-based, it doesn’t absorb moisture but isn’t compatible with systems designed for DOT 3 or 4.
- DOT 5.1: Glycol-based like DOT 4 but with an even higher boiling point, ideal for performance or heavy-duty vehicles.
Choosing the right type for your vehicle is essential for maintaining optimal braking performance. Always consult your car’s manual before making a selection.
When to Change Your Brake Fluid
Manufacturer Recommendations and General Guidelines
Most car manufacturers recommend changing brake fluid every two to three years or after driving 20,000 to 30,000 miles, depending on the vehicle and the type of fluid used. However, it’s always best to check your car’s owner’s manual for the exact maintenance schedule. Regularly changing the brake fluid ensures your braking system operates efficiently and safely.
Signs Indicating the Need for a Brake Fluid Change
Even if you’re following a maintenance schedule, there are signs that your brake fluid might need attention sooner:
- Spongy Brake Pedal: If the brake pedal feels soft or unresponsive, air or moisture may have contaminated the brake fluid.
- Dark or Dirty Fluid: Fresh brake fluid is usually clear with a slight yellow tint. If it looks dark or murky when checked, it’s time for a change.
- Warning Light: Some modern vehicles have a brake system warning light that alerts you to potential issues, including low or degraded brake fluid.
- Reduced Braking Performance: Difficulty stopping or longer braking distances could indicate fluid problems.
Factors Affecting Brake Fluid Lifespan
- Driving Conditions: Frequent stop-and-go traffic or heavy braking generates heat that can degrade brake fluid faster.
- Climate: Humid environments cause brake fluid to absorb moisture more quickly, reducing its effectiveness.
- Age of Vehicle: Older vehicles may have worn components, increasing the risk of contamination.
Regular checks and timely fluid replacement are critical to keeping your braking system in top condition, no matter the circumstances.
Tools and Materials Needed
Before starting a brake fluid change, having the right tools and materials on hand ensures a smooth and safe process. Here’s what you’ll need:
Necessary Tools
- Wrenches: A set of wrenches, typically metric, for loosening bleeder screws.
- Brake Bleeder Kit: Essential for extracting old fluid and removing air from the brake lines.
- Funnel: To pour new brake fluid into the reservoir without spilling.
- Jack and Jack Stands: To lift and securely support your vehicle.
- Syringe or Turkey Baster: Useful for removing old fluid from the reservoir.
- Rags or Shop Towels: For cleaning spills and wiping tools.
Required Materials
- New Brake Fluid: Select the correct type (e.g., DOT 3, DOT 4) based on your car’s specifications.
- Safety Equipment: Gloves and safety goggles to protect your hands and eyes from corrosive brake fluid.
- Brake Cleaner: To clean components and ensure no residue affects performance.
- Disposable Container: For collecting old brake fluid.
Having all these items ready will help you efficiently change your brake fluid while minimizing risks and messes. Always double-check your tools and materials list before beginning the job!
Preparation Steps
Proper preparation is key to safely and effectively changing your car’s brake fluid. Follow these steps to get started:
Ensuring Vehicle Stability and Safety
- Park on a Level Surface: Ensure the vehicle is on a flat surface to prevent rolling.
- Engage the Parking Brake: This provides extra stability while working on the brakes.
- Lift the Vehicle if Needed: Use a jack and secure the car with jack stands for safety. Never rely solely on the jack.
- Wear Protective Gear: Put on gloves and safety goggles to protect yourself from brake fluid, which is corrosive.
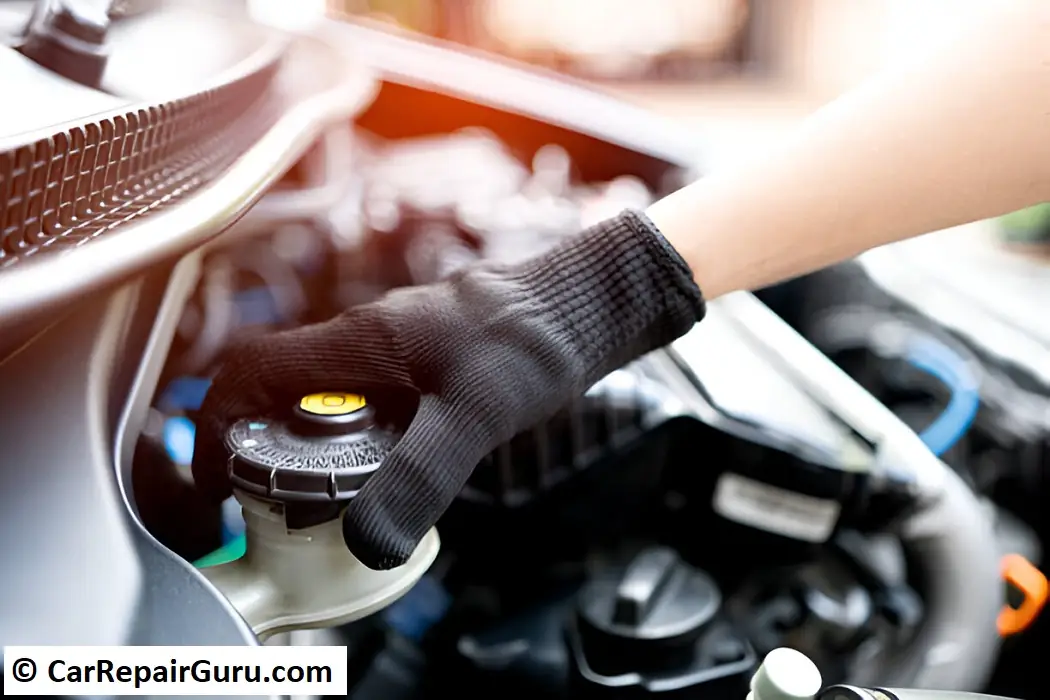
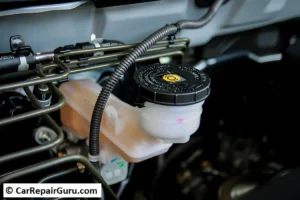
Locating the Brake Fluid Reservoir
- Open the car’s hood and locate the brake fluid reservoir, typically found on top of the master cylinder near the driver’s side firewall.
- The reservoir is usually transparent or has clear markings to indicate fluid levels.
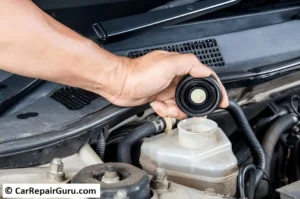
Checking Current Brake Fluid Level and Condition
- Inspect the fluid level against the MIN and MAX markings on the reservoir.
- Observe the fluid color: fresh fluid is light yellow, while old or contaminated fluid appears dark or murky.
- If the level is low or the fluid is discolored, it’s time for a replacement.
Taking these preparatory steps ensures you’re ready to proceed with confidence and reduces the risk of errors or accidents during the brake fluid change process.
Step-by-Step Guide to Changing Brake Fluid
Changing your car’s brake fluid might seem daunting, but following these detailed steps will help you complete the task safely and effectively.
1. Removing Old Brake Fluid
- Open the hood and locate the brake fluid reservoir.
- Use a syringe or turkey baster to extract as much old brake fluid as possible.
- Pour the extracted fluid into a disposable container for proper disposal later.
- Keep the reservoir cap loosely in place to prevent debris from entering.
2. Cleaning the Reservoir
- Wipe down the exterior of the reservoir with a clean rag to remove dirt and grease.
- Inspect the inside of the reservoir for debris or residue. Use brake cleaner and a lint-free cloth to clean it if necessary.
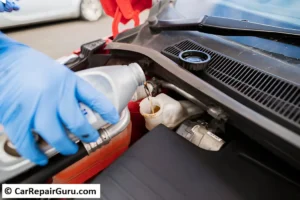
3. Refilling with New Brake Fluid
- Pour fresh brake fluid into the reservoir using a funnel to avoid spills. Fill it to the MAX line but avoid overfilling.
- Ensure you’re using the correct type of brake fluid (e.g., DOT 3, DOT 4) as specified in your car’s manual.
4. Bleeding the Brake System to Remove Air Bubbles
Bleeding the brakes ensures no air remains in the lines, which could compromise braking performance. Follow these steps:
- Start with the wheel furthest from the master cylinder (usually the rear passenger side).
- Attach a clear hose to the bleeder valve on the brake caliper or drum and place the other end in a container partially filled with brake fluid.
- Have a helper pump the brake pedal several times, then hold it down.
- Loosen the bleeder valve slightly to release air and old fluid. Close the valve once the flow becomes clear and free of bubbles.
- Repeat this process for each wheel, working your way closer to the master cylinder.
- Check and refill the reservoir with new fluid after bleeding each wheel to prevent air from entering the system.
5. Ensuring Proper Disposal of Old Brake Fluid
- Collect all used brake fluid in a sealed, labeled container.
- Never pour brake fluid down drains or into the environment it’s hazardous waste.
- Take the used fluid to a local recycling or automotive service center that accepts hazardous materials.
Final Checks
- Double-check all bleeder valves to ensure they’re tightly closed.
- Test the brake pedal press it a few times to ensure firmness and responsiveness.
- Take a short test drive to confirm the brakes are working properly.
By following these steps, you’ll not only maintain optimal braking performance but also extend the life of your braking system. It’s a manageable task with the right tools, materials, and preparation!
Post-Change Checks
After changing your brake fluid, it’s crucial to perform a series of checks to ensure the system is functioning properly and safely.
Testing Brake Pedal Firmness
- Sit in the driver’s seat and press the brake pedal several times.
- The pedal should feel firm and responsive, not spongy or soft.
- If it feels soft, there might still be air in the brake lines. In this case, repeat the bleeding process to remove any trapped air.
Inspecting for Leaks
- With the vehicle still elevated, inspect all bleeder valves and brake lines for leaks.
- Look for any signs of fluid dripping or pooling around the valves, calipers, or drums.
- Tighten any connections if leaks are detected and clean up excess fluid with a rag.
Taking a Test Drive
- Start by driving at a low speed in a safe, open area. Gradually apply the brakes to test their responsiveness and stopping power.
- Listen for unusual noises like squealing or grinding, which could indicate an issue.
- Perform a few hard stops to ensure the brakes engage smoothly without delay.
These post-change checks help confirm that the brake fluid change was successful and that your vehicle is safe to drive. Regular maintenance like this not only improves performance but also provides peace of mind on the road.
Common Mistakes to Avoid
Changing brake fluid requires attention to detail and precision. Avoid these common mistakes to ensure the process is done correctly and safely:
1. Not Using the Correct Type of Brake Fluid
Brake fluid types (e.g., DOT 3, DOT 4, DOT 5) have specific chemical properties designed for different braking systems. Using the wrong type can damage your vehicle’s braking components or reduce braking efficiency. Always consult your vehicle’s owner’s manual to confirm the correct type and avoid mixing different types of fluid unless specified as compatible.
2. Allowing Air into the Brake Lines
Air in the brake lines reduces hydraulic pressure, leading to a spongy brake pedal and decreased stopping power. This often happens if the reservoir is allowed to run dry during the bleeding process. To prevent this, monitor fluid levels carefully and top up the reservoir after bleeding each wheel. Take your time to bleed the system thoroughly until no air bubbles remain.
3. Overlooking Safety Precautions
Brake fluid is corrosive and can harm your skin, eyes, and painted surfaces. Failing to wear gloves and goggles increases the risk of injury. Additionally, working under an unstable vehicle can lead to accidents. Always use jack stands and ensure the vehicle is secure before starting work.
Avoiding these mistakes not only protects your vehicle but also ensures your safety and the effectiveness of your braking system.
Conclusion
Regular brake fluid maintenance is essential for your vehicle’s safety and performance. As a critical component of the braking system, brake fluid ensures that your car responds effectively when you need to stop. Neglecting it can lead to reduced braking efficiency, increased wear on parts, and even potential brake failure.
By following the steps outlined in this guide, you can confidently change your brake fluid, ensuring optimal braking performance and prolonging the life of your braking system. From understanding brake fluid types to properly bleeding the brakes and avoiding common mistakes, you now have the knowledge to maintain this vital system.
Taking the time to care for your brakes not only saves money on repairs but also provides peace of mind on the road. Whether you choose to handle it yourself or visit a professional, regular brake fluid checks and changes are a small effort with big safety rewards.
change car brake fluid (FAQs)
1. How often should brake fluid be changed?
Brake fluid should generally be changed every 2 to 3 years or after driving 20,000 to 30,000 miles, depending on your vehicle and the type of brake fluid. Refer to your car’s owner’s manual for specific recommendations. Regular replacement prevents contamination and ensures optimal braking performance.
2. Can I change brake fluid myself, or should I consult a professional?
If you’re confident with basic car maintenance and have the right tools, you can change brake fluid yourself by following a detailed guide. However, if you’re uncertain or lack the proper equipment, it’s best to consult a professional to avoid mistakes like introducing air into the brake lines or using the wrong type of fluid.
3. What are the risks of not changing brake fluid regularly?
Neglecting brake fluid maintenance can lead to several problems:
- Decreased braking performance: Contaminated fluid reduces hydraulic pressure.
- Corrosion: Moisture absorbed by old fluid can corrode brake components.
- Brake failure: Severe fluid degradation can result in brake system failure, posing serious safety risks.
4. How can I tell if my brake fluid needs changing?
Check the fluid in the reservoir. Fresh brake fluid is light yellow and clear, while old fluid appears dark or murky. Signs like a spongy brake pedal, warning lights, or reduced braking performance also indicate it’s time for a change.
5. What type of brake fluid should I use?
The type of brake fluid depends on your vehicle. Common types include DOT 3, DOT 4, DOT 5, and DOT 5.1. Always refer to your owner’s manual for the recommended type, as using the wrong fluid can damage your brake system.