There are few car troubles more frustrating than an engine that sputters, struggles, or simply refuses to start. You turn the key, and instead of a confident roar, you get a weak crank or, even worse, silence. While several issues can cause these symptoms, a common culprit hiding in your gas tank is a failing fuel pump. This vital component is the heart of your fuel system, and when it gets weak, your entire engine suffers.
Before you resign yourself to an expensive repair bill, the good news is that you can diagnose the problem yourself. Testing a fuel pump can seem intimidating, but it’s a logical process. This guide will walk you through everything you need to know, from the simple “listen test” that requires no tools to the definitive fuel pressure test. We’ll help you pinpoint the issue, understand the results, and decide on the next steps, potentially saving you hundreds of dollars.
- Is Your Fuel Pump Failing? 5 Common Symptoms
- Safety First – Critical Precautions Before You Begin
- Tools You’ll Need to Test a Fuel Pump
- How to Test a Fuel Pump – 3 Step-by-Step Methods
- Method 1 – The “Listen Test” (No Tools Required)
- Method 2 – The Fuel Pressure Test (The Definitive Test)
- Understanding Your Fuel Pressure Test Results
- What If the Pump Isn’t the Problem? Checking Related Components
- How to Test the Fuel Pump Fuse and Relay
- How to Test the Fuel Pump with a Multimeter
- What’s Next? Repair or Replace
- Conclusion
- Frequently Asked Questions (FAQ)
- How much does it cost to test a fuel pump?
- Can you drive with a bad fuel pump?
- What does a bad fuel pump sound like?
- Does a clogged fuel filter cause the same symptoms as a bad fuel pump?
- How long does a fuel pump last?
Is Your Fuel Pump Failing? 5 Common Symptoms
Before you break out the tools, let’s confirm your vehicle is showing the classic signs of a bad fuel pump. A failing pump rarely dies without warning. Instead, it usually gives you several clues that it’s struggling to deliver the right amount of fuel to your engine. If you’re experiencing one or more of these issues, you’re on the right track to diagnosing the problem.
Engine Sputtering or Hesitation
You’re driving at a steady speed, and the engine suddenly sputters or feels like it’s missing a beat. This often happens under load, like going up a hill or accelerating onto a highway. The pump is struggling to keep up with the engine’s demand for fuel, causing temporary fuel starvation.
Difficulty Starting the Engine
A healthy fuel pump primes the system with pressure the moment you turn the key. When the pump is weak, it can’t build that pressure quickly. This results in long crank times where the engine turns over for several seconds before it finally catches and starts. In severe cases, it leads to a no-start condition.
Loss of Power and Poor Acceleration
Does your car feel sluggish and unresponsive? A weak fuel pump can’t supply the extra fuel needed for acceleration, making your car feel underpowered and weak. You’ll notice it most when you need to merge into traffic or pass another vehicle.
Loud Whining Noise from the Fuel Tank
One of the most distinct symptoms is a noticeable humming or whining sound coming from the rear of the car, where the fuel tank is located. This is the sound of the electric motor inside the pump straining to work. The noise will be most apparent when you first turn the key to the “on” position.
Worsening Fuel Economy
If you suddenly find yourself visiting the gas station more often, a failing pump could be the cause. When the engine receives inconsistent fuel pressure, its sensors try to compensate, often leading to inefficient combustion and wasted fuel.
Safety First – Critical Precautions Before You Begin
We cannot stress this enough: you are working with your vehicle’s fuel system, which is highly flammable. Taking shortcuts here is not an option. Your safety, and the safety of your vehicle, depends on following these precautions to the letter before you even think about touching a tool.
Work in a Well-Ventilated Area: Never work on a fuel system in an enclosed garage. Work outdoors or in a garage with the doors wide open to allow gasoline fumes to dissipate.
Disconnect the Negative Battery Terminal: This is the most critical step. Disconnecting the battery prevents any accidental sparks from the electrical system, which could ignite fuel vapors.
No Sparks, No Flames: This means no smoking, no welding, and no grinding anywhere near your work area. Keep all potential sources of ignition far away.
Wear Protective Gear: Always wear safety glasses to protect your eyes from fuel spray and nitrile gloves to protect your skin from gasoline.
Have a Class B Fire Extinguisher Nearby: Be prepared for the worst-case scenario. A Class B extinguisher is designed for flammable liquid fires like gasoline.
Tools You’ll Need to Test a Fuel Pump
You don’t need a professional mechanic’s entire toolbox for this job, but having the right tools on hand makes the process smoother and safer. Many of these can be purchased in an affordable kit, and some auto parts stores even offer a loaner program for specialty tools like fuel pressure gauges.
For the Fuel Pressure Test (Most Accurate Method):
- Fuel Pressure Gauge Kit: This is the essential tool for this job. Ensure the kit comes with various adapters to fit your specific vehicle’s fuel rail.
- Basic Wrench or Socket Set: You may need these to remove plastic engine covers to access the fuel rail.
- Rags or Shop Towels: Essential for catching any small fuel drips and keeping your work area clean.
For the Electrical Test:
- Digital Multimeter: This invaluable tool helps you determine if the pump is receiving power. A basic model is all you need.
- Vehicle’s Wiring Diagram: This is your map to the electrical system. You can find it in a vehicle-specific repair manual (like a Haynes or Chilton manual) or through online subscription services.
How to Test a Fuel Pump – 3 Step-by-Step Methods
Here, we’ll break down the diagnostic process into three distinct methods, starting with the simplest and moving to the most definitive.
Method 1 – The “Listen Test” (No Tools Required)
This is the absolute first diagnostic step everyone should perform. It’s free, takes less than a minute, and can immediately tell you if your pump is completely dead or just weak. The goal is to hear the pump prime the system.
- Step 1: Create a Quiet Environment. Park your car in a quiet place like a garage or an empty street where you can hear faint sounds.
- Step 2: Position Yourself. Open your driver’s side door and lean down near the rear of the car, as close to the fuel tank as you can get. If you’re unsure where the tank is, it’s usually located under the rear seats.
- Step 3: Have a Friend Turn the Key. Ask a helper to turn the ignition key to the “On” position—the position right before you’d crank the engine to start it. Do not start the car.
- Step 4: Listen Closely. As the key is turned, you should hear a distinct, low-pitched humming or whirring sound that lasts for 2 to 3 seconds. This is the sound of the electric fuel pump motor kicking on to build pressure in the fuel lines.
What Your Results Mean:
- You Hear a Hum: This is good news and bad news. It means your pump is receiving electrical power and the motor is running. However, it doesn’t mean it’s strong enough to create adequate pressure. A humming pump can still be a weak pump.
- You Hear Silence: If there is absolutely no sound, the pump is not getting power or the motor has completely failed. This tells you the next step is to check the electrical components, like the fuel pump fuse and relay.
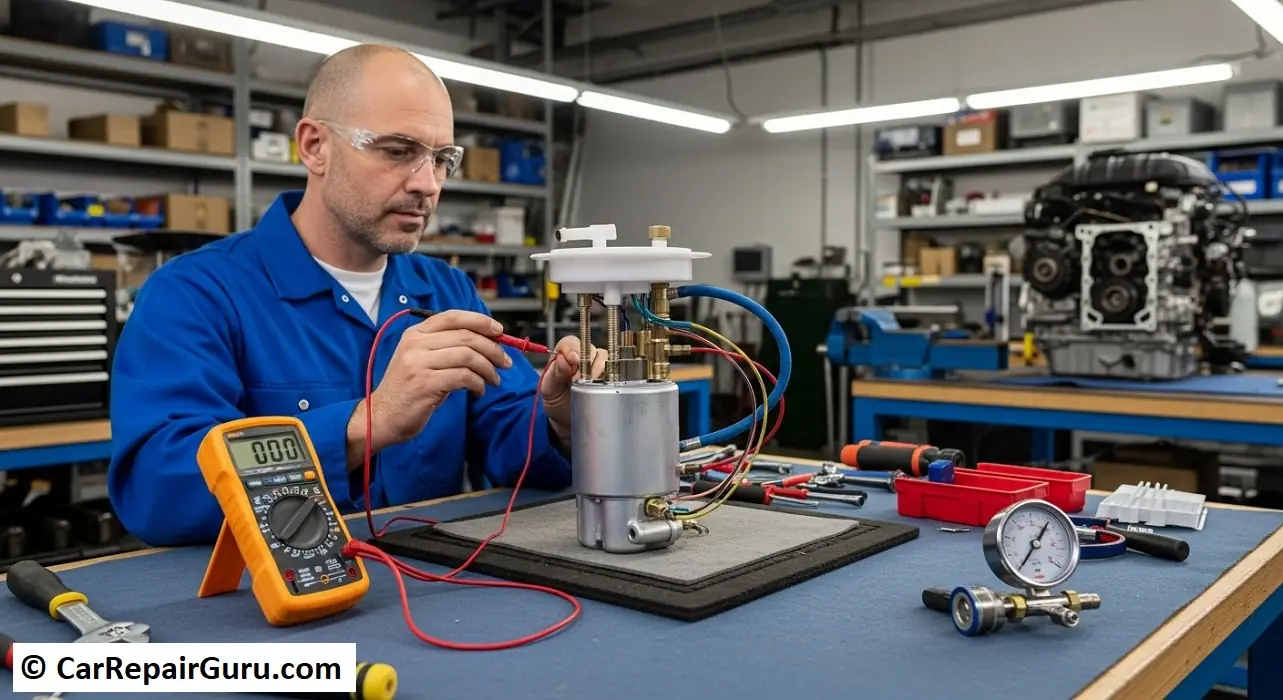
Method 2 – The Fuel Pressure Test (The Definitive Test)
If you heard the pump hum but still suspect it’s the problem, the fuel pressure test is how you prove it. This test measures the exact pressure the pump is generating, giving you a clear, data-driven answer. This is the method professionals use to diagnose a faulty fuel pump.
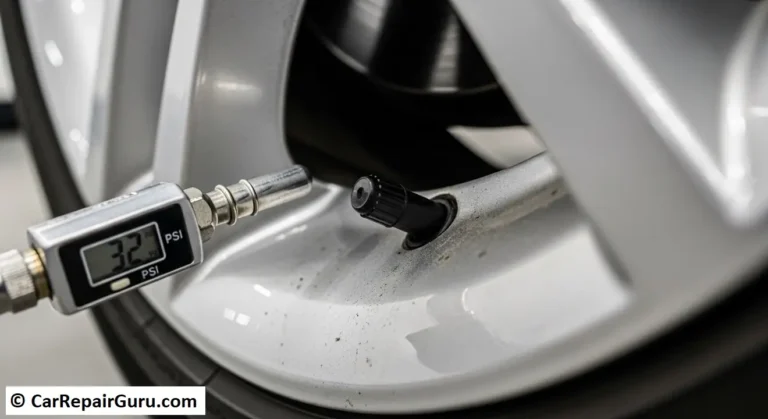
Step 1: Locate the Fuel Rail’s Schrader Valve. Pop the hood and look for the fuel rail, which is a metal pipe that delivers fuel to the injectors. On this rail, you’ll find a small, capped valve that looks exactly like the air valve on your tires. This is the test port, known as the Schrader valve.
Step 2: Relieve the Fuel System Pressure. Before connecting the gauge, you must safely relieve any existing pressure. The easiest way is to locate the fuel pump fuse in your vehicle’s fuse box. Pull the fuse out, then start the engine. It will run for a few seconds and then stall. This clears the fuel from the lines.
Step 3: Connect the Fuel Pressure Gauge. Remove the cap from the Schrader valve. Firmly screw the fitting from your fuel pressure gauge onto the valve. Make sure it’s snug to prevent leaks. It’s wise to wrap a rag around the connection point just in case.
Step 4: Re-pressurize the System. Go back to the fuse box and re-install the fuel pump fuse. Now, have your friend turn the key to the “On” position (engine off) again. You should see the needle on the gauge jump up immediately as the pump primes the system. This is your Key On, Engine Off (KOEO) pressure reading.
Step 5: Check the KOEO Reading. Note the pressure in pounds per square inch (psi). The correct pressure varies by vehicle, but most modern fuel-injected cars should be in the 40-65 psi range. Crucially, you must consult your vehicle’s repair manual for the exact specification.
Step 6: Start the Engine. With the gauge still connected, start the car and let it idle. The pressure may drop slightly, which is often normal. This is your Key On, Engine Running (KOER) reading. Again, check this against your vehicle’s specs.
Step 7: Check Pressure Under Load. While safely in park, gently rev the engine up to around 2,500 RPM and hold it. Watch the gauge. The pressure should remain steady or increase slightly. A significant drop in pressure indicates the pump cannot keep up with the engine’s demand.
Understanding Your Fuel Pressure Test Results
The numbers on the gauge tell a story. Here’s how to interpret what your fuel pump is telling you.
The Classic Culprit: Low Pressure (e.g., 10-20 psi below spec)
If your KOEO or idling pressure is significantly below your vehicle’s specification, you have a fuel delivery problem. This is a very strong indication of a weak or failing fuel pump. However, don’t rush to replace it just yet. A severely clogged fuel filter can also restrict flow and cause low pressure. It’s always a good idea to replace the fuel filter first, as it’s cheaper and part of regular maintenance.
The Obvious Failure: Zero Pressure
If the gauge needle doesn’t move at all when you turn the key on, the pump isn’t running. This confirms what you might have suspected during the “listen test.” The problem is either a completely dead pump motor or, more likely, an electrical issue preventing power from reaching the pump. It’s time to check the fuse, relay, and wiring.
The Deceptive Pump: Pressure Drops Under Load
Sometimes, a pump can produce adequate pressure at idle but can’t sustain it when the engine needs more fuel. If you saw the pressure was good at idle but dropped significantly when you revved the engine, the pump is weak and on its way out. It simply doesn’t have the volume capacity to meet demand.
The Red Herring: Pressure is Too High
This is less common, but if your pressure reading is much higher than the manufacturer’s spec, the problem is likely not the pump. Instead, the issue is probably a faulty fuel pressure regulator, which is stuck closed and not allowing excess fuel to return to the tank.
What If the Pump Isn’t the Problem? Checking Related Components
If your tests resulted in zero noise and zero pressure, don’t condemn the pump just yet. The fuel pump might be perfectly fine, but it can’t run without power. The problem often lies in the simple, inexpensive components that supply that power.
How to Test the Fuel Pump Fuse and Relay
The fuse and relay are the gatekeepers of electricity for your fuel pump. They are usually located in a fuse box in the engine bay or under the dashboard. Your owner’s manual will have a diagram showing their locations.
Checking the Fuse
Pull the fuel pump fuse out and hold it up to the light. You should see an intact metal strip inside. If that strip is broken or looks burnt, the fuse is blown. Replace it with a new fuse of the exact same amperage. If the new fuse blows immediately, you have a short circuit that needs further diagnosis.
Testing the Relay (The Swap Trick)
A relay is an electrical switch. Testing it properly requires a multimeter, but there’s an easy trick. Look at the diagram and find another relay in the fuse box with the same part number and pin configuration (the horn or A/C compressor relay is often identical).
Swap the suspected bad fuel pump relay with the known good one. Now, try the “listen test” again. If you hear the pump hum, you’ve found your problem: a bad relay. This is a simple, five-dollar fix.
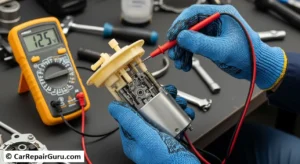
How to Test the Fuel Pump with a Multimeter
If the fuse and relay are good but the pump still won’t run, it’s time to see if power is making it all the way to the pump itself.
Access the Connector: You’ll need to access the electrical connector on top of the fuel tank. This may require removing a back seat cushion or an access panel in the trunk.
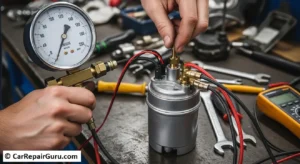
Check for Voltage: Unplug the connector. Set your digital multimeter to the “DC Volts” setting. Have your friend turn the key to the “On” position. Probe the power and ground wires in the connector (your wiring diagram is essential here). You should see a reading of approximately 12 volts for the 2-3 seconds that the pump is supposed to prime.
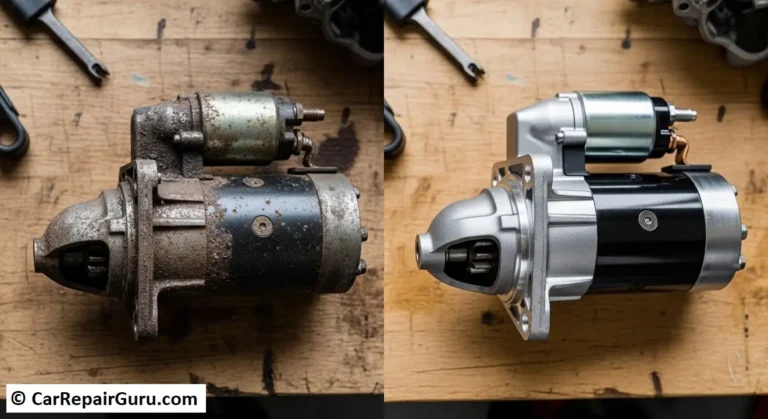
Interpreting the Results: If you get 12 volts, it means the entire electrical circuit is working correctly and delivering power. Since the pump is receiving power but not running, the pump motor itself has failed and the entire fuel pump assembly needs to be replaced. If you get no voltage, the problem is a break in the wiring somewhere between the relay and the pump.
What’s Next? Repair or Replace
You’ve completed your diagnosis and you know for sure that your fuel pump has failed. Now you have a decision to make.
DIY Replacement: Replacing a fuel pump is a complex job that involves dropping the fuel tank or accessing it through the cabin. Given the safety risks of working with a tank full of gasoline, this is generally recommended only for experienced home mechanics with the right tools and a very safe working environment. If you feel confident, it can save you a significant amount on labor costs.
Professional Mechanic: For the vast majority of car owners, this is the recommended route. A professional mechanic has the experience, specialized tools (like a vehicle lift), and safety equipment to do the job correctly and efficiently. They can also properly dispose of the old gasoline.
Cost to Replace a Fuel Pump: Be prepared for a significant expense. The cost can vary widely depending on your vehicle’s make and model. The part itself can range from $150 to over $500, and labor can add another $250 to $700 or more, bringing the total typical cost to anywhere from $400 to $1,200+.
Conclusion
Diagnosing a faulty fuel pump is a process of elimination that puts you in control of your car’s repair. By following a logical sequence—from listening for the initial prime to verifying pressure with a gauge and checking the electrical supply—you can move from guessing to knowing. Remember to always prioritize safety when working with your fuel system.
This knowledge not only empowers you to make an informed decision about your vehicle’s health but also protects you from unnecessary repairs. Whether you tackle the replacement yourself or hand the keys to a pro, you can do so with confidence.
Frequently Asked Questions (FAQ)
How much does it cost to test a fuel pump?
If you do it yourself, the only cost is the tools. A good fuel pressure gauge kit costs around $40-$60, and a multimeter is about $20. Many auto parts stores will loan or rent a fuel pressure gauge for free. If you take it to a mechanic for a diagnostic, expect to pay a diagnostic fee, typically between $80 and $150, which is often applied toward the final repair cost if you have them do the work.
Can you drive with a bad fuel pump?
It is highly discouraged. While a weak pump might allow you to limp the car for a short distance, it is unreliable and unsafe. The engine could stall at any moment, including in the middle of an intersection or on a busy highway, leaving you stranded and creating a dangerous situation. It’s best to get it repaired as soon as possible.
What does a bad fuel pump sound like?
The most common sound is a loud, persistent whining or humming noise coming from the fuel tank area. A healthy pump makes a quiet hum for only 2-3 seconds when you first turn the key. A failing pump’s whine will often be continuous and louder than normal as the motor strains to build pressure.
Does a clogged fuel filter cause the same symptoms as a bad fuel pump?
Yes, absolutely. A severely clogged fuel filter restricts fuel flow and can perfectly mimic the symptoms of a weak pump, including sputtering, loss of power, and hard starting. Because a fuel filter is much cheaper and easier to replace than a fuel pump, it is always recommended to replace a clogged filter before condemning the pump itself.
How long does a fuel pump last?
The lifespan of a fuel pump varies greatly, but most original equipment pumps are designed to last for 100,000 miles or more. However, factors like regularly running the tank close to empty (the fuel cools and lubricates the pump), getting a bad tank of gas with debris, or electrical issues can cause them to fail prematurely.