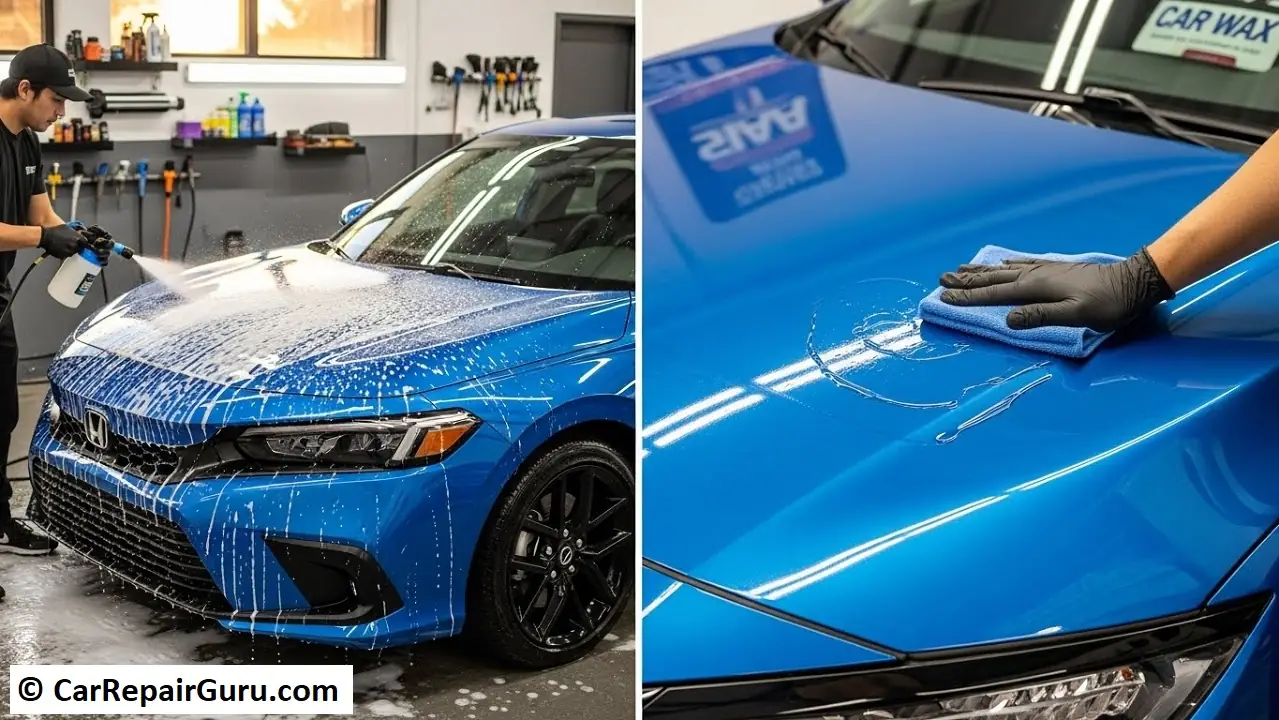
There’s a special kind of pride that comes from stepping back and admiring your car when it’s truly, deeply clean. We’re not talking about a quick run through the automated car wash; we mean that head-turning, water-beading, mirror-like finish that makes your car look brand new again.
But achieving that professional-level shine at home can feel intimidating. Many people unknowingly damage their car’s paint by using the wrong soap, washing in direct sunlight, or using old rags that create fine scratches. The good news? You don’t need to be a professional detailer to get professional results.
This comprehensive guide will walk you through the correct, pro-level method to wash and wax your car. By the end, you’ll have the knowledge and confidence to protect your investment and give it a finish that will make your neighbors jealous.
- Why You Should Regularly Wash and Wax Your Car
- The Essential Car Wash and Wax Toolkit
- For Washing & Drying
- For Decontamination & Waxing
- The 7-Step Professional Car Washing Method
- Step 1 – Find the Right Spot
- Step 2 – Tackle the Wheels and Tires First
- Step 3 – The Pre-Rinse
- Step 4 – The Two-Bucket Car Wash Method
- Step 5 – Wash from Top to Bottom
- Step 6 – The Final Rinse
- Step 7 – Dry Without Scratches
- Pre-Wax Prep – How to Clay Bar Your Car (The Pro’s Secret)
- The Art of Waxing – 5 Steps to a Perfect Finish
- Step 1 – Choose Your Wax
- Step 2 – Apply a Thin, Even Coat
- Step 3 – Let the Wax Haze
- Step 4 – Buff to a Brilliant Shine
- Step 5 – Final Inspection
- Final Thoughts – Maintaining Your Hard Work
- Frequently Asked Questions (FAQ)
- How often should I wash and wax my car?
- Can I use an all-in-one “wash and wax” product?
- What’s the difference between car wax and polish?
Why You Should Regularly Wash and Wax Your Car
Before we grab the buckets, let’s talk about why this is so important. It’s about more than just looking good. A proper wash and wax routine is one of the best things you can do for your vehicle.
- Ultimate Protection: Think of wax as sunscreen and a raincoat for your car’s paint. It creates a protective barrier against damaging UV rays that cause fading, as well as environmental fallout like acid rain, bird droppings, tree sap, and road grime.
- Stunning Appearance: A clean, waxed surface is incredibly smooth, allowing light to reflect evenly. This is what creates that deep, wet-looking gloss that enhances your paint’s color and richness.
- Preserves Paint Longevity: Your car’s paint has a top layer called a clear coat. Dirt and grime are abrasive and can slowly wear this layer down, leading to oxidation, rust, and costly repairs. Regular cleaning and waxing preserve this crucial layer.
- Boosts Resale Value: There’s no denying it—a car with a well-maintained, gleaming exterior will always command a higher price than one with dull, neglected paint. It’s a direct reflection of how the vehicle has been cared for.
The Essential Car Wash and Wax Toolkit
Putting together the right car cleaning supplies is the first step to success. Ditch the old t-shirts and the dish soap—using purpose-built tools will make the job easier, safer, and far more effective.
For Washing & Drying
- Two 5-Gallon Buckets: This is non-negotiable for the two-bucket car wash method, the industry standard for preventing scratches.
- Grit Guards: These plastic grates sit at the bottom of your buckets. They trap the dirt and grit you rinse off your wash mitt, preventing it from being reapplied to your car.
- pH-Neutral Car Wash Soap: Dish soap is designed to strip grease and oil, which means it will also strip any existing wax and dry out your paint and plastic trim. A dedicated car soap is gentle on your car’s finish.
- Microfiber Wash Mitt: Sponges trap dirt and grit in their large pores, essentially turning them into sandpaper. A plush microfiber mitt traps dirt deep within its fibers, away from your paint.
- Separate Wheel & Tire Brushes: Your wheels are covered in abrasive brake dust and heavy grime. Never use the same tools on your wheels that you use on your paint.
- High-Quality Microfiber Drying Towels: Look for a large, plush, “waffle-weave” style towel. They are incredibly absorbent and designed to soak up water without leaving streaks or scratches.
For Decontamination & Waxing
- Clay Bar and Lubricant (Optional but Highly Recommended): Even after a good wash, contaminants can be bonded to your paint. A clay bar safely lifts these away, leaving a perfectly smooth surface.
- High-Quality Car Wax: You have options! Carnauba wax is the classic choice, known for its incredible depth and warm glow. Synthetic paint sealants are engineered for durability, offering longer-lasting protection.
- Foam Wax Applicator Pads: These are soft, reusable pads that help you apply a thin, even layer of wax without scratching the paint.
- Plush, Clean Microfiber Towels: You’ll need a few clean, dry towels specifically for buffing the wax off. Do not use your drying towel for this.
The 7-Step Professional Car Washing Method
Ready? This is where the magic happens. Follow these steps for a perfect, swirl-free wash every time.
Step 1 – Find the Right Spot
Always wash your car in a shaded area, and ensure the surface of the paint is cool to the touch. If you wash in direct sunlight, the heat will cause the water and soap to evaporate too quickly, leaving stubborn water spots and soap residue that can be difficult to remove.
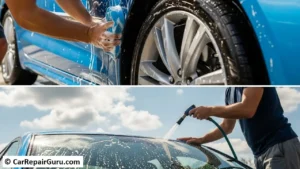
Step 2 – Tackle the Wheels and Tires First
Your wheels and tires are usually the dirtiest part of your car. By cleaning them first, you prevent the heavy grime and brake dust from splashing onto your freshly cleaned paint. Spray them with a dedicated wheel cleaner, agitate with your brushes, and rinse them thoroughly.
Step 3 – The Pre-Rinse
Before a single bubble touches your car, give it a thorough rinse with your hose, starting from the top and working your way down. This crucial step removes the larger, loose pieces of dirt and debris, doing a lot of the heavy lifting for you and reducing the risk of scratching the paint during the contact wash.
Step 4 – The Two-Bucket Car Wash Method
This is the single most important technique to avoid swirl marks.
- Place a grit guard in each of your two buckets.
- Fill one bucket with your pH-neutral car soap and water (the “Wash Bucket”).
- Fill the second bucket with plain, clean water (the “Rinse Bucket”).
- Dunk your microfiber wash mitt into the soapy Wash Bucket and load it up with suds.
- Wash a small section of your car (e.g., half the roof).
- Before getting more soap, dunk the dirty mitt into the clean Rinse Bucket. Swish it around and scrub it against the grit guard to release all the dirt.
- Now that the mitt is clean, you can safely go back to the Wash Bucket for fresh suds and move to the next section. Repeat this process for the entire car.
Step 5 – Wash from Top to Bottom
Gravity is your friend. Start with the roof and work your way down the windows, hood, trunk, and side panels. Save the dirtiest parts of the car—the lower rocker panels and bumpers—for last. Wash in gentle, straight-line motions, not aggressive circles. This further minimizes the chance of creating visible swirl marks.
Step 6 – The Final Rinse
Once the entire car is washed, give it a final, thorough rinse from top to bottom. Ensure no soap residue is hiding in panel gaps, around mirrors, or in the grille.
Pro-Tip: For the final rinse, remove the spray nozzle from your hose. Let the water flow gently over the surfaces in a “sheeting” motion. This encourages most of the water to run off, leaving far less for you to dry by hand.
Step 7 – Dry Without Scratches
Using a large, clean microfiber drying towel, gently dry the vehicle. You can either blot the water off section by section, or lay the towel flat and slowly drag it across the surface. Wringing out the towel as it becomes saturated will help it absorb more water. Don’t forget to dry the door jambs, trunk lid, and around the hood.
Pre-Wax Prep – How to Clay Bar Your Car (The Pro’s Secret)
Think your paint is clean? Run your fingertips over the hood in a plastic sandwich bag. If it feels gritty or rough, your paint has bonded contaminants. A clay bar is the only way to safely remove them. This step is what separates a good detail from a great one.
- Working on a small (2’x2′) section at a time, spray the area generously with clay lubricant.
- Gently glide the clay bar back and forth over the lubricated surface with light pressure. You’ll feel and hear it “grabbing” the contaminants.
- Continue until the clay glides smoothly and silently.
- Wipe the area dry with a clean microfiber towel and feel the difference. It should be as smooth as glass.
The Art of Waxing – 5 Steps to a Perfect Finish
Now for the rewarding part. Applying a layer of wax is what provides that deep shine and long-lasting protection. These are the essential car waxing steps.
Step 1 – Choose Your Wax
For this guide, we’ll focus on traditional paste or liquid waxes, as they offer the best results. The best car wax for you depends on your goal:
- Carnauba Wax: Delivers an unmatched deep, warm, wet-looking shine. Perfect for show cars or enthusiasts who enjoy waxing more frequently (protection typically lasts 2-3 months).
- Synthetic Sealant: An engineered polymer that offers incredible durability and slickness. It may not have the same deep glow as carnauba, but its protection lasts much longer (often 4-6 months or more).
Step 2 – Apply a Thin, Even Coat
The biggest mistake in car detailing at home is using too much wax. More is not better!
- Put a small, pea-sized amount of wax on your foam applicator pad.
- Apply it to the paint in a small section (e.g., half a fender).
- Use gentle, overlapping motions—either straight lines or small circles, consistency is key—to spread the product into a thin, hazy layer. If you can barely see it, you’re doing it right.
Step 3 – Let the Wax Haze
Follow the manufacturer’s instructions, but most waxes need to dry to a haze before being removed. This usually takes 5-15 minutes, depending on the temperature and humidity. A simple way to check is the “swipe test”: gently swipe your finger across the waxed area. If it smears, it needs more time. If it wipes away clean, it’s ready to be buffed off.
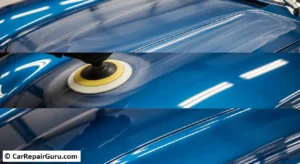
Step 4 – Buff to a Brilliant Shine
Using a clean, plush microfiber towel, gently wipe away the wax residue. Start with light pressure and flip the towel to a clean side frequently to avoid caking it with dried wax. This “buffing” motion reveals the slick, glossy surface underneath.
Step 5 – Final Inspection
Once you’ve buffed the entire car, take a step back and inspect your work from different angles and in different light. Look for any hazy high spots or streaks you may have missed and give them a final, gentle wipe with a clean section of your towel.
Final Thoughts – Maintaining Your Hard Work
You did it! Your car now has a jaw-dropping shine and a durable shield against the elements. By following these steps—using the right tools, mastering the two-bucket method, applying wax thinly, and working in the shade—you’ve performed a detail that rivals the pros.
A properly washed and waxed car isn’t just a joy to look at; it’s a protected investment that will hold its value and beauty for years to come. Now that you know how to wash and wax your car like an expert, grab your supplies and give your vehicle the treatment it truly deserves
Frequently Asked Questions (FAQ)
How often should I wash and wax my car?
You should wash your car every 1-2 weeks, or more often if it’s exposed to harsh elements like salt or bird droppings. A good rule of thumb is to wax your car every 3 months with a carnauba wax or every 4-6 months with a synthetic sealant. The best test? If water stops beading tightly on the surface, it’s time to re-wax.
Can I use an all-in-one “wash and wax” product?
These products are great for maintaining an existing layer of wax between major details, but they don’t provide the same deep clean or durable protection as a dedicated, separate waxing step.
What’s the difference between car wax and polish?
This is a common point of confusion. Polish is a micro-abrasive that removes a microscopic layer of the clear coat to eliminate light scratches, swirl marks, and oxidation. Wax is a non-abrasive protective layer that is applied on top of the paint to add shine and protection. You polish to correct the paint, then you wax to protect it.