Marco Riley
We have all felt that sinking feeling in the pit of our stomach after looking at a repair bill. You drop your vehicle off for a simple oil change, and an hour later the service advisor calls to recommend two hundred dollars in basic filter and wiper replacements. When you work hard for your paycheck, paying triple the retail price for a five-minute task hurts.
I am Marco Riley, an ASE Certified Master Technician with more than fifteen years on the shop floor. I can tell you straight from experience that you do not need a bay full of diagnostic computers or a degree in mechanical engineering to take care of your daily driver. Learning the fundamentals of car DIY maintenance gives you complete control over your vehicle’s health, saves you serious cash, and stops small mechanical problems before they turn into four-figure headaches.
- Driveway Safety Rules – Protecting Yourself and Your Vehicle
- The Quickest Money Savers – Simple DIY Jobs for Beginners
- Battery Care – Cleaning Terminals and Preventing No-Starts
- Fluid Level Checks – Reading Your Car’s Vital Signs
- Tire Health – Pressure, Tread Depth, and Wear Patterns
- DIY vs Professional Repair – Knowing When to Step Aside
- The Starter Tool Kit – What You Actually Need
- Expert Advice from Marco Riley
- Frequently Asked Questions
- Does doing my own maintenance void my car’s warranty?
- How often should I perform basic DIY maintenance checks?
- What is the easiest car maintenance job to learn first?
- How should I dispose of used motor oil and fluids safely?
Driveway Safety Rules – Protecting Yourself and Your Vehicle
Before you turn a single bolt on your car, you need to set up a safe working area. Working in a home driveway has distinct hazards compared to a professional shop with concrete floors and hydraulic lifts. Asphalt can soften under direct summer sun, and uneven ground can cause a raised vehicle to shift unexpectedly.
Always park on a flat, level concrete surface, engage the emergency brake firmly, and place solid rubber wheel chocks behind the tires that remain on the ground. When working under the hood, remove loose jewelry, tie back long hair, and keep your hands clear of electric radiator cooling fans. These fans can cycle on automatically even when the engine is switched off.
Crucial Step Warning: Never place any part of your body under a car supported solely by a hydraulic floor jack. Hydraulic seals can rupture without warning. Always lower the vehicle onto properly rated steel jack stands and give the car a firm push to verify stability before getting underneath.
Before lifting or servicing your vehicle, run through this pre-work safety checklist:
- Surface Check – Verify the ground is level, dry, and made of solid concrete rather than soft dirt or asphalt.
- Transmission Lock – Place automatic transmissions in Park; put manual gearboxes into first gear or reverse.
- Mechanical Chocks – Place heavy-duty chocks against the wheels that remain on the pavement.
- Jack Stand Confirmation – Position jack stands exclusively under factory-designated pinch welds or frame rails, never under oil pans or steering linkages.
The Quickest Money Savers – Simple DIY Jobs for Beginners
Dealerships and quick-lube chains make a substantial portion of their profit margins on simple wearable items. Cabin air filters, engine air filters, and windshield wiper blades require minimal effort, yet shops often charge hefty labor rates to install them.
Your engine air filter sits inside a plastic housing under the hood, secured by metal clips or a few screws. A dirty filter chokes your engine of oxygen, hurting throttle response and gas mileage. Your cabin air filter, usually hidden right behind the glovebox, cleans the air blowing through your climate control vents. Replacing both filters takes less than fifteen minutes combined and requires nothing more than a standard screwdriver.
Pro-Tip: When removing an old cabin or engine filter, check the stamped airflow arrow on the plastic frame. Install your new filter with the arrow pointing in the exact same direction to maintain proper airflow and filtration.
| Maintenance Job | Average Dealership Cost | DIY Home Cost | Average Time Required |
|---|---|---|---|
| Engine Air Filter | $50 – $75 | $15 – $25 | 5 – 10 minutes |
| Cabin Air Filter | $60 – $90 | $12 – $20 | 10 minutes |
| Wiper Blade Pair | $45 – $70 | $20 – $35 | 5 minutes |
| Headlight Bulb Swap | $50 – $100 | $15 – $30 | 15 minutes |
Battery Care – Cleaning Terminals and Preventing No-Starts
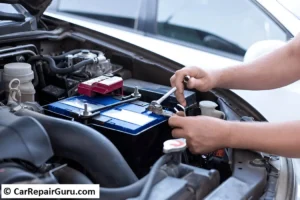
A car battery creates electrical power through a chemical reaction that naturally releases hydrogen gas. Over time, these corrosive fumes react with the metal terminals, forming a crusty white, blue, or greenish powder. This buildup creates electrical resistance, preventing your alternator from charging the battery fully and eventually leaving you stranded with a car that refuses to crank.
Performing regular car battery maintenance and cleaning these connections is a straightforward driveway fix. Mix one tablespoon of household baking soda into a cup of warm water. When applied to the terminals, this alkaline solution neutralizes the acidic corrosion immediately. Scrub the posts and cable clamps with a stiff wire battery brush, wipe everything clean with a shop towel, and dry the area thoroughly.
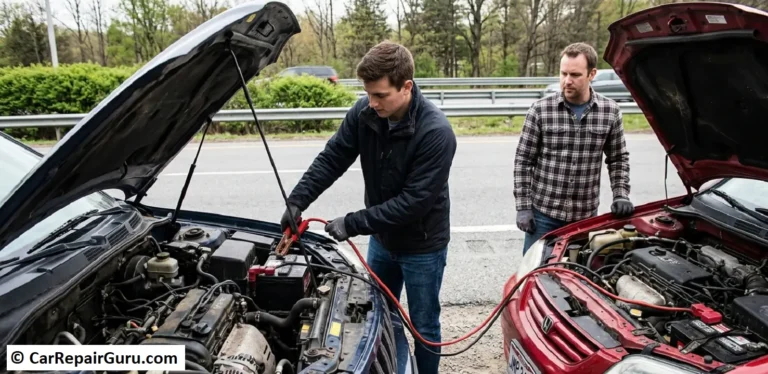
Important Safety Step: Always disconnect the negative (black or minus sign) terminal clamp first, and reconnect it last. This ensures that if your metal wrench touches the vehicle chassis while loosening the positive terminal, you will not cause an electrical arc or spark.
Follow this exact sequence when servicing your battery connections:
- Turn off the ignition and remove the key from the vehicle.
- Loosen the nut on the negative terminal clamp and lift it clear of the post.
- Loosen and remove the positive terminal clamp.
- Apply the baking soda solution to neutralize all visible corrosion.
- Scrub the terminal posts and inside the cable clamps until the bare metal shines.
- Reinstall the positive cable first, tighten firmly, and finish by securing the negative cable.
- Apply a thin coat of dielectric grease or petroleum jelly over the metal terminals to block out air and moisture.
Fluid Level Checks – Reading Your Car’s Vital Signs
Automotive fluids serve as the lifeblood of your powertrain and hydraulic systems. Inspecting them on a monthly basis gives you an early warning sign of internal wear or external leaks before warning lights flash on your dashboard.
To check your engine oil accurately, park on level ground with the engine turned off for at least ten minutes so the oil drains back into the pan. Pull the dipstick, wipe it clean with a lint-free rag, reinsert it completely, and pull it out again. The oil level should rest squarely between the minimum and maximum indicator markings. Brake fluid and power steering fluid reservoirs are translucent, allowing you to check levels without removing caps, which keeps dirt and moisture from contaminating the system.
Common Mechanic Mistake to Avoid: Never twist off a pressurized radiator cap or coolant reservoir lid while the engine is hot. Boiling coolant and trapped steam will spray out under severe pressure, causing instant, severe burns.
Keep this visual guide in mind when checking fluid health:
- Engine Oil – Honey amber when fresh; dark brown is normal during service life; thick jet black with a burnt smell signals an overdue change.
- Transmission Fluid – Bright translucent pink or red; dark brown or black with a burnt odor indicates severe friction material wear.
- Brake Fluid – Clear to light golden amber; dark green or murky brown means moisture contamination has occurred.
- Coolant (Antifreeze) – Bright neon green, pink, blue, or orange depending on the manufacturer formula; muddy brown or rusty fluid indicates internal corrosion.
Tire Health – Pressure, Tread Depth, and Wear Patterns
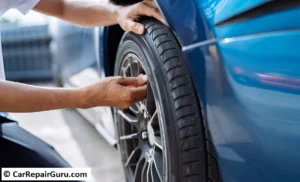
Your tires represent the only contact patch between thousands of pounds of moving steel and the road. Keeping them properly inflated and monitoring for signs of uneven tire wear ensures shorter stopping distances, improved fuel mileage, and dependable traction during heavy rain.
Check your tire pressures at least once a month when the tires are cold, meaning the car has been parked for at least three hours. Never use the PSI number stamped on the tire sidewall; that number represents the maximum pressure the tire can handle safely, not the operating pressure for your car. Instead, check the yellow-and-white tire placard located on the driver side door jamb for the correct factory PSI specification.
Shop Floor Reality: While the classic upside-down penny test can give you a quick check, an inexpensive digital tire tread depth gauge gives you real measurements. Replace your tires when the tread depth reaches 3/32 of an inch, especially if you drive in wet climates.
| Tire Wear Pattern | Underlying Mechanical Cause | Recommended Corrective Action |
|---|---|---|
| Wear on Both Outer Edges | Chronic under-inflation | Inflate tires to factory door jamb PSI |
| Wear Down the Exact Center | Chronic over-inflation | Lower pressure to factory door jamb PSI |
| Smooth Wear on One Edge Only | Wheel camber or toe alignment off | Schedule a professional 4-wheel alignment |
| Diagonal Cupping or Scalloping | Worn shocks or out-of-balance tires | Replace worn dampers and balance wheels |
DIY vs Professional Repair – Knowing When to Step Aside
Being smart about driveway wrenching means knowing your personal limits. Tackling basic repairs builds practical skills, but getting over your head on complex components risks your safety, your transportation, and your wallet.
Routine fluid drains, filter swaps, accessory belts, and brake pad changes are well within reach for an attentive home mechanic with proper tools. However, jobs that involve high mechanical tension, hazardous chemicals, or deep powertrain teardowns belong in a dedicated repair shop equipped with specialized tools and safety equipment.
Costly Mistake to Avoid: Never attempt to disassemble a MacPherson strut assembly using cheap or worn spring compressors. Coil springs store tremendous kinetic energy; if a clamp slips, the spring can release with lethal force.
Use this breakdown to determine whether a job belongs in your driveway or at an ASE certified shop:
- Safe to DIY at Home:
- Engine oil, transmission drain-and-fill, and differential fluid changes
- Disc brake pad and rotor replacements
- Alternator, starter motor, and serpentine belt installations
- Spark plug and ignition coil pack updates
- Thermostats and radiator hose replacements
- Take It to an ASE Certified Shop:
- Complete transmission overhauls and clutch replacements
- Air conditioning repairs involving pressurized refrigerant recovery
- Timing belt replacements on interference engines
- Internal engine rebuilds (head gaskets, crankshaft seals)
- Advanced electronic CAN-bus network and ABS module diagnostics
The Starter Tool Kit – What You Actually Need
You do not need a three-thousand-dollar rolling toolbox to maintain your vehicle. Many home mechanics make the mistake of buying gigantic tool sets packed with hundreds of useless specialty screwdriver bits they will never touch.
Start by investing in a reliable 3/8-inch drive mechanic tool set that includes both shallow and deep metric sockets, a solid ratchet, and a few extensions. Most modern vehicles manufactured after the mid-1990s rely almost exclusively on metric fasteners. Adding a few dedicated fluid tools will allow you to handle nearly all basic servicing tasks immediately.
Budget Recommendation: Buy quality hand tools with a lifetime warranty from reputable brands. Hand tools do not need to come off an expensive tool truck to be durable and accurate enough for home garage use.
Here are the six basic tools every beginner driveway mechanic should own:
- 3/8-Inch Metric Socket Set – Sockets ranging from 8mm to 19mm along with a sturdy teardrop ratchet.
- Quality Hydraulic Floor Jack and Stand Pair – A 2.5-ton to 3-ton steel jack paired with two locking steel jack stands.
- Oil Filter Pliers or Band Wrench – A universal gripping tool that removes stubborn, over-tightened filter housings.
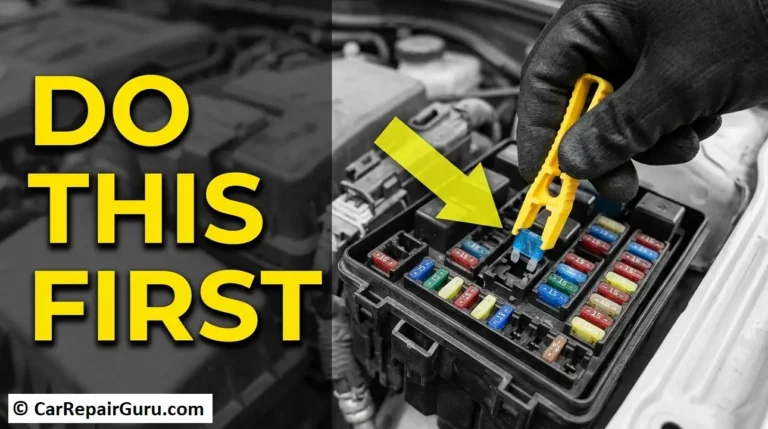
- Digital Multimeter – An indispensable electronic tester for checking battery voltage, alternator output, and blown fuses.
- Fluid Catch Pan and Funnel Kit – A low-profile drain container with an integrated pour spout to keep your driveway clean.
- Digital Tire Pressure Gauge – A backlit, accurate gauge for monitoring cold tire pressures and tread depths.
Expert Advice from Marco Riley
Wrenching on your own vehicle is one of the most rewarding skills you can develop as a driver. When you understand the machinery that carries you and your family down the highway every day, you eliminate the mystery, avoid roadside anxiety, and keep hundreds of dollars in your pocket every single year.
Take your time on every job, double-check your work, and never cut corners on personal safety. Starting with small, manageable tasks is the secret to building lasting mechanical confidence. With a modest set of hand tools, a clean workspace, and a patient approach, mastering your own car DIY maintenance will keep your vehicle running smoothly for hundreds of thousands of miles.
Frequently Asked Questions
Does doing my own maintenance void my car’s warranty?
No. Under the federal Magnuson-Moss Warranty Act, manufacturers cannot void your factory warranty simply because you performed maintenance yourself or used aftermarket parts. You must, however, keep clear records. Save every purchase receipt for filters and fluids, and keep a dated logbook documenting the mileage and service performed.
How often should I perform basic DIY maintenance checks?
Perform a five-minute visual inspection once a month. Check your engine oil, coolant reservoir, brake fluid level, wiper fluid, and tire pressure. Inspect your engine air filter every 12,000 to 15,000 miles, and swap your cabin air filter annually or ahead of heavy allergy seasons.
What is the easiest car maintenance job to learn first?
The simplest starting point is replacing your engine air filter and cabin air filter, followed by changing your wiper blades. These jobs require virtually no tools, carry zero risk of mechanical damage when done with care, and give you immediate confidence working around your vehicle.
How should I dispose of used motor oil and fluids safely?
Never pour motor oil, coolant, or transmission fluid onto the ground, into a storm drain, or into regular household trash. Pour your used fluids into clean, sealable plastic containers (such as the empty jugs your new oil came in) and drop them off at your local auto parts retailer. Most major auto parts stores accept used motor oil, transmission fluid, and car batteries free of charge for recycling.
About the Author