Marco
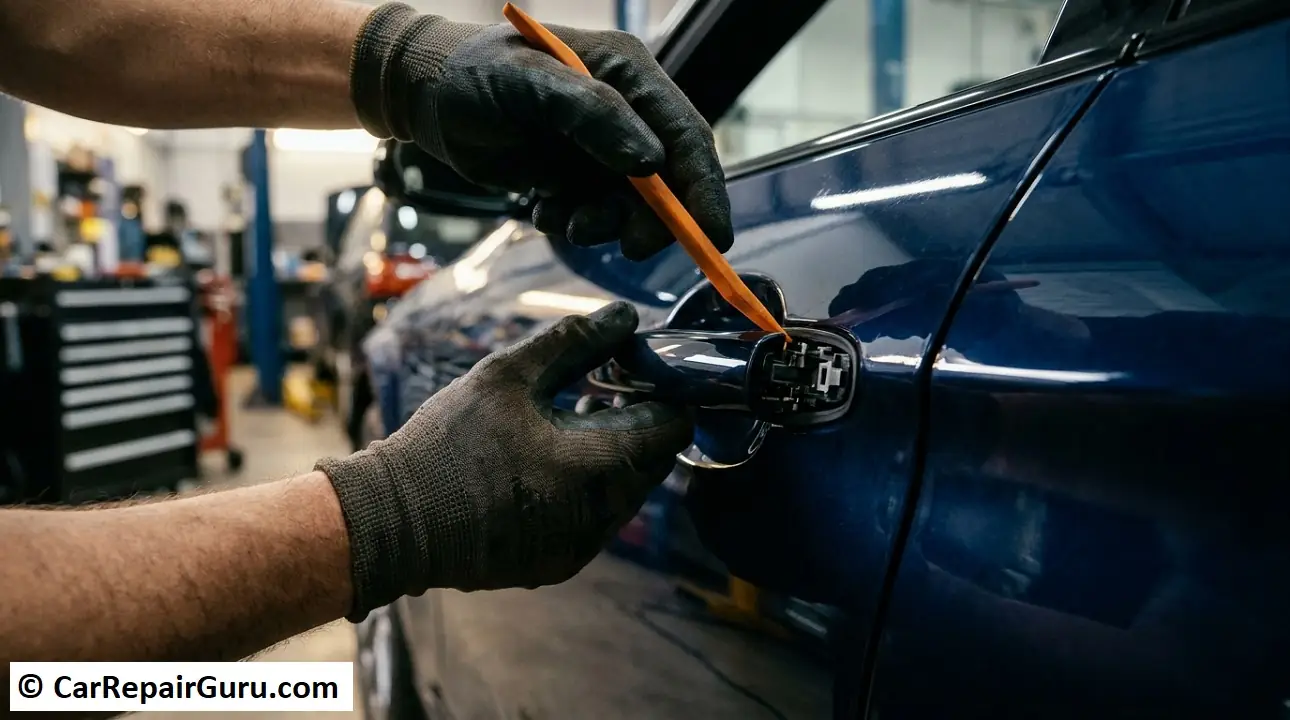
A broken car door handle can leave you climbing through another door just to get into your own car. Sometimes the handle snaps off completely. In other cases, it pulls without opening the door, feels loose, or refuses to return to its normal position.
Before buying a replacement, find out what has actually failed. The problem could be the handle itself, a disconnected linkage, a broken cable, or the door latch. Replacing the wrong part wastes time and money.
If the handle is damaged, replacing it yourself may be possible with basic hand tools. The exact process depends on your vehicle’s make, model, year, and door design. Some handles are accessible through small openings in the door, while others require removing additional components, including the window regulator or glass.
This guide explains how to diagnose the problem, choose the correct replacement part, replace an exterior or interior door handle, and check that everything works before finishing the repair. For more repair advice, explore our car body repair guides. Always use the service instructions for your specific vehicle when the procedure involves safety systems or components that are difficult to access.
- Diagnose the Problem Before Buying a Replacement Handle
- Tools and Replacement Parts You May Need
- Replacement Parts
- Tools
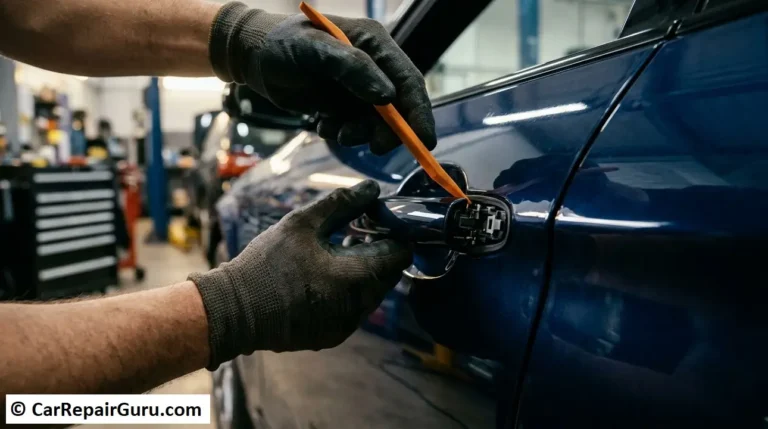
- How to Replace an Exterior Car Door Handle
- Step 1 – Prepare the Vehicle
- Step 2 – Remove the Interior Door Panel
- Step 3 – Access the Handle Mounting Hardware
- Step 4 – Disconnect the Handle Linkage
- Step 5 – Remove the Old Handle
- Step 6 – Transfer the Lock Cylinder if Necessary
- Step 7 – Install the Replacement Handle
- How to Replace an Interior Car Door Handle
- Step 1 – Remove the Door Panel
- Step 2 – Locate the Interior Handle
- Step 3 – Disconnect the Cable or Linkage
- Step 4 – Install the New Interior Handle
- Test the Handle and Door Lock Before Reassembly
- Car Door Handle Replacement Cost
- When to Get Professional Help
- Frequently Asked Questions
- Can I use superglue to fix a broken car door handle?
- How do I find the correct replacement door handle?
- Why won’t my car door open even though the handle moves?
- Are car door handles universal?
- Do I need to remove the window to replace a car door handle?
- Can I replace an exterior door handle without replacing the lock cylinder?
- How long does it take to replace a car door handle?
Diagnose the Problem Before Buying a Replacement Handle
A handle that does not open the door is not necessarily broken. Check what happens when you pull it and compare the symptoms with the possibilities below.
| What you notice | Possible cause | What to check |
|---|---|---|
| The handle is cracked or snapped off | Broken handle or mounting point | Inspect the handle and its mounting area |
| The handle moves freely without releasing the door | Disconnected linkage, damaged cable, or faulty latch | Check the handle mechanism and linkage |
| The handle stays pulled out | Binding mechanism, broken return spring, or latch problem | Check whether the handle moves freely and returns correctly |
| The door opens from inside but not outside | Possible exterior handle or linkage fault | Inspect the exterior release mechanism |
| The door will not open from either handle | Possible latch, lock, linkage, or other mechanical problem | Diagnose the lock and latch before replacing the handle |
These symptoms are clues, not confirmed diagnoses. For example, a handle that moves without releasing the door could have a disconnected linkage, but a faulty latch can cause similar symptoms.
If the door is stuck shut, avoid forcing the handle or prying the door open. You could damage the paint, weather seals, or locking mechanism.
Tools and Replacement Parts You May Need
Gather the necessary tools before removing the door panel. The exact tools depend on how your vehicle’s handle is attached.
Replacement Parts
- Correct replacement handle: Choose a part designed for your vehicle’s exact model year, door position, and trim level.
- Retaining clips: Replace any broken or damaged clips that connect the handle to the linkage.
- Door panel clips: Keep suitable replacement clips available in case the original clips break during removal.
- Replacement seals or gaskets: Obtain these if your vehicle uses them and the original seals are damaged or must be replaced.
Some replacement handles are supplied as bare components, while others include additional hardware or electronic parts. Check the product description carefully before ordering.
Tools
- Plastic trim removal tools
- Screwdrivers suited to the vehicle’s fasteners
- Socket set and extensions
- Torx bits, if required
- Needle-nose pliers, if appropriate for the retaining clips
- Masking tape to protect nearby paint
- A small container for screws and clips
- The vehicle’s service manual or repair instructions
Do not assume that every vehicle uses the same socket size or number of mounting bolts. Check the correct procedure before starting.
Safety note: If the job requires disconnecting the battery, working near a side-impact airbag, or removing the window glass or regulator, follow the manufacturer’s procedure. Disconnecting a battery incorrectly can create additional problems, and some vehicles require specific precautions or electronic reset procedures.
How to Replace an Exterior Car Door Handle
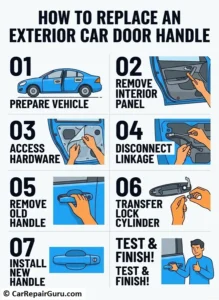
The exterior handle is the part you pull from outside the vehicle. Depending on the design, it may connect to the latch through a metal rod, a cable, or an electronic mechanism.
The following steps describe a general approach. Your vehicle may require additional steps or a different removal sequence.
Step 1 – Prepare the Vehicle
Park on level ground, switch off the ignition, and secure the vehicle. Keep the door open while working whenever possible.
Check the vehicle-specific service instructions before removing the door trim. If the procedure requires electrical isolation, follow the manufacturer’s instructions and wait the specified time before working near airbag components.
Protect the paint around the handle with masking tape. Keep the screws, clips, and small components organized so you can reinstall them in their original positions.
Step 2 – Remove the Interior Door Panel
You usually need access to the inside of the door to reach an exterior handle’s mounting hardware.
Start by locating the panel fasteners. Depending on the vehicle, screws may be hidden behind trim covers, inside the armrest, or near the interior release handle.
Use a plastic trim tool to remove the covers and carefully release the panel clips. Do not pull the panel away forcefully because electrical wiring and release cables may still be connected.
Once the fasteners are removed, release the panel according to the service instructions. Some panels lift upward, while others use a different mounting arrangement.
Disconnect electrical connectors for window switches, speakers, or other equipment as required. Never pull on the wires themselves.
If the door contains side-impact airbag components or you cannot identify a connector safely, stop and consult the vehicle-specific instructions.
Step 3 – Access the Handle Mounting Hardware
With the panel removed, inspect the inside of the door. You may need to peel back a moisture barrier or remove an access cover.
Locate the handle mounting nuts or bolts and identify the connection between the handle and the latch mechanism.
Some vehicles allow access through openings in the door’s inner metal panel. Others require removal of additional parts, such as the window regulator or glass.
Do not assume the window can remain installed. For example, Tesla’s Model 3 service instructions describe a vehicle-specific exterior handle procedure that includes removing the door glass and other components. You can review the official Tesla Model 3 exterior door handle service procedure for an example of why the correct procedure matters.
Step 4 – Disconnect the Handle Linkage
The handle may connect to the latch through a metal rod, a cable, or another type of release mechanism.
Take a clear photo of the original connections before removing anything. This can help you remember the routing and position of the components during installation.
Release the retaining clip according to its design, then disconnect the rod or cable without bending it or forcing the plastic retainer.
Older plastic clips can become brittle. If a clip breaks, replace it with the correct part rather than securing the linkage with an improvised fastener.
If the handle has electrical connectors, keyless-entry equipment, or touch sensors, disconnect them using the specified procedure.
Step 5 – Remove the Old Handle
Remove the handle’s mounting hardware while supporting the handle so it does not fall against the paint.
Keep track of any spacers, seals, brackets, and retainers. Note their positions before removing them.
Carefully withdraw the handle from the door. If it will not come out, check whether a hidden fastener, connected cable, or additional component is still holding it in place.
Do not force the handle through the opening. Some designs require a specific angle or sequence to remove the assembly without damaging the surrounding panel.
Step 6 – Transfer the Lock Cylinder if Necessary
Some exterior handles use a separate mechanical lock cylinder, while others have a different locking arrangement.
If your replacement handle requires the original lock cylinder, transfer it using the vehicle-specific procedure. Retaining clips and cylinder housings vary, so do not assume every handle uses the same type of spring or U-shaped clip.
Keep the original key and lock cylinder together. If the replacement includes a new cylinder, check whether it needs to be matched to your existing key or programmed according to the vehicle’s requirements.
Never force a lock cylinder into a housing that does not accept it correctly.
Step 7 – Install the Replacement Handle
Compare the new handle with the old one before installation. Check the mounting points, linkage connections, seals, and any electrical connectors.
Position the new handle in the door and install the required hardware. Reconnect the linkage and make sure each retaining clip is fully secured.
Install any required seals, plugs, or moisture barriers in their original positions. These components help prevent water entry and preserve the door’s intended protection.
Tighten the fasteners to the manufacturer’s specified torque where applicable. Do not guess the torque value.
How to Replace an Interior Car Door Handle
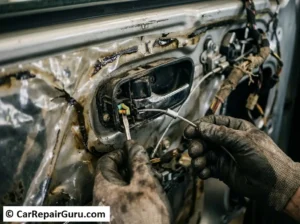
An interior door handle is the lever you pull from inside the vehicle to release the door latch. Its replacement can be simpler than replacing an exterior handle, but the mounting method and linkage still vary.
Step 1 – Remove the Door Panel
Locate and remove the fasteners holding the interior trim panel. Use plastic trim tools to release the clips without damaging the panel.
Lift or release the panel as directed by the service instructions. Disconnect any necessary switches, connectors, or cables before moving it away from the door.
Step 2 – Locate the Interior Handle
The handle may be attached directly to the door panel or mounted to a separate bracket.
Inspect how the handle connects to the release mechanism. Some vehicles use a cable, while others use a metal rod or a different linkage arrangement.
If the handle is integrated into a larger trim assembly, you may need to replace the assembly rather than the lever alone.
Step 3 – Disconnect the Cable or Linkage
Photograph the original arrangement before disconnecting the release cable or rod.
Release the retaining clip or cable end without bending the linkage. If the cable housing is held by a separate retainer, make sure you understand how that retainer releases before applying pressure.
If the handle is attached with rivets or specialized fasteners, consult the service procedure for the correct removal and replacement method. Do not drill or substitute fasteners unless the manufacturer specifies an appropriate repair.
Step 4 – Install the New Interior Handle
Fit the replacement handle in the correct position and reconnect the cable or linkage.
Check that the cable housing is seated securely and the release mechanism moves as intended. Reinstall any brackets or fasteners using the specified procedure.
Before reinstalling the door panel, test the mechanism while the door remains open. If the handle does not release the latch reliably, investigate the connection instead of forcing the lever.
Test the Handle and Door Lock Before Reassembly
Do not reinstall the door panel until you have checked the repair. A loose connection or incorrectly installed clip may prevent the door from opening after everything is put back together.
With the door open, inspect the handle and linkage for interference. Check that the handle returns to its resting position and that the lock and release mechanisms work correctly.
Where the vehicle’s service procedure permits a static latch test, follow that exact procedure. I-CAR explains how a suitable tool can simulate the striker during a static test to verify that the latch closes and releases after door handle work. Read its latch and door handle testing guidance.
Do not improvise a latch test if you are unsure how the mechanism operates. Keep your fingers clear of the latch, never slam the door during testing, and make sure the latch is fully released before attempting to close the door.
Check the following before reinstalling the panel:
- The exterior handle operates and returns correctly, if replaced.
- The interior handle releases the latch, if replaced.
- The door locks and unlocks as intended.
- The linkage clips and cable retainers remain securely connected.
- Electrical connectors and window switches work as expected.
- All required moisture barriers, seals, and access plugs are restored.
If the latch sticks, the handle does not release it reliably, or the lock behaves unexpectedly, do not close the door until the fault is corrected.
Once the mechanism passes the required checks, reinstall the moisture barrier and door panel. Reconnect all electrical components, secure the panel fasteners, and test the window and lock functions again.
Car Door Handle Replacement Cost
The cost of replacing a car door handle depends on the vehicle, the type of handle, the part’s availability, and how much work is required to access it.
A basic handle may cost relatively little, while a painted exterior handle with electronic entry features can cost substantially more. Labor also varies depending on whether the technician can access the handle directly or must remove additional components.
The following table summarizes the main cost factors without treating any particular price as a universal estimate.
| Expense | What affects the cost |
|---|---|
| Replacement handle | Vehicle model, part quality, finish, and included hardware |
| Clips and seals | Whether the original components can be reused safely |
| Labor | Access difficulty, required disassembly, and local labor rates |
| Paint or finishing | Whether the replacement needs color matching or additional finishing |
| Electrical work | Whether the handle includes sensors, wiring, or electronic entry features |
For a useful estimate, ask a repair shop for a quote that separates parts and labor. Provide the vehicle’s year, make, model, and the affected door. Ask whether the quote includes any required clips, seals, paint, and electronic setup.
DIY replacement can save labor costs when the procedure is straightforward and you have the right tools. However, if the job requires removing glass, handling airbag-related components, or diagnosing a complicated locking system, professional repair may be the safer and more practical choice.
When to Get Professional Help
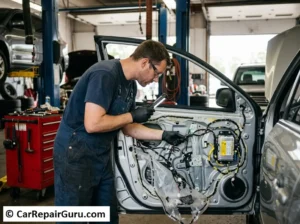
Replacing a door handle is not always a simple trim repair. Consider professional assistance if:
- The door is stuck shut and cannot be opened normally.
- The repair requires removing window glass or a regulator and you lack the necessary experience.
- The procedure involves side-impact airbag components or unfamiliar electrical systems.
- The replacement handle does not fit or the linkage cannot be adjusted according to the service instructions.
- The door still fails to latch or release correctly after the repair.
- The lock, keyless-entry system, or electronic handle requires programming or specialized diagnosis.
A properly functioning door latch is important for safe entry and exit. If the door cannot close and latch securely, do not drive the vehicle until the problem has been corrected.
Replacing a car door handle is manageable when the fault is correctly identified and the repair procedure matches your vehicle. Choose the right part, avoid forcing clips or linkages, and verify that the door locks and releases properly before putting the trim back together.
Frequently Asked Questions
Can I use superglue to fix a broken car door handle?
Superglue is not a reliable repair for a handle that has snapped or cracked under load. The handle needs to withstand repeated pulling, and adhesive alone may fail. Replace the damaged part or use a repair method specifically approved for that component.
How do I find the correct replacement door handle?
Check the vehicle’s year, make, model, trim level, and affected door. Compare the part number and mounting arrangement, and use the VIN when needed to confirm compatibility. Do not rely on appearance alone.
Why won’t my car door open even though the handle moves?
Possible causes include a disconnected cable, a broken linkage clip, a damaged handle mechanism, or a faulty latch. The symptoms alone cannot confirm which part has failed. Diagnose the release mechanism before ordering parts.
Are car door handles universal?
No. Handles vary by vehicle, model year, door position, mounting points, finish, and locking or electronic features. Confirm compatibility before purchasing a replacement.
Do I need to remove the window to replace a car door handle?
Not always. Some vehicles provide enough access through openings in the inner door panel, while others require removal of the window, regulator, or additional components. Follow the procedure for your exact vehicle.
Can I replace an exterior door handle without replacing the lock cylinder?
Often, yes. Some replacement handles allow the original lock cylinder to be transferred, so you can continue using your existing key. Check the design of your vehicle and the replacement part before beginning the repair.
How long does it take to replace a car door handle?
The time depends on the vehicle’s design, the handle type, and how much disassembly is required. A straightforward replacement may be manageable for an experienced DIYer, while a job involving glass removal, electronic components, or a stuck latch can take considerably longer.
About the Author