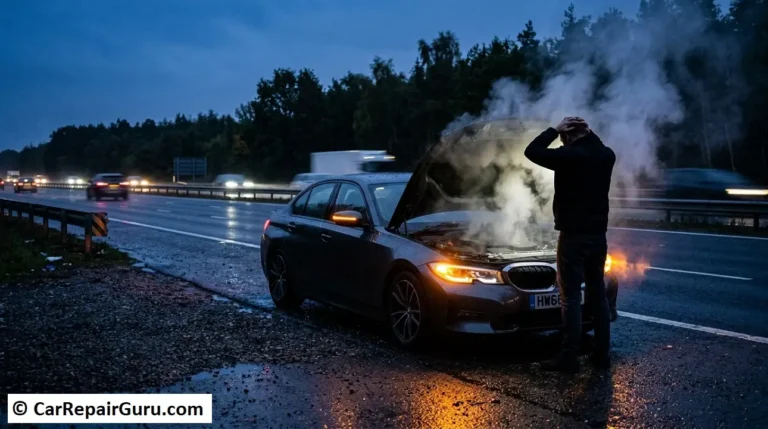
There are few moments behind the wheel more terrifying than stepping on the brake pedal and feeling it sink effortlessly to the floor. No resistance, no stopping power – just a “squishy” feeling and a surge of panic.
If this happens, or if you’ve noticed a puddle of mysterious fluid forming near your tires, you are likely dealing with a brake line leak.
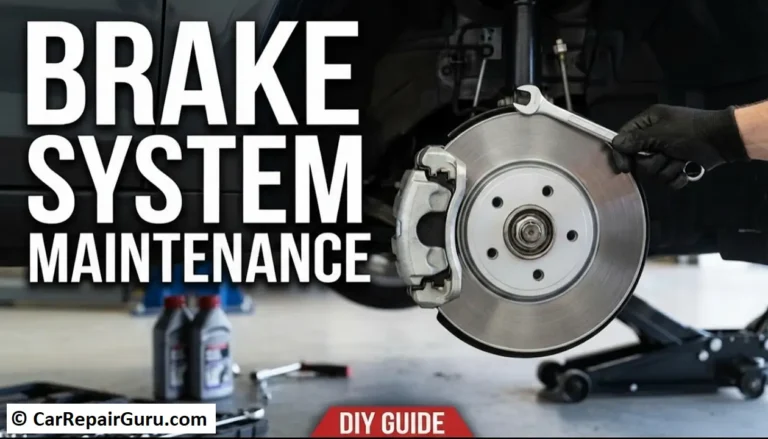
The braking system is the single most critical safety feature in your vehicle. It relies on hydraulic pressure to clamp your brake pads against the rotors. When fluid leaks out, air gets in, pressure drops, and your ability to stop the car disappears.
In this guide, we’re going to walk through everything you need to know about brake line leaks repair, from spotting the symptoms and estimating the cost to replace brake lines, to deciding whether to tackle a DIY fix or call a professional.
⚠️ CRITICAL SAFETY WARNING: Do not drive a vehicle with a known brake fluid leak. Even if the brakes feel “okay” at low speeds, a sudden panic stop can blow out a rusted line completely, causing total brake failure. If you suspect a leak, tow the vehicle.
- Symptoms of a Brake Fluid Leak
- 1. The “Spongy” or Soft Pedal
- 2. Visible Puddles
- 3. Dashboard Warning Lights
- 4. Corrosion and Wet Spots
- Why Do Brake Lines Fail?
- Can I Drive with a Brake Leak?
- Brake Line Repair – Splice vs. Full Replacement
- Option 1 – Splicing (Section Repair)
- Option 2 – Full Replacement
- Brake Line Materials – Steel vs. NiCopp vs. Stainless
- How Much Does Brake Line Repair Cost?
- Professional Repair Costs
- DIY Repair Costs
- DIY Guide – Overview of Fixing a Steel Brake Line
- 1. Gather Your Tools
- 2. Locate and Remove
- 3. Prep the New Line
- 4. Flaring the Line
- 5. Install and Tighten
- 6. Bleed the Brakes
- Choosing the Right Brake Fluid
- Temporary Fixes – What NOT To Do
- How to Prevent Future Brake Line Rust
- Final Thoughts
- Frequently Asked Questions
Symptoms of a Brake Fluid Leak
Your car usually gives you warning signs before the brakes fail completely. Recognizing these brake fluid leak symptoms early can save you money—and potentially your life.
1. The “Spongy” or Soft Pedal
This is the classic symptom. When you press the brake, it shouldn’t feel like stepping on a ripe plum. It should be firm. If the pedal travels closer to the floor than usual or feels soft, you have air in the lines or a loss of fluid pressure.
2. Visible Puddles
Brake fluid isn’t like oil or coolant. Fresh fluid is usually clear with a slight yellow tint, similar to vegetable oil. Old fluid can look dark brown or black. If you touch it, it feels slick and oily. If you see this pooling near the inside of your wheels or under the middle of the car, you have a leak.
3. Dashboard Warning Lights
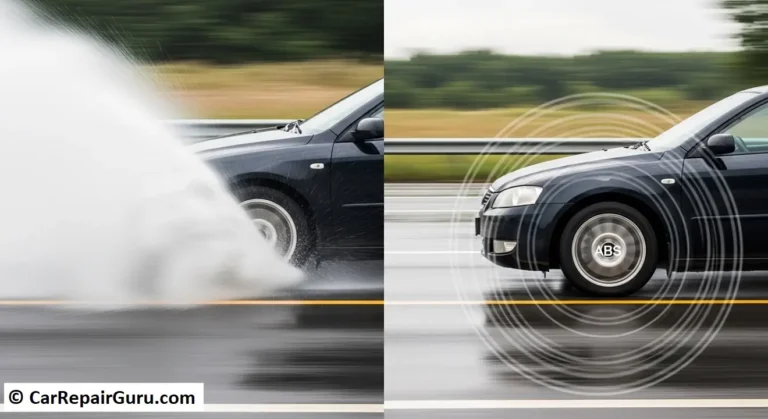
Modern cars are smart. If your fluid reservoir gets low, the Red Brake Warning Light (often an exclamation point inside a circle) will illuminate. In some cases, the ABS (Anti-Lock Brake System) light may also turn on because the system can’t pressurize properly.
4. Corrosion and Wet Spots
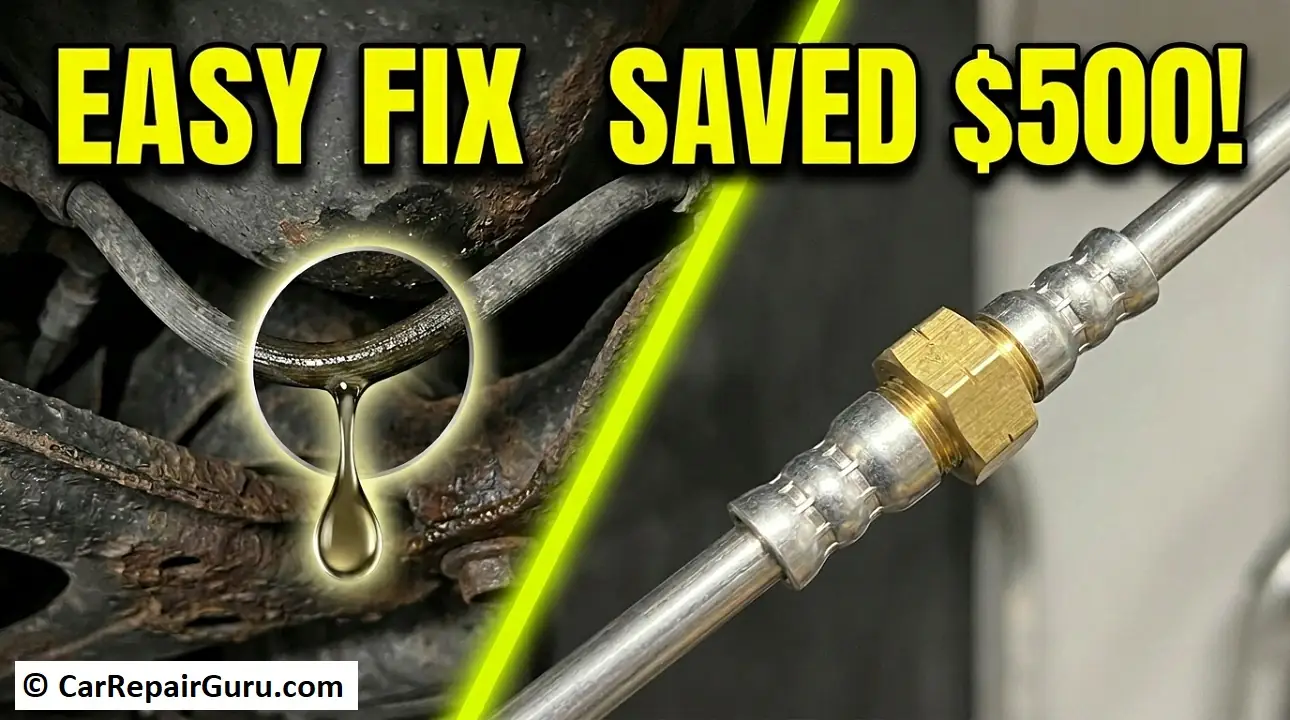
If you crawl under the car and look at the metal tubes running along the frame, they should be dry. If they are caked in rust and look “sweaty” or wet, they are actively weeping fluid.
Why Do Brake Lines Fail?
To understand how to fix a broken brake line, you have to understand what killed it.
- The “Rust Belt” Factor (Corrosion): This is the #1 killer of brake lines. In regions where road salt is used in winter, the steel lines underneath the car are constantly bombarded with corrosive slush. Over time, the steel flakes away until pinholes form.
- Friction (Rubbing): Sometimes, a line will come loose from its plastic clip and rub against the frame or suspension. Eventually, the metal wears through.
- Rubber Hose Deterioration: Your brake system has two types of lines: hard metal lines (running the length of the car) and soft rubber hoses (connecting the hard line to the caliper so the wheels can turn). Rubber dries out, cracks, and rots over time.
- Road Debris: A kicked-up rock or a piece of debris on the highway can puncture a line, though this is less common than rust.
Can I Drive with a Brake Leak?

Let’s answer this clearly: No.
Brake systems operate under massive hydraulic pressure—often exceeding 1,000 to 2,000 PSI during a hard stop.
You might think, “It’s just a small drip, I can drive it to the shop.” Here is the reality: That “small drip” is a weak point in a pressurized system. When you hit the brakes hard to avoid a squirrel or a red light runner, that weak point can burst wide open. You will lose all pressure instantly. The emergency brake (parking brake) is not designed to stop a car quickly from highway speeds.
The verdict: Call a tow truck. It is not worth the risk.
Brake Line Repair – Splice vs. Full Replacement
When you take your car to a mechanic or look at brake line repair kits, you generally have two options: splicing in a new section or replacing the whole line.
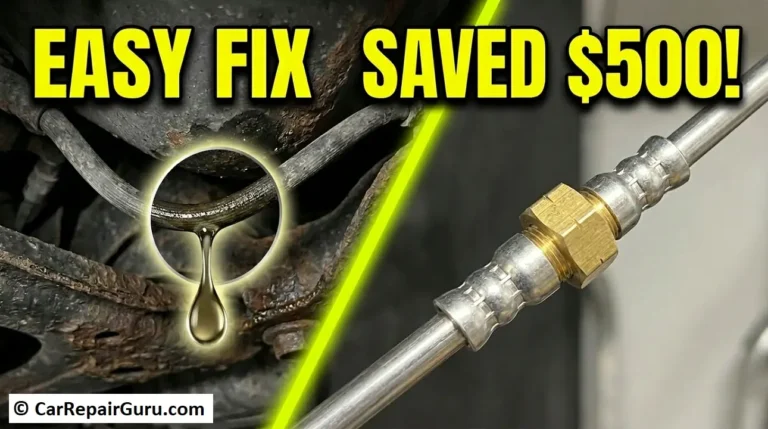
Option 1 – Splicing (Section Repair)
If you have one bad spot of rust on a long line that is otherwise healthy, you can cut out the bad section and “splice” in a new piece of line.
- The Pros: It’s faster and much cheaper. You don’t have to snake a 10-foot line over the gas tank and rear axle.
- The Cons: It introduces two new connection points (potential leak spots).
- The Rule: You must use high-pressure brake unions. You cannot use compression fittings (the kind used for plumbing water pipes) on brake lines. Compression fittings are illegal for brake systems in many states because they can pull apart under high pressure.
Option 2 – Full Replacement
This involves removing the entire rusted line from the master cylinder all the way to the flexible hose at the wheel.
- The Pros: It’s the safest, longest-lasting fix. You eliminate all the hidden rust.
- The Cons: It is labor-intensive and expensive.
Pro Tip: If you are replacing lines, ask for NiCopp (Nickel-Copper) tubing. Unlike traditional steel, NiCopp does not rust, and it is much easier to bend and shape. It costs slightly more but lasts forever.
Brake Line Materials – Steel vs. NiCopp vs. Stainless
When you decide to replace a section of your brake line, you need to choose the right material. Not all metal tubing is created equal, and choosing the wrong one can make the job ten times harder.
- Standard Steel Lines (PVF Coated): This is what most cars come with from the factory. It is cheap and strong, but it is rigid and hard to bend by hand. While it usually has a coating to resist rust, it will eventually corrode again, especially in winter climates.
- NiCopp (Nickel-Copper) Lines: This is the “gold standard” for repair shops and DIYers today. It is an alloy of copper, nickel, and iron.
- Why choose it? It is virtually rust-proof and much softer than steel, meaning you can often bend it with your thumbs without needing a bending tool. It seals easily and lasts the life of the vehicle.
- Stainless Steel: High-end restoration projects often use stainless steel for its shiny appearance and durability. However, it is extremely hard. It is difficult to flare and almost impossible to bend without expensive hydraulic tools. For a standard repair, avoid stainless steel unless you have professional-grade equipment.
How Much Does Brake Line Repair Cost?
The cost to replace brake lines varies wildly depending on whether you do it yourself or hire a pro, and whether you replace one line or all of them.
Professional Repair Costs
- One Line (Splice/Partial): $150 – $300.
- One Line (Full Replacement): $250 – $500.
- Complete Replacement (All Lines): $1,000 – $2,000+.
- Why so much? The parts are cheap, but the labor is brutal. Mechanics often have to drop the fuel tank, remove exhaust shields, or dismantle parts of the suspension to route the new lines properly.
DIY Repair Costs
- Parts: A roll of NiCopp line and a bag of fittings costs about $40 – $70.
- Tools: A good flaring tool and cutter will run you $50 – $150.
- Fluid: $15 for a quart of DOT 3 or DOT 4 fluid.
- Total: Under $200, assuming you are willing to get your hands dirty.
DIY Guide – Overview of Fixing a Steel Brake Line
Note: This is an advanced DIY job. If you are not comfortable making precision airtight seals, do not attempt this.
If you decide to tackle this, here is the general workflow for how to fix a broken brake line.
1. Gather Your Tools
You cannot do this with pliers and a wrench. You need:
- A tubing cutter.
- A double flaring tool (for domestic/Asian cars) or a bubble flare tool (for European cars).
- Line wrenches (flare nut wrenches) to avoid stripping the fittings.
- Brake fluid and a bleeding kit.
2. Locate and Remove
Identify the leak. If the rest of the line looks crusty and rusted, don’t try to splice it—the old metal will crumble when you try to flare it. You need to find “clean” metal or replace the whole run. Use the tubing cutter to remove the damaged section.
3. Prep the New Line
Measure your new line. Crucial Step: Slide your new fittings onto the line before you flare the ends. If you flare the end first, you won’t be able to get the nut on!
4. Flaring the Line
This is the art form. You must use the tool to fold the end of the metal tube into a perfect cone (double flare) or bubble.
- If the flare is crooked or cracked, it will leak.
- Practice on a scrap piece of tubing 5 or 6 times before doing the real one.
5. Install and Tighten
Connect your new line using a union or screw it directly into the component. Tighten it snugly, but don’t over-torque it or you’ll crack the flare.
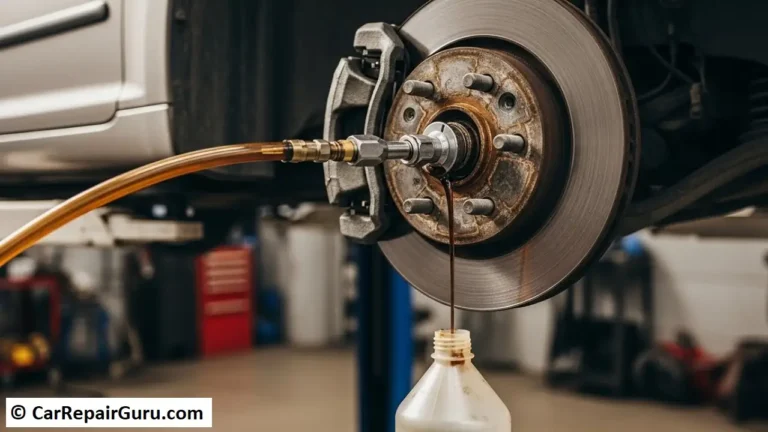
6. Bleed the Brakes
You have introduced air into the system. You must “bleed” the brakes to get the air out. Starting at the wheel furthest from the master cylinder, open the bleeder valve while a helper pumps the pedal, flushing fluid through until no bubbles remain.
Choosing the Right Brake Fluid
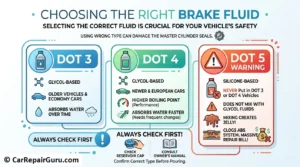
Once the line is fixed, you have to refill the reservoir. You cannot just grab any bottle off the shelf. Brake fluid is specific to your vehicle’s design, and using the wrong type can ruin the seals in your master cylinder.
- DOT 3: The most common fluid for older vehicles and standard economy cars. It is glycol-based and absorbs water over time.
- DOT 4: Used in many newer vehicles and European cars. It has a higher boiling point than DOT 3, making it better for performance, but it absorbs water faster and needs to be changed more often.
- DOT 5 (Silicone): WARNING: Never put DOT 5 in a standard car that calls for DOT 3 or 4. DOT 5 is silicone-based and does not mix with glycol fluids. If you mix them, the fluid will turn to jelly and clog your anti-lock brake system (ABS), leading to a massive repair bill.
Always check your reservoir cap or owner’s manual to confirm the correct fluid type before pouring.
Temporary Fixes – What NOT To Do
The internet is full of bad advice. When it comes to brake line leaks repair, there are no “hacks.”
- NO Compression Fittings: As mentioned, these are for water, not hydraulic brakes. They can slide off.
- NO JB Weld or Epoxy: Glue cannot hold 2,000 PSI of internal pressure. It will burst.
- NO Duct Tape or Rubber Wrap: This will not stop the fluid. The pressure will spray right past the tape.
There is no “patch” for a brake line. You must replace the metal tubing.
How to Prevent Future Brake Line Rust
If you just spent hundreds of dollars fixing a leak, you want to make sure you never have to do it again. While you can’t control the weather or road salt, you can take steps to protect your undercarriage.
- Regular Car Washes: In the winter, get a car wash that includes an “undercarriage spray” at least once every two weeks to blast away the salt accumulation.
- Oil-Based Undercoating: Products like Fluid Film or Woolwax are excellent for protecting brake lines. Unlike rubberized undercoatings (which can trap moisture against the metal), oil-based sprays creep into crevices and repel water. Spraying your lines once a year before winter can stop rust in its tracks.
- Flush Your Brake Fluid: Brake fluid is “hygroscopic,” meaning it absorbs moisture from the air. Over time, water builds up inside your brake lines, rotting them from the inside out. Flushing your brake fluid every 2 to 3 years prevents internal corrosion.
Final Thoughts
A brake line leak is one of the most serious mechanical issues a car can have, but it is also entirely fixable. Whether you choose to invest in the tools to bend your own NiCopp lines or pay a professional to ensure the job is done to factory standards, the most important thing is speed.
Do not ignore the soft pedal. Do not ignore the spot on the driveway. The cost to replace brake lines is significantly cheaper than the cost of an accident.
If you aren’t 100% confident in your ability to create a perfect high-pressure flare, leave this job to the pros. Your safety—and everyone else’s on the road—is worth it.
Frequently Asked Questions
Can you just patch a brake line?
No. You cannot patch it like a bicycle tire. You must cut out the bad section and replace it with new metal tubing and proper fittings.
Is it usually the metal line or the rubber hose?
It depends on age and location. In snowy areas, the metal lines usually rust out first. In warm, dry climates, the rubber hoses often dry-rot and crack first.
How often should brake lines be replaced?
There is no set schedule. However, if you live in the Rust Belt, you should have a mechanic inspect the underside of your vehicle for corrosion every year once the car is over 10 years old.
How long does it take to fix a brake line?
A simple splice typically takes a mechanic 1 to 2 hours. However, replacing all hard lines on a rusted vehicle is a major job that can take 6 to 8 hours due to difficult routing around the fuel tank and chassis.
Is it safe to splice a brake line?
Yes, but only if you use high-pressure flare unions on solid metal tubing. You should never use compression fittings (plumbing style), as they can pull apart under the immense hydraulic pressure of a panic stop.