Marco Riley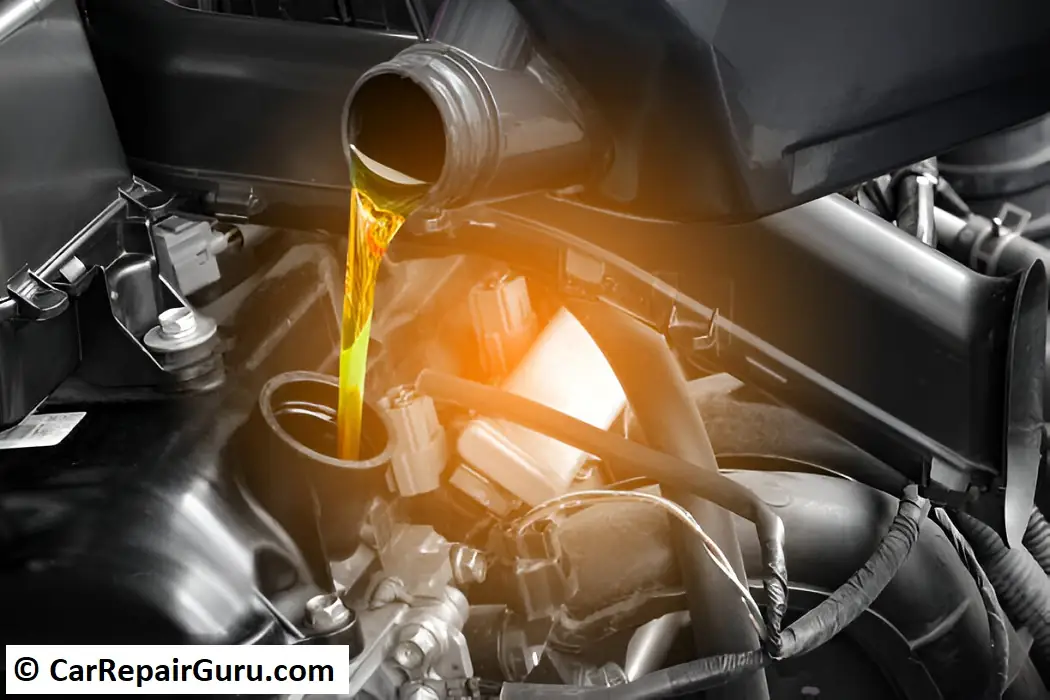
We have all been there – walking out to your car, glancing at the windshield sticker, and realizing your service interval passed three weeks ago. Between busy work schedules and dealership service quotes that seem to climb higher every year, taking care of basic maintenance can feel like a headache. But once you get your hands on a few basic hand tools, learning how to change car oil in your own driveway gives you total control over the parts going into your engine while keeping hard-earned money in your wallet.
As an ASE Certified Master Technician, I have performed thousands of oil changes on everything from compact commuter cars to heavy-duty work trucks. While modern engines are sophisticated pieces of machinery, draining and refilling your lubricant is straightforward once you respect the safety rules and understand the workflow.
- Essential Tools and Supplies You Need Before Starting
- Safety First – Preparing and Lifting the Vehicle Correctly
- Step 1 – Draining the Old Oil Without the Mess
- Step 2 – Removing and Replacing the Oil Filter
- Step 3 – Reinstalling the Drain Plug with a New Crush Washer
- Step 4 – Pouring Fresh Oil and Checking the Dipstick
- Step 5 – Starting the Engine and Checking for Leaks
- Responsible Disposal – What to Do with Old Motor Oil
- Common DIY Oil Change Mistakes to Avoid
- Final Thoughts
- Frequently Asked Questions
- How long does an oil change usually take at home?
- Can I switch between synthetic and conventional oil without flushing?
- What happens if I accidentally put too much oil in my engine?
- Why did my fresh oil turn dark almost immediately after the change?
Essential Tools and Supplies You Need Before Starting
Before turning a single bolt, you need your gear lined up next to the vehicle. Scrambling to find an elusive socket while hot oil drips into a pan is how messes happen.
You do not need an industrial shop setup. A solid floor jack, two sturdy jack stands, a drain pan with plenty of capacity, an oil filter wrench, and a metric socket set will handle almost every passenger vehicle on the road. Along with tools, check your owner’s manual for your vehicle’s specific oil capacity and viscosity rating, such as 0W-20 or 5W-30. Always purchase an OEM-quality filter and a fresh crush washer for the drain bolt.
Mechanic Setup Tip: Always double-check that your oil catch pan can hold at least two quarts more than your engine’s total oil capacity. If your truck takes seven quarts, a five-quart pan will overflow all over your driveway before you can stop it.
| Required Tool or Supply | Primary Function | DIY Practical Notes |
|---|---|---|
| Floor Jack and Jack Stands | Lifting and securing the vehicle | Never use a hydraulic floor jack alone for support. |
| Socket Set & Ratchet | Removing the oil pan drain plug | Most common sizes are 13mm, 14mm, 15mm, and 17mm. |
| Oil Filter Wrench | Breaking loose stubborn filters | Band-style or end-cap sockets work best in tight spaces. |
| Catch Pan & Clean Funnel | Capturing waste and pouring fresh oil | Wipe the funnel clean inside and out before pouring. |
| Fresh Engine Oil & Filter | Lubrication and filtration | Match the exact API specification listed in your manual. |
| New Crush Washer / Gasket | Sealing the drain plug to the pan | Single-use soft metal or rubber-coated washer prevents leaks. |
Safety First – Preparing and Lifting the Vehicle Correctly
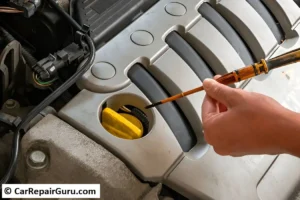
Working underneath a vehicle requires zero compromises on safety. Park your car on a completely flat, level concrete surface. Set the emergency parking brake firmly, place the transmission in Park (or First gear for manual transmissions), and position wheel chocks securely behind the rear tires.
Start the engine and let it idle for two to three minutes. Cold oil is thick and drains slowly, trapping suspended contaminants in the bottom of the pan. Warming it up slightly thins the fluid so it carries debris out with it. Do not let the engine reach full operating temperature, or the exhaust pipes and oil will be hot enough to burn your skin.
Crucial Safety Warning: Never slide any part of your body under a car supported solely by a hydraulic floor jack. Hydraulic seals can fail without warning. Always lower the vehicle onto rated jack stands positioned directly beneath factory pinch welds or reinforced frame rails, then give the car a firm shake to ensure total stability before getting underneath.
- Park and Chock: Solid, level concrete ground with rear wheels blocked.
- Warm the Fluid: Run the engine for 2 to 3 minutes, then shut it off.
- Jack the Car: Lift from designated front lift points.
- Set on Stands: Lower onto jack stands and test stability with a firm push on the bumper.
Step 1 – Draining the Old Oil Without the Mess
Slide underneath the car and locate the engine oil pan. It sits directly under the engine block, distinct from the transmission pan which is located further back. The oil pan features a single bolt located at the lowest point or along the lower rear edge.
Slide your catch pan underneath, positioning it slightly forward of the plug to catch the initial outward stream of fluid. Fit the correct socket onto the drain plug and turn it counterclockwise to break it loose. Once it turns freely, remove the ratchet and finish unscrewing the bolt with your fingers.
Pro-Tip for Clean Hands: Keep light inward pressure on the bolt as you turn the final threads. When you feel the threads disengage completely, pull the plug away quickly in a clean, upward motion. This keeps the oil from running down your arm.
- Position the catch basin slightly offset to account for the arc of the draining fluid.
- Loosen the drain plug counterclockwise using your socket and ratchet.
- Unscrew the remaining threads using your fingertips while maintaining inward pressure.
- Pull the bolt back quickly and let the oil drain completely until it drops to a faint drip (usually 5 to 10 minutes).
- Remove the engine oil filler cap up top to allow air in, which speeds up the drainage process below.
Step 2 – Removing and Replacing the Oil Filter
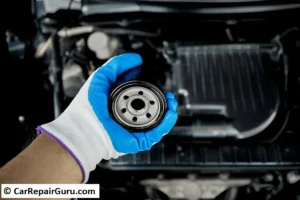
With the pan still draining, locate the oil filter. Depending on your vehicle, you will either see a traditional metal spin-on canister or a plastic housing containing a replaceable paper cartridge. Reposition your drain pan directly underneath the filter location, as dirty oil will spill out the moment the seal breaks.
Fit your filter wrench over the body and turn counterclockwise. Once loose, spin it off by hand. Empty the residual fluid inside the filter into the catch pan. Take a clean shop rag and wipe the mounting surface on the engine block clean of old grit and oil.
Common Mistake to Avoid – The Double Gasket Trap: Inspect the old filter after removing it. Make sure the black rubber O-ring came off with it. If the old gasket sticks to the engine block and you screw a new filter on top of it, oil pressure will blow the seal out on your first drive, emptying your engine oil within seconds.
| Filter Installation Step | Correct Procedure | Risk of Doing It Wrong |
|---|---|---|
| Mating Surface Check | Wipe clean; confirm old rubber gasket is gone | Double gasket causes immediate, catastrophic oil loss. |
| New Gasket Prep | Apply a thin film of clean oil to the new rubber ring | Dry rubber bunches up, tears, and fails to seal smoothly. |
| Tightening Method | Spin on by hand until gasket touches, then add 3/4 turn | Using a wrench to tighten crushes the seal and strips threads. |
Step 3 – Reinstalling the Drain Plug with a New Crush Washer
Before you touch the oil fill cap up top, you must seal the bottom end. Wipe the drain plug clean and discard the old crush washer. These washers are made of soft aluminum or copper designed to crush and flatten against the pan surface, creating a leak-proof seal. Reusing a crushed washer is an open invitation for slow, stubborn driveway drips and tricky engine oil leaks.
Thread the drain plug into the oil pan strictly by hand for the first three to four full turns. This guarantees you do not cross-thread the bolt into soft aluminum pan threads.
Crucial Torque Note: Once the plug sits flush against the pan, use a torque wrench to tighten it to factory specification (typically between 20 to 30 lb-ft for most passenger cars). If you do not own a torque wrench, snug it down firmly with a standard ratchet using wrist strength, never full arm force.
- Always fit a new washer: Replace the crush washer with every single oil service.
- Hand-thread first: Spin the bolt in by hand until it seats against the pan.
- Snug, do not overtighten: Tighten until the washer compresses; never heave on the ratchet handle.
- Wipe the area clean: Spray a burst of brake cleaner and wipe dry so you can spot fresh leaks later.
Step 4 – Pouring Fresh Oil and Checking the Dipstick
Lower your vehicle back down to level ground so you get an accurate reading on the dipstick. Place a clean funnel directly into the oil filler neck on the valve cover. Check your manual for exact capacity, and pour in roughly half a quart less than the total specified amount.
Pour slowly to prevent the funnel from overflowing onto the hot exhaust manifold. Once poured, replace the oil cap and let the vehicle sit for two minutes. This gives the fresh oil sufficient time to cascade through the cylinder head channels down into the sump.
Shop Floor Advice: When checking engine oil with the dipstick, wipe it clean with a lint-free rag, reinsert it fully until it clicks, and pull it out again. Look at the crosshatch or two dots near the tip. The fresh, amber fluid should sit between the minimum and maximum marks. It is easy to add another half-quart, but draining an overfilled pan is messy.
- Low Mark (Bottom Dot/Line): Indicates the engine is approximately one quart low.
- Safe Zone (Crosshatch Area): The correct operating range for engine oil level.
- Full Mark (Top Dot/Line): Maximum allowable fluid level when cold.
Step 5 – Starting the Engine and Checking for Leaks
With the oil level reading safely within the crosshatch, leave the vehicle in park, get into the driver’s seat, and start the engine. Watch the instrument cluster closely.
The red oil pressure light – one of the most critical dashboard warning lights – should illuminate briefly and turn off within two to three seconds as the new oil filter fills and the oil pump pressurizes the entire lubrication system. Let the engine idle smoothly for one minute.
Critical Post-Start Check: If the oil pressure warning light stays illuminated past four seconds, shut the engine off immediately. This indicates a loss of pressure, often caused by an airlock, missing oil, or a severe filter leak.
While the engine idles, look under the front bumper with a flashlight. Check around the drain plug and the base of the oil filter for any active drips. If everything stays completely dry, shut off the engine, let it sit for three minutes, and check the dipstick one final time. Top off slightly if the level dropped after filling the new filter core.
- Dash Light Check: Ensure the oil pressure icon vanishes within 3 seconds.
- Underbody Visual: Look for drips at the plug and filter while the engine runs.
- Final Level Verification: Re-check dipstick after shutting off the engine; add fluid to the top mark if needed.
Responsible Disposal – What to Do with Old Motor Oil
Never pour used motor oil down storm drains, onto the ground, or into household trash cans. Used motor oil collects heavy metals, carbon deposits, and fuel residue during engine operation, making it toxic to groundwater. Fortunately, used engine oil can be refined and recycled indefinitely into new base stocks.
Funnel the dirty oil from your catch basin into the empty plastic containers that held your fresh oil. Screw the caps on tightly and wipe the outside of the jugs.
Environmental Note: Keep your waste oil pure. Never mix old oil with used coolant, brake fluid, or carburetor cleaner. Collection centers test drop-offs, and contaminated oil cannot be processed through standard recycling channels.
| Disposal Item | Approved Method | Prohibited Action |
|---|---|---|
| Used Engine Oil | Take to local auto parts stores or municipal recycling centers | Pouring down household drains or ground soil |
| Used Oil Filters | Drain upside down for 24 hours, take to collection site | Tossing full of wet oil into standard trash bins |
| Oily Shop Rags | Store in sealed metal cans or dry thoroughly before disposal | Piling damp rags together (spontaneous combustion risk) |
Common DIY Oil Change Mistakes to Avoid
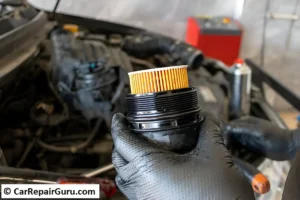
A smooth driveway oil change comes down to avoiding a few common traps that catch first-timers off guard.
One frequent issue is using wrench tools to tighten the new filter. Filters must be hand-tightened only. Using a metal band tool to crank down on a new filter crushes the internal gasket and makes removal nearly impossible during your next service.
Another bad habit is adding aftermarket oil flush solvents or thick additives to modern engines. Today’s high-efficiency engines feature tight internal bearing clearances and variable valve timing solenoids that rely on exact oil viscosities. Adding random thickeners or harsh flushes can disrupt oil flow to critical timing components.
- Overtightening the Drain Plug: Stripping the threads on an aluminum oil pan requires costly repairs or pan replacement.
- Skipping the Washer: Reusing an old crush washer is the number one cause of slow, persistent underside leaks.
- Using Incorrect Oil Weight: Modern variable valve timing systems depend on precise fluid viscosity to actuate cam phasers properly.
- Neglecting Maintenance Reset: Forgetting to reset your car’s digital oil life monitor leads to confusing service reminders later.
Final Thoughts
Taking care of routine maintenance on your own schedule is one of the most satisfying skills you can pick up as a car owner. When you understand how to change car oil with the right tools, careful safety steps, and proper fluids, you protect your engine from premature wear and know the job was done with care.
Keep a small logbook in your glovebox with the date and mileage of every service, and your vehicle will reward you with dependable performance for years down the road.
Frequently Asked Questions
How long does an oil change usually take at home?
For a beginner, the complete job typically takes between 35 and 45 minutes from setup to cleanup. Once you become familiar with your vehicle’s lift points, drain plug location, and filter access, the entire process takes less than 20 minutes in your driveway.
Can I switch between synthetic and conventional oil without flushing?
Yes. Modern synthetic and conventional oils are fully compatible. You can switch between them at any service interval without running special flush treatments. However, if your manufacturer specifies full synthetic oil, never downgrade to conventional oil.
What happens if I accidentally put too much oil in my engine?
Overfilling by half a quart or more causes the crankshaft to whip through the oil sitting in the pan. This aerates the fluid, creating a thick foam. Foamy oil cannot be pumped effectively, leading to dropped oil pressure and potential engine damage. If significantly overfilled, drain the excess before driving.
Why did my fresh oil turn dark almost immediately after the change?
This is completely normal, especially in modern direct-injected or diesel engines. Motor oil contains strong detergent additives designed to scrub microscopic soot and carbon deposits off internal components and hold them in suspension. Dark oil simply means the detergents are doing their job.
About the Author